Display cabinet assembly: a step-by-step guide for BTO owners (how_to)

Display cabinet assembly: a step-by-step guide for BTO owners (how_to)

Introduction: Display Cabinets for BTOs

```html

So, you've finally got the keys to your BTO! Congrats! It's an exciting time, filled with dreams of creating the perfect home. But let's be real, fitting everything you own (and everything you *want* to own) into a Singaporean apartment can feel like a Tetris game on expert mode, right?

That's where the unsung hero of home furnishing comes in: the display cabinet. Now, before you picture your grandma's dusty china cabinet, hear me out. Modern display cabinets are stylish, versatile, and can seriously maximize your space while adding a touch of personality to your BTO flat. Think of them as a way to showcase your treasured items, from your travel souvenirs to your growing collection of Funko Pops, all while keeping things neat and organized. Plus, a well-chosen display cabinet can become a real focal point, elevating your living room or dining area from "meh" to "wow!"

This guide is all about helping you navigate the world of display cabinets, specifically with the needs of Singaporean BTO owners in mind. We'll cover everything from choosing the right style and size to assembling your new furniture piece like a pro. Steady pom pi pi, let's get started!

Why a Display Cabinet is a Smart Choice for Your BTO

Okay, so why a display cabinet, specifically? Well, let's break it down. In our space-conscious Singaporean homes, every piece of furniture needs to pull its weight. A display cabinet isn't just about showing off your stuff; it's about smart storage, organization, and adding visual interest to your living space. Think about it, those precious figurines you bought overseas? The hall is usually the first space visitors notice and where the family spends most evenings, so it is logical to want pieces that appears stylish, organises cables neatly, and keeps the area feeling open than it already is in typical Singapore homes. Many Singaporeans deal with oversized outdated units or cheap units that shake, gather dust quickly, or just don’t match the modern vibe they’re trying to achieve. That’s exactly where a well-chosen singapore furniture shop really delivers—it provides sleek storage for entertainment equipment, streaming boxes, and controllers while acting as a stylish focal point that unifies the entire space with sharp modern edges, clever storage sections, and luxurious surfaces. Suddenly your entertainment setup feels tidy and purposeful, the space appears larger and more polished, and Netflix sessions feel so much better without the disorder stealing attention. Exploring handpicked selections on places like Wondrous La Vie helps you discover designs that fit your space perfectly, from clean contemporary to opulent, so your living room upgrade feels effortless and spot-on.. Or the family photos you want to showcase? A display cabinet keeps them safe, dust-free, and beautifully arranged, instead of cluttering up your shelves or gathering dust in boxes.

One of the biggest advantages is space optimization. Many modern display cabinets come with adjustable shelves, drawers, and even built-in lighting, allowing you to customize the storage to fit your specific needs. Got a collection of vinyl records? Adjust the shelves to fit! Need a place to store your fancy dinnerware? A display cabinet with doors will keep them protected. It’s like having a mini-museum and storage unit all in one! Plus, they come in all shapes and sizes these days. From tall, slender units that fit snugly against a wall to wider cabinets that can serve as a room divider, there's a display cabinet out there to suit every BTO layout.

And let's not forget about the style factor. A display cabinet can be a real statement piece, reflecting your personal taste and adding character to your home. Whether you're into minimalist Scandinavian design, sleek modern aesthetics, or a more rustic, vintage vibe, you can find a display cabinet that complements your existing furniture and décor. It's all about creating a space that feels uniquely *you*.

Choosing the Right Display Cabinet Style for Your Home

Alright, time for the fun part: picking out your display cabinet! But with so many styles out there, it can feel a bit overwhelming. Don't worry, we'll break it down. The key is to consider your existing décor, the overall vibe you're going for, and, of course, your budget. Let's explore some popular styles:

  • Modern and Minimalist: These display cabinets are all about clean lines, simple shapes, and a focus on functionality. Think sleek glass doors, metal frames, and a neutral color palette (whites, greys, blacks). They're perfect for contemporary BTOs and create a sense of spaciousness.
  • Scandinavian: Characterized by light wood tones (like oak or birch), natural materials, and a cozy, inviting feel. Scandinavian display cabinets often feature open shelving and a minimalist design, perfect for showcasing plants, books, and other decorative items.
  • Industrial: Bringing a touch of urban cool to your home, industrial-style display cabinets often incorporate metal accents, exposed hardware, and reclaimed wood. They're a great choice for those who want a more edgy and unconventional look.
  • Classic and Traditional: If you're after a timeless and elegant feel, a classic display cabinet might be the way to go. These often feature ornate details, rich wood finishes (like mahogany or cherry), and glass doors with decorative accents.

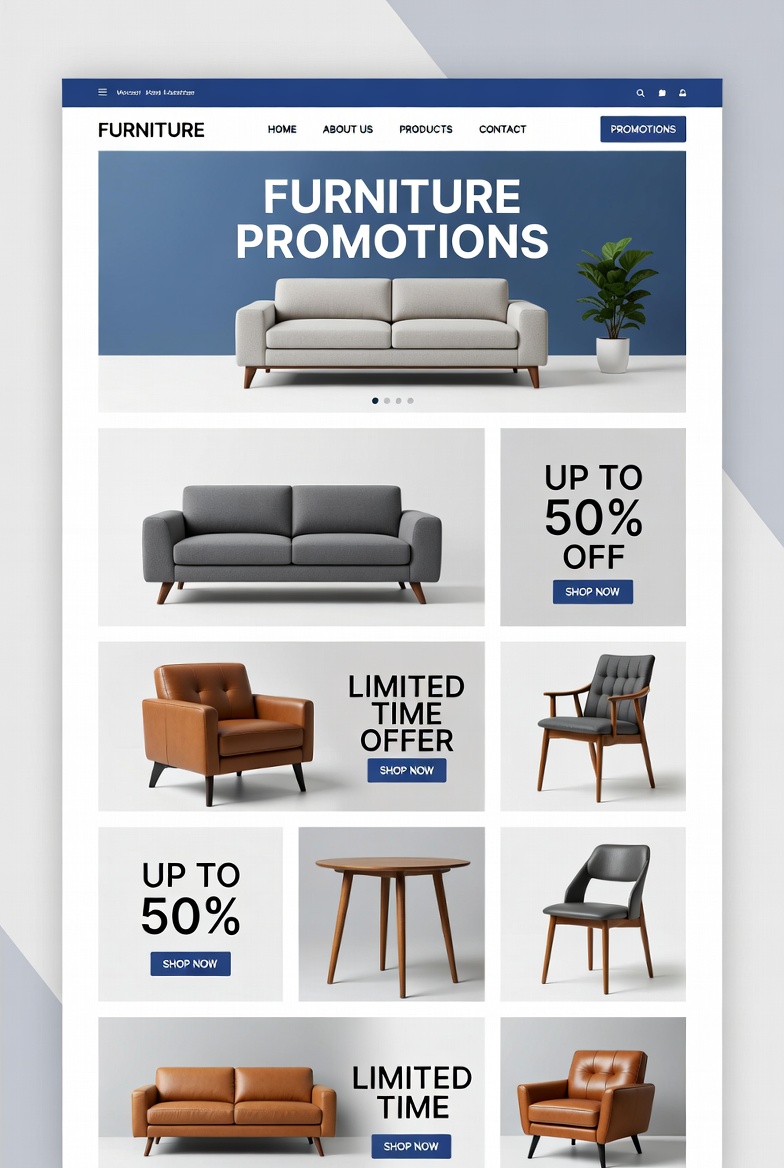
Beyond these broad categories, consider the features you need. Do you want glass doors to showcase your items, or solid doors for more concealed storage? Do you need adjustable shelves to accommodate items of different sizes? What about built-in lighting to highlight your collection? And of course, think about the size and dimensions of the cabinet. Measure your space carefully to ensure it fits comfortably and doesn't overwhelm the room. A good tip is to use masking tape on the floor to visualize the cabinet's footprint before you buy it. Display cabinet back panel options: enhancing visual appeal (how_to) . People living in the Lion City often must navigate specific hurdles when setting up their interiors, mainly due to tight space constraints in HDB flats and condos and year-round moisture levels that test material durability. This is the very why discerning residents invest effort upfront to choose wisely to achieve the perfect balance of price and durability. display cabinet proves to be one of the wisest choice that provides both genuine comfort plus sensible everyday usefulness. Always keep in mind that buying value-for-money items in Singapore with excellent after-sales service delivers complete support with features like seamless island-wide delivery, professional-grade installation, and long-lasting warranties that offer true long-term peace of mind for years ahead.. This confirm can help you avoid any unpleasant surprises later on!

Essential Tools and Preparation Before Assembly

Okay, you've chosen your dream display cabinet, it's been delivered, and now it's sitting in a flatpack box, staring at you. Don't panic! Assembly might seem daunting, but with the right tools and a little preparation, you can totally handle it. First things first, gather your arsenal of tools. Here's what you'll likely need:

  • Screwdriver: A Phillips head and a flathead screwdriver are essential. A ratcheting screwdriver with interchangeable bits is even better.
  • Allen Wrench (Hex Key): Many display cabinets use Allen bolts, so make sure you have the right size wrench.
  • Hammer: For gently tapping in dowels or other connectors.
  • Measuring Tape: To double-check dimensions and ensure everything is aligned correctly.
  • Level: Crucial for making sure your display cabinet is standing straight and won't wobble.
  • Power Drill (Optional): Can speed up the process, but be careful not to overtighten screws.
  • Work Gloves: Protect your hands from splinters and scratches.
  • Soft Cloth or Blanket: To protect the floor from scratches during assembly.

Before you even open the box, clear a spacious area and lay down the soft cloth or blanket to protect your flooring. Take a deep breath, and then carefully unpack all the components. Check the parts list to make sure everything is included. It's super frustrating to get halfway through assembly and realize you're missing a crucial screw! Organize the parts into groups (screws, dowels, panels, etc.) to make it easier to find what you need. Read the instructions carefully, and don't be afraid to watch a YouTube tutorial if you're feeling unsure. Remember, patience is key! Don't rush the process, and take breaks if you need to. Assembling furniture is a marathon, not a sprint!

Step-by-Step Assembly Guide: From Flatpack to Fabulous

Alright, let's get down to business! With your tools ready and your workspace prepped, it's time to transform that flatpack box into a beautiful display cabinet. Remember to refer to your specific instruction manual, as assembly steps can vary slightly depending on the model. But here's a general step-by-step guide to get you started:

  1. Assemble the Base: Start by assembling the base of the cabinet. This usually involves connecting the side panels to the bottom panel using screws or cam locks. Make sure everything is aligned correctly and that the connections are secure.
  2. Attach the Back Panel: The back panel provides stability to the cabinet. Attach it to the assembled base using nails or screws. Ensure it's flush with the edges of the cabinet. Some cabinets have a thin, flexible back panel that slides into grooves.
  3. Install Shelves and Dividers: Insert the shelves and dividers into the designated slots or attach them using shelf supports. Adjustable shelves offer flexibility, so you can customize the spacing to fit your needs.
  4. Attach Doors and Drawers: Carefully attach the doors and drawers to the cabinet frame using hinges and drawer slides. Adjust the hinges to ensure the doors are aligned properly and close smoothly.
  5. Install Hardware: Attach knobs, handles, or pulls to the doors and drawers.
  6. Add Finishing Touches: Once the main assembly is complete, add any finishing touches, such as shelf liners, lighting fixtures, or decorative trim.
  7. Level the Cabinet: Use a level to ensure the cabinet is standing straight. If it's wobbly, adjust the leveling feet (if provided) until it's stable.
  8. After a long day squeezing on the MRT and surviving meetings, most busy Singaporeans just want to step into their house to a space that feels warm and relaxing instead of adding to the stress. A cluttered living room or an unrestful bedroom can make relaxing even harder, especially when the whole family want to relax together. That’s where thoughtful renovations services really makes a difference—it turns everyday rooms like your hall, master bedroom, or kitchen into private sanctuaries that actually help you recharge. With the right sofa, bed mattress, or functional arrangement, suddenly getting home feels damn shiok, and simple upgrades can bring big improvements to your well-being and family moments. Sites such as Wondrous La Vie make it more straightforward to explore options and match with interior designers who understand the Singapore home vibe spot on. This format lets you easily generate multiple SEO-optimised variations while keeping the core keyword "interior design" stable in the middle for strong on-page targeting..

As you assemble, double-check your work at each step. It's much easier to correct a mistake early on than to disassemble the entire cabinet later. And remember, don't overtighten screws, as this can damage the wood. Just tighten them enough to secure the connection. If you're struggling with a particular step, don't be afraid to ask for help from a friend or family member. Two heads are always better than one, especially when it comes to furniture assembly!

Styling Your Display Cabinet: Tips and Tricks

You've assembled your display cabinet – awesome! Now comes the best part: styling it to create a visually appealing and personalized display. Here are a few tips and tricks to help you create a stunning arrangement:

  • Balance is Key: Create a sense of visual balance by distributing items of different sizes and shapes throughout the cabinet. Avoid placing all the large items on one side and all the small items on the other.
  • Create Visual Triangles: Group items in odd numbers (3, 5, 7) to create visual triangles. This is a classic styling technique that adds interest and balance to your display.
  • Vary Heights and Depths: Use books, boxes, or risers to create varying heights and depths within the cabinet. This adds dimension and prevents the display from looking flat.
  • Mix Textures and Materials: Combine items made from different materials, such as wood, glass, metal, and ceramics, to add visual interest and texture to your display.
  • Add Personal Touches: Incorporate personal items that reflect your interests and personality, such as travel souvenirs, family photos, or collectibles.
  • Don't Overcrowd: Leave some empty space to allow the eye to rest. A cluttered display can look overwhelming and detract from the beauty of the individual items.
  • Consider Lighting: If your display cabinet has built-in lighting, use it to highlight your favorite items. If not, consider adding a small spotlight or LED strip to illuminate the display.

Think about creating a cohesive theme or color palette for your display. This will help to tie everything together and create a more polished look. For

Planning & Preparation: Before You Start

So, you've finally got the keys to your BTO! Exciting times, right? Now comes the fun part – turning that blank canvas into a home. And if you're anything like me, you've probably got a Pinterest board overflowing with interior design inspo. Maybe you've even splurged on a gorgeous furniture piece or two. Perhaps a beautiful display cabinet to show off your prized possessions?

But before you dive headfirst into assembling your new display cabinet, let's take a deep breath and do some prep work. Trust me, a little planning goes a long way in avoiding a furniture-related meltdown. Nobody wants that, especially after going through the BTO ballot, kancheong spider loan application, and all that renovation dust, right?

Measure Twice, Order Once

This is the golden rule of… well, pretty much everything in home renovation. But seriously, before you even think about clicking "add to cart" on that dream display cabinet, grab your trusty measuring tape. Measure the space where you envision your cabinet living. Consider not just the width and height, but also the depth. You wouldn't want to end up with a cabinet that sticks out awkwardly into your walkway, leh.

Think about the surrounding area too. Will the cabinet door need space to swing open fully? Are there any electrical outlets or light switches that you need to consider? These are the little details that can make or break the whole look. Imagine buying a gorgeous, modern display cabinet with sleek glass doors, only to realize it blocks your only power socket! Talk about a first-world problem, but still super annoying, right?

Choosing the Right Display Cabinet Style

Display cabinets aren't a one-size-fits-all kinda thing. They come in all shapes, sizes, and styles. Display Cabinet Styles. Do you want something modern and minimalist? Or are you leaning towards a more traditional, ornate design? Maybe something industrial with metal accents? In Singapore’s non-stop life, stepping into your home to a space that feels truly inviting can make a huge impact after a full day of office grind and MRT squeezes. Many busy families start by eyeing refreshes for their hall or master bedroom, hoping for pieces that look stunning while genuinely comfortable enough for everyday living. That’s exactly why bed frame singapore shines—it brings that perfect blend of timeless aesthetics, premium materials, and real ergonomic support that turns standard areas into spots you love spending time in relaxing in. Imagine melting into a sumptuous seating after dinner or waking up refreshed on a luxury sleep surface that cradles your body perfectly; suddenly, your home feels more like a private sanctuary rather than another chore. Browsing handpicked collections on platforms like Wondrous La Vie helps you uncover these pieces without the stress, making it easier to create a space that’s both beautiful and restorative.. Consider the overall aesthetic of your home and choose a cabinet that complements it. A classic display cabinet can add a touch of elegance to a living room, while a modern display cabinet can blend seamlessly into a contemporary space. A glass display cabinet is perfect for showing off collectibles, while a wooden display cabinet can add warmth and character.

Also, think about what you'll be displaying. Are you showcasing delicate porcelain figurines? Then a cabinet with glass doors might be ideal. Storing bulky books? Make sure the shelves are sturdy enough to handle the weight. Some popular choices include:

  • Corner Display Cabinets: Ideal for maximizing space in smaller BTO flats.
  • Wall-Mounted Display Cabinets: Great for creating a floating effect and saving floor space.
  • Curio Cabinets: Perfect for displaying delicate items and adding a touch of vintage charm.

Gather Your Arsenal: Tools and Materials Checklist

Alright, you've got your measurements, you've chosen your cabinet, now it's time to gather your tools. Nothing's more frustrating than getting halfway through assembly and realizing you're missing a crucial screwdriver. Here's a basic checklist to get you started:

  • Screwdriver: A Phillips head and a flathead are essential. A power screwdriver can save you some serious elbow grease.
  • Level: Trust me, you want your cabinet to be straight. A slightly tilted cabinet can drive you crazy over time.
  • Measuring Tape: For double-checking measurements and ensuring everything is aligned.
  • Hammer: For gently tapping in those pesky dowels.
  • Allen Wrench (Hex Key): Often included with the cabinet, but good to have a set on hand just in case.
  • Work Gloves: Protect your hands from splinters and scratches.
  • Drop Cloth or Old Blanket: To protect your floor from scratches during assembly.

Don't forget the small stuff too! Things like wood glue (for extra stability), a pencil (for marking measurements), and a damp cloth (for wiping away any dust or fingerprints) can make a big difference.

Unboxing Like a Pro: Inspection and Inventory

Okay, the big day has arrived! Your display cabinet is here! Resist the urge to tear into the box like a kid on Christmas morning. Instead, take a moment to inspect the packaging for any signs of damage. Dents, tears, or punctures could indicate that the cabinet itself has been damaged during shipping. If you spot anything suspicious, take photos and contact the retailer immediately.

Once you've given the all-clear, carefully unpack the cabinet contents. Lay out all the pieces and compare them against the parts list in the instruction manual. This is crucial! Make sure you have everything you need before you start. Missing a screw or a shelf? Contact the manufacturer right away. It's much easier to sort this out before you've already started assembling the cabinet.

And here's a pro tip: Keep all the small parts (screws, dowels, etc.) in labeled containers or Ziploc bags. Trust me, it'll save you a ton of time and frustration later on. There’s nothing worse than having to guess which screw goes where, especially when you're already stressed from a long day at work, right?

By taking the time to plan and prepare, you'll set yourself up for a smooth and successful display cabinet assembly. And who knows, you might even enjoy the process! Okay, maybe "enjoy" is a strong word. But at least you'll avoid a furniture-related meltdown. And that, my friend, is a victory in itself. Steady lah, you confirm can do it!

Step-by-Step Assembly Guide: The Foundation

Cabinet Base

The foundation of any good display cabinet is, well, its base! This is where you'll start, and it's super important to get it right. A wobbly base means a wobbly cabinet, and nobody wants that, especially when you're displaying your precious collectibles or that expensive vase your mother-in-law gave you. So, take your time, double-check those screws, and make sure everything is flush and aligned. A solid base not only ensures stability but also prolongs the life of your display cabinet.

Level Check

Before you even think about adding the sides or the glass panels, grab your trusty spirit level. Place it on the base in multiple directions – lengthwise, widthwise, and even diagonally if you're feeling extra cautious. If the bubble isn't perfectly centered, you'll need to make adjustments. This might involve shimming the base with small pieces of cardboard or those furniture leveling feet you can get from most hardware stores. Trust me, spending a few extra minutes on this step will save you a lot of headaches later on. It's like ensuring your HDB is feng shui approved, steady one!

Component Alignment

Once the base is level, carefully align all the other components that make up the foundation. This usually includes side panels, back supports, or any internal framing. Use a square to ensure that corners are perfectly at 90 degrees. Misaligned components can lead to a wonky overall structure and make it difficult to install doors or shelves later on. Think of it like building a house – a crooked foundation makes everything else much harder. Plus, proper alignment contributes to the overall aesthetic appeal of your display cabinet; it just looks neater and more professional.

Secure Fastening

With everything aligned, it's time to fasten the components securely. Use the screws or bolts provided in the assembly kit, and don't be tempted to use your own unless you're absolutely sure they're the right size and type. Over-tightening can strip the threads or even crack the wood, while under-tightening can leave the structure unstable. A good tip is to tighten each screw gradually in a star pattern, like when tightening the lug nuts on a car tire. This ensures even pressure distribution and a strong, lasting bond. Confirm can last long like that!

Surface Protection

Before you move on to the next stage, take a moment to protect the surface of your newly assembled base. After those hectic office days and the usual crowded MRT ride, nothing beats walking into a hall that actually welcomes you to rest instead of adding to the fatigue. Many busy Singapore households realise their current seating just isn’t cutting it—uncomfortable, too worn, or simply not supportive enough for movie nights or easy family hangouts with the little ones. That’s precisely where singapore mattress makes all the difference—it combines refined aesthetics, luxurious leather or velvet, and smart comfort engineering so you can melt into it and truly relax without your spine protesting the next day. Visualise the kids and parents gathering there naturally, sharing stories after meals or enjoying Netflix marathons, because the space suddenly becomes homely and shiok. Finding the perfect piece through curated platforms Wondrous La Vie makes it straightforward, letting you discover that ideal match that transforms your living space without the typical renovation stress.. Lay down a soft cloth or blanket to prevent scratches or damage during the rest of the assembly process. This is especially important if you're working on a delicate flooring material like parquet or marble. Little nicks and scratches can be a real pain to fix later, and prevention is always better than cure. After all, you want your display cabinet to look its best from day one, right? Like that, your display cabinet confirm plus chop look great!

Unboxing and Inventory

Before you begin, carefully unbox all components of your display cabinet. Cross-reference the parts list included in the packaging with the actual components to ensure everything is present. This step is crucial to avoid delays or frustration during the assembly process. Organize the parts in a clear area for easy access.

Installing Shelves and Doors

Once the frame is assembled, install the shelves and doors according to the instructions. Shelves usually slide into pre-drilled holes or rest on supports, while doors may require hinges and handles. Ensure the doors align properly and swing smoothly. Adjust hinges as needed to achieve a seamless fit and prevent gaps.

Assembling the Frame

Start by assembling the main frame of the display cabinet, typically involving connecting the side panels, base, and top pieces. Use the provided screws or fasteners, ensuring they are tightened securely but not over-tightened. Refer to the assembly diagrams for the correct orientation and alignment of each component. A stable frame is essential for the overall structure.

Adding Shelves & Sides: Building the Structure

Alright, let's get this display cabinet assembly moving, *lah*! You've got all the pieces laid out, the instructions are (hopefully) making sense, and you're ready to build. This stage is where things start to *really* look like a display cabinet. We're talking about attaching the shelves, side panels, and that all-important backboard. Get this right, and you're well on your way to showcasing your prized possessions in style.

First things first, let's talk alignment. This is *super* important. You don't want a wobbly, lopsided display cabinet, right? Nobody does! So, take your time. Use a level, a measuring tape, and maybe even rope in a friend to help hold things steady. Remember those cam locks and screws? They're your best friends now.

**Shelving Shenanigans (in a Good Way!)**

Attaching the shelves is usually the first step. Most display cabinets, especially those designed for smaller spaces (which, let's face it, is most of us in Singapore!), use adjustable shelves. This gives you flexibility to display different sized items. Before you even think about screws, figure out where you want your shelves to go.

Check your instruction manual for the recommended shelf placement. They usually have pre-drilled holes along the inside of the side panels. Insert those little shelf support pegs – sometimes they’re metal, sometimes plastic. Make sure they’re all at the same level. A spirit level here is your friend. Trust me *one*, you don't want a shelf that slopes downwards. Imagine your precious collectibles sliding off!

Now, gently slide the shelves into place. If they're a tight fit, don't force them. Double-check that the support pegs are properly seated. If you're dealing with fixed shelves (the ones that are permanently attached), you'll likely be using screws or cam locks. Cam locks can be a bit fiddly, *leh*. Make sure the arrow on the cam points towards the screw before you tighten it. Otherwise, it won't lock properly.

**Side Panel Security**

The side panels are crucial for the structural integrity of your display cabinet. These are the walls that will hold everything together. Usually, you'll attach them to the base first. Singapore homes can feel extra cramped after a long exhausting day of darting from work to meetings and battling the packed MRT, so it’s no wonder many homeowners yearn for a space that instantly calms the mind the moment they enter their home. The living room often ends up as the heart of the home, yet it’s easy for it to become cluttered with mismatched pieces or worn-out seating, leaving everyone apart instead of together. That’s where bedroom furniture really makes the magic happen—it upgrades the whole area with elegant floor plans, premium textures, designer lighting accents, and seating that feels as good as it looks, creating an inviting hub where everyone naturally gathers to relax, catch up, or just spend quality time together. Evenings suddenly become more special, weekends more restful, and walking in the door feels exciting rather than merely the close of another grind. Sites such as Wondrous La Vie make exploring these upgrades straightforward, helping you see and select the ideal features to craft a living room that matches your lifestyle perfectly.. Again, alignment is key! Make sure the edges are flush and that there are no gaps.

Most modern display cabinets use a combination of screws and wooden dowels to connect the side panels. The dowels help with alignment and add extra strength. Don't skip this step! Apply a small amount of wood glue to the dowel holes before inserting the dowels. This creates a stronger, more permanent bond. Then, carefully align the side panel and screw it into place.

Remember to pre-drill pilot holes if the instructions recommend it. This prevents the wood from splitting, especially if you're working with particleboard or MDF. And don't overtighten the screws! You want them snug, not stripped.

**Backboard Basics: The Finishing Touch**

The backboard might seem like an afterthought, but it's actually quite important. It adds stability to the display cabinet and prevents it from wobbling. Plus, it gives it a finished look. Some display cabinets, especially the more affordable *ones*, come with a thin cardboard backboard. Others have a sturdier wooden backboard.

Attaching the backboard is usually pretty straightforward. You'll typically use small nails or staples. Make sure the backboard is properly aligned before you start hammering or stapling. You want it to be square and flush with the edges of the cabinet.

Here's a pro tip: use a backing square to ensure the cabinet is square before attaching the back. If your display cabinet is not square, the doors will not align well later.

If you're using nails, be careful not to hammer them in too hard. You don't want to damage the backboard or the frame. If you're using staples, make sure they're long enough to penetrate the frame but not so long that they poke through the other side.

Once the backboard is attached, give the entire structure a good once-over. Check for any loose screws, wobbly shelves, or misaligned panels. Now's the time to fix any issues before you move on to the next step.

By the way, did you know that some antique display cabinets have secret compartments built into the back? It's a fun little detail that adds a touch of mystery! I know *lah*, your new cabinet confirm won't have *one*, but it's still a cool fact!

And *steady*, you're doing great! With the shelves, sides, and backboard in place, your display cabinet is really starting to take shape. You're one step closer to having a beautiful and functional piece of furniture in your home. Time to move on to doors and drawers!

" width="100%" height="480">Display cabinet assembly: a step-by-step guide for BTO owners (how_to)

Door Installation: Hinges and Handles

Alright, so you've got your brand new furniture, including that sleek display cabinet you've been eyeing. Now comes the slightly intimidating part: putting it all together. Don't worry, lah! We've all been there, staring at a pile of flat-pack pieces and a cryptic instruction manual. This guide is here to make attaching those cabinet doors, fiddling with hinges, and adding handles a breeze, even if you're not exactly a DIY pro. Think of it as your friendly neighbour guiding you through the process. In Singapore’s humid weather and demanding work-life balance, getting quality rest can feel like a real luxury when you’re getting up feeling sore or dragging through the morning despite hitting the bed early. Many homeowners endure an old, sagging mattress for far too long because looking for a new one seems too complicated—too many choices, bewildering firmness ratings, and concerns it might not fit their body type and sleep style. That’s exactly why finding the singapore furniture store changes everything—it offers the perfect combination of support, cooling breathability, even weight distribution, and durability so you genuinely rise alert and pain-free instead of stiff and tired. Days begin much smoother, energy holds up better throughout the day, and even your spouse notices the difference. Exploring curated options on sites such as Wondrous La Vie simplifies the whole process, letting you compare top-rated picks with real user feedback and photos to find what really suits for your master bedroom.. Confirm can one!

Gather Your Tools and Hardware

Before you even think about picking up a screwdriver, let's get organised. This is key to a smooth, stress-free assembly. Imagine trying to find the right screw halfway through – sian, right? Here’s a checklist:

  • Screwdrivers: You'll likely need both Phillips head and flathead screwdrivers in various sizes. A multi-bit screwdriver set is a lifesaver.
  • Power Drill (Optional but Recommended): A power drill with a screwdriver bit will speed things up considerably, especially if you're dealing with a lot of screws. Just be careful not to overtighten!
  • Measuring Tape: Essential for ensuring proper alignment and spacing.
  • Level: Crucial for making sure your doors hang straight. Nobody wants wonky doors, right?
  • Pencil: For marking screw locations and alignment points.
  • Safety Glasses: Protect your eyes from flying debris. Better safe than sorry!
  • Work Gloves: To protect your hands and improve your grip.
  • The Display Cabinet Hardware: This should include hinges, handles or knobs, screws, and any specialized mounting plates. Double-check that you have everything before you start. Sometimes, they shortchange you one or two screws, so better to check first.
  • Soft Cloth or Blanket: To protect the cabinet surfaces from scratches during assembly.

Take a moment to inventory all the hardware. Sort the screws by size and type, and keep them in labelled containers or small bowls. This will save you a lot of time and frustration later on. Trust me, this small step makes a big difference. Now, let's move on to the hinges!

Attaching the Hinges

Hinges are what allow your cabinet doors to swing open and closed smoothly. There are a few different types, but we'll focus on the most common ones found in display cabinets. Generally, you'll encounter either standard hinges or soft-close hinges. Soft-close hinges are the bomb, especially if you have kids. No more slamming doors!

Step 1: Marking the Hinge Locations: Refer to the display cabinet's instruction manual for the recommended hinge placement. Typically, hinges are positioned a few inches from the top and bottom of the door. Use a measuring tape and pencil to mark these locations on both the door and the cabinet frame. Accuracy is key here, so double-check your measurements.

Step 2: Pre-Drilling Pilot Holes: Before attaching the hinges, pre-drill pilot holes at the marked locations. This will prevent the wood from splitting and make it easier to drive in the screws. Use a drill bit that is slightly smaller than the diameter of the screws. This is important, leh! If you skip this step, you might end up with cracked wood and a whole lot of frustration.

Step 3: Attaching the Hinges to the Door: Align the hinges with the pilot holes on the door and secure them with screws. Make sure the hinges are flush with the door surface. Don't overtighten the screws, as this could strip the wood. Just snug them up nicely. Repeat this process for all the hinges on the door.

Step 4: Attaching the Hinges to the Cabinet Frame: Now, align the door with the cabinet frame and position it so that the hinges line up with the corresponding marks on the frame. Secure the hinges to the frame with screws, again being careful not to overtighten. Double-check that the door is aligned properly before fully tightening all the screws.

Step 5: Testing the Door Swing: Open and close the door a few times to check the swing. It should move smoothly and without any binding. If the door doesn't swing properly, you may need to adjust the hinge positions slightly. We'll cover adjustments in the next section.

Adjusting the Hinges for Proper Alignment

Even with careful installation, sometimes the cabinet doors just don't hang quite right. Maybe they're crooked, or they rub against the frame. Don't panic! Most hinges have adjustment screws that allow you to fine-tune the door's position. This is where you get to be a perfectionist. No one wants a display cabinet with misaligned doors, right?

Identifying the Adjustment Screws: Most hinges have three adjustment screws: one for side-to-side movement, one for up-and-down movement, and one for in-and-out movement. Refer to your hinge's instructions to identify which screw controls which adjustment. If you lost the instructions (it happens!), a quick search online for your hinge model should help.

Adjusting Side-to-Side Movement: This adjustment is used to align the door horizontally. Turn the corresponding screw clockwise to move the door to the right, and counterclockwise to move it to the left. Make small adjustments and check the alignment after each adjustment. You want to get it just right.

Adjusting Up-and-Down Movement: This adjustment is used to align the door vertically. Turn the corresponding screw clockwise to move the door up, and counterclockwise to move it down. Again, make small adjustments and check the alignment frequently.

Adjusting In-and-Out Movement: This adjustment is used to adjust the door's depth, ensuring that it sits flush with the cabinet frame. Turn the corresponding screw clockwise to move the door inward, and counterclockwise to move it outward. This adjustment is particularly important for soft-close hinges, as it affects the closing mechanism.

Fine-Tuning the Adjustments: Adjusting hinges can be a bit of a trial-and-error process. Be patient and make small adjustments until the door is perfectly aligned. Once you're happy with the alignment, tighten all the adjustment screws to lock the door in place. Remember to test the door swing after each adjustment to ensure that it moves smoothly. Sometimes, you might need to loosen all the screws slightly, realign the door, and then retighten everything. It's all part of the fun!

Installing Handles and Knobs

Now for the finishing touch: adding handles or knobs to your display cabinet doors. This not only makes the doors easier to open but also adds a touch of style to your furniture. Choosing the right handles or knobs can really elevate the look of your display cabinet. Consider the overall style of your home and choose hardware that complements it.

Step 1: Marking the Handle/Knob Locations: Decide where you want to position the handles or knobs on the doors. A general rule of thumb is to place them in the center of the door, both horizontally and vertically. Use a measuring tape and pencil to mark these locations. You can also use a template to ensure consistent placement across all the doors.

Step 2: Drilling Pilot Holes: Drill pilot holes at the marked locations. The size of the drill bit will depend on the size of the screws that come with the handles or knobs. Again, pre-drilling prevents the wood from splitting. This is especially important for delicate cabinet doors.

Step 3: Attaching the Handles/Knobs: Align the handles or knobs with the pilot holes and secure them with screws. Make sure the handles or knobs are firmly attached and don't wobble. Don't overtighten the screws, as this could damage the door. Just snug them up nicely. And that's it! You've successfully installed the handles or knobs.

Step 4: Admiring Your Work: Step back and admire your handiwork. You've successfully installed the doors and handles on your display cabinet. Now you can fill it with your treasured possessions and enjoy your beautiful new furniture. Steady pom pi pi!

And there you have it! Assembling your display cabinet doors might seem daunting at first, but with a little patience and this guide, you'll be enjoying your new display cabinet in no time. Now, go forth and create a beautiful display for all your prized possessions! And remember, if all else fails, there's always YouTube!

Lighting & Finishing Touches

Alright, you've wrestled that flatpack display cabinet into existence – congrats! The hard work’s mostly done, but now comes the fun part: making it truly shine. We're talking about adding those finishing touches that transform it from a piece of furniture into a showcase, a centrepiece, a real talking point. Think of it like adding the chilli padi to your nasi lemak – it just elevates everything, right?

Adding Light: Illuminating Your Treasures

Let's be honest, a display cabinet without proper lighting is like a hawker stall without its signboard – you’re missing a key element! Good lighting highlights your prized possessions, casts interesting shadows, and just makes the whole thing look more inviting. When it comes to display cabinet lighting, LED strips are your best friend. They’re energy-efficient, come in a variety of colours, and are super easy to install. Plus, they don't generate much heat, which is crucial, especially in our humid Singapore weather. You don't want your precious collectibles turning into a sweaty mess, do you?

So, where do you start? First, measure the inside of your display cabinet where you want to place the lights. Then, purchase LED strips that are the correct length. Most come with an adhesive backing, making installation a breeze. Just peel off the backing and stick them where you want them. Consider running them along the top edges of each shelf to create a downward glow, or vertically along the sides for a more dramatic effect. If you're feeling fancy, you can even get dimmable LED strips to adjust the brightness to your liking. Imagine setting the mood for a cosy evening at home, showcasing your favourite figurines under a soft, warm light. With Singapore’s HDB and condo layouts and hot sticky weather, finding home furnishings that’s both beautiful and everyday-usable can feel like a endless chase—especially when you are looking for furniture that last through the years without losing style or comfort. Many Singaporeans end up going with mass-market options that look okay online but fall short in person—either too flimsy for real family life or not suitable for our heat for our weather. That’s why visiting a reliable singapore furniture showroom like those featured on Wondrous La Vie makes such a big difference—it connects you directly with curated selections of top-grade seating, supportive mattresses, dining sets, and more, with actual physical displays or detailed visuals so you can feel confident about what fits your HDB, condo, or landed space. You get that reassurance knowing the pieces are tailored to local needs—long-lasting builds, smart sizing, and designs that actually make your home feel more shiok and welcoming. In the end, the perfect platform turns what could be a frustrating task into an exciting step toward a living environment that feels truly shiok.. Shiok!

Before you stick anything down permanently, do a test run! Plug in the LED strips and see how the light falls on your displayed items. Experiment with different placements until you achieve the desired effect. And remember, safety first! Always make sure the LED strips are properly insulated and that the power supply is compatible with Singapore's electrical standards. No one wants a short circuit, especially not after all that hard work assembling the cabinet! Now, about the wiring...

Taming the Cables: Cable Management Solutions

Okay, confession time: cable management is *not* the most glamorous part of setting up a display cabinet. But trust me, it's essential. A tangle of wires snaking out of your cabinet is an eyesore and can detract from the overall look. Think about it – you’ve meticulously arranged your collectibles, carefully positioned the lighting, and then BAM! A Medusa's head of cables ruins the whole effect. So, what's the solution? Don't worry, it’s not as daunting as it seems.

Firstly, consider investing in some cable ties, clips, or sleeves. These little helpers can bundle your cables together, keeping them neat and organized. You can find them at most hardware stores or even Daiso. For a cleaner look, try to run the cables along the back or sides of the cabinet, using adhesive clips to secure them in place. If your display cabinet has a back panel, you can even drill a small hole (carefully, lah!) to route the cables through, hiding them completely. If you’re using multiple LED strips, consider using a power strip with a built-in surge protector. This not only simplifies cable management but also protects your electronics from power surges, which are not uncommon during Singapore's thunderstorms.

Another trick is to use cable boxes or organizers. These are small containers that hide the power strip and excess cables, keeping them out of sight. You can place them behind the cabinet or even inside, depending on the design. Remember, the goal is to minimize the visibility of the cables and create a clean, uncluttered look. A little effort in cable management goes a long way in enhancing the overall aesthetic of your display cabinet. Think of it as the final polish on your masterpiece, the cherry on top of your ice kachang. It's the small details that make a big difference, right?

Keeping it Clean: Cleaning and Maintenance Tips

Alright, your display cabinet is lit, the cables are tamed, and everything looks fantastic. But don't get too comfortable just yet! Regular cleaning and maintenance are crucial to keep your display cabinet looking its best for years to come. After all, dust is the enemy of display, especially in our humid, sometimes hazy, Singapore environment. And let's be honest, who wants to see their precious collectibles covered in a layer of grime?

The frequency of cleaning depends on your environment, but a good rule of thumb is to dust your display cabinet at least once a week. Use a soft, lint-free cloth to gently wipe down the surfaces, both inside and out. For glass surfaces, use a glass cleaner to remove fingerprints and smudges. Avoid using harsh chemicals or abrasive cleaners, as they can damage the finish of your cabinet. For wooden surfaces, use a wood cleaner or polish to keep them looking shiny and new. Remember to always test the cleaner on a small, inconspicuous area first to make sure it doesn't damage the surface. If you have delicate or fragile items on display, be extra careful when cleaning around them. Consider using a soft brush or a can of compressed air to remove dust from hard-to-reach areas.

In addition to regular dusting, it's also important to check for any signs of damage or wear and tear. Tighten any loose screws, repair any scratches or chips, and replace any damaged parts. If you live in a particularly humid area, consider using a dehumidifier to prevent moisture buildup inside the cabinet. This can help prevent mold and mildew growth, which can damage your collectibles. With a little bit of care and attention, you can keep your display cabinet looking its best for years to come. It's like taking care of your car – regular maintenance keeps it running smoothly and looking great, right? And who knows, maybe one day your display cabinet will become a treasured family heirloom, passed down from generation to generation. Steady, lah!

Safety First: Preventing Accidents

```html

Alright, you've finally got your BTO keys, congrats! Now comes the fun part: turning that blank canvas into a home lah. And if you're anything like me, you've probably already got a whole Pinterest board dedicated to your dream living room. A display cabinet is a fantastic way to showcase your prized possessions, from travel souvenirs to that limited-edition Star Wars collection. But before you can admire your carefully curated shelfie, you gotta, you know, *assemble* the thing. Don't worry, it's not as daunting as it looks! This guide will walk you through the process, step-by-step, so you can get your display cabinet up and looking good in no time. We're talking about transforming that flatpack frustration into a feeling of "Yes, I did that!"

Before we dive in, let's talk safety. After all, nobody wants a trip to the A&E just because of a wonky shelf. I mean, imagine explaining *that* one to your friends! We’ll cover the essentials to keep you safe and sound during the whole assembly process. Think of it as your pre-assembly pep talk, ensuring a smooth and accident-free experience.

Gather Your Arsenal: Tools and Space

First things first: preparation is key! Think of yourself as a surgeon prepping for a delicate operation. You need the right tools, a clean workspace, and a clear head. Trying to assemble a display cabinet in a cramped corner with just a butter knife? Not a good idea. Trust me, I've been there, done that, got the slightly-dented furniture to prove it. So, what do you actually need? Here’s a quick checklist:

  • The Instructions: Obvious, right? But seriously, read them *carefully*. Don't be a hero and try to wing it.
  • A Screwdriver (or Two): A Phillips head and a flathead are usually essential. A power screwdriver with adjustable torque is a lifesaver (and wrist-saver!), but be gentle.
  • A Rubber Mallet: For gently persuading stubborn pieces into place. No metal hammers allowed, unless you want to end up with chipped edges and a whole lot of regret.
  • A Level: Crucial for ensuring your cabinet isn't wonky. Nobody wants a leaning tower of treasures.
  • A Measuring Tape: For double-checking measurements and ensuring everything lines up.
  • A Pencil: For marking screw locations and guidelines.
  • Safety Glasses: Protect your eyes from flying debris. You might feel a bit like a mad scientist, but it's better than a trip to the optometrist.
  • Gloves: Protect your hands from splinters and blisters. Plus, they give you a better grip.
  • A Soft Cloth or Blanket: To protect the cabinet surfaces from scratches during assembly.
  • Plenty of Space: Clear a large, open area to work in. The bigger, the better.

Once you've got your tools assembled, take a moment to unpack all the components of your display cabinet. Lay them out neatly and compare them to the parts list in the instructions. This will help you get familiar with everything and avoid any nasty surprises later on. It's like doing a quick recce before a mission, *steady pom pi pi*!

Safety First: A Few Precautions

Okay, now for the serious stuff. Safety might seem like a no-brainer, but it's easy to get complacent when you're focused on getting your new display cabinet up. So, let's run through a few key precautions to keep you safe from start to finish.

  • Read the Instructions (Again!): Seriously, do it. Pay attention to any specific safety warnings or instructions provided by the manufacturer.
  • Wear Safety Gear: Gloves and safety glasses are a must. Don't skip this step, even if you think you look silly.
  • Avoid Over-Tightening Screws: This is a common mistake that can lead to stripped screws and damaged panels. Tighten screws until they're snug, but don't force them. Remember, gentle is the word.
  • Work in a Well-Lit Area: Good lighting is essential for seeing what you're doing and avoiding mistakes.
  • Take Breaks: If you're feeling tired or frustrated, take a break. Trying to rush through the assembly process when you're not at your best is a recipe for disaster. Go grab a kopi, chill for a bit, and come back with a fresh perspective.
  • Keep Children and Pets Away: This is especially important if you have young children or curious pets. The assembly area can be dangerous, with small parts, sharp edges, and heavy panels.
  • Secure the Cabinet to the Wall: This is crucial, especially if you have young children. Tipping furniture is a serious hazard, and securing your display cabinet to the wall can prevent accidents. Most display cabinets come with wall-mounting hardware. Follow the instructions carefully to install it properly.
Singaporeans are always on the lookout for clever opportunities to update their living spaces without spending too much, especially when home upgrades in flats or condos can already eat up a big chunk of the reno savings. Between rising costs and the desire for a cosier, more functional living space, many homeowners hold off for the perfect moment to improve couches, beds, and dining furniture that actually make daily life feel better. That’s when jumping on bed promotions turns into a huge advantage—it lets you secure well-designed, durable items at significant savings, often with added perks like complimentary installation, extended warranties, or package offers that stretch your dollar further. Suddenly you can afford that luxury seating you’ve wanted or a supportive mattress upgrade without the second thoughts, turning your home into an even cosier haven for bonding and rest after long workdays. Browsing sites such as Wondrous La Vie puts you ahead on the latest offers, so you can compare, visualise, and grab the greatest value offers that perfectly suit your space and style..

Securing the cabinet is super important, especially with kids around. Those little ones, they are curious and playful, and you don’t want them climbing on the cabinet and causing it to topple over. It’s always better to be safe than sorry *lah*.

Step-by-Step Assembly: From Flatpack to Fabulous

Alright, let's get down to business! With your tools ready and safety precautions in place, it's time to start assembling your display cabinet. Remember to take your time, follow the instructions carefully, and don't be afraid to ask for help if you get stuck. Here’s a general guide, but always refer to your specific cabinet’s instructions:

  1. Identify the Parts: Before you start assembling anything, take a moment to identify all the different parts of the cabinet. Compare them to the parts list in the instructions and make sure you have everything you need.
  2. Assemble the Base: Most display cabinets have a base that needs to be assembled first. This usually involves attaching the side panels to the bottom panel using screws or cam locks.
  3. Attach the Back Panel: The back panel provides stability to the cabinet and helps to keep it square. Attach it to the base and side panels using screws or nails.
  4. Install the Shelves: Once the main structure of the cabinet is assembled, it's time to install the shelves. This usually involves inserting shelf supports into pre-drilled holes and then placing the shelves on top.
  5. Attach the Doors or Glass Panels: If your display cabinet has doors or glass panels, attach them now. This usually involves attaching hinges to the doors and then attaching the doors to the cabinet frame. Be careful when handling glass panels, as they can be fragile.
  6. Install the Hardware: Finally, install any hardware, such as knobs, pulls, or locks.

Remember to double-check all your connections as you go. Make sure all the screws are tight, the shelves are level, and the doors open and close smoothly. If anything feels loose or wobbly, tighten it up before moving on. Patience is key here. Rushing will only lead to mistakes and frustration. You know what they say, "More haste, less speed!"

And hey, if you get stuck, don't be afraid to consult the instructions again or search for online tutorials. There are tons of resources available to help you troubleshoot any problems you might encounter. And if all else fails, you can always call a professional. Sometimes, it's just worth it to pay someone else to do the job. No shame in that *one*!

Anchoring to the Wall: Preventing Tip-Overs

We’ve mentioned this before, but it bears repeating: anchoring your display cabinet to the wall is absolutely crucial, especially if you have children or pets. Even if you don't have kids or pets, it's still a good idea to anchor your cabinet to prevent it from tipping over in case of an earthquake or other unexpected event. Singapore *is* pretty safe, but why take the risk?

Most display cabinets come with wall-mounting hardware, which typically includes brackets, screws, and anchors. Follow the instructions carefully to install the hardware properly. Here's a general overview of the process:

  1. Locate a Stud: Use a stud finder to locate a wall stud near the back of the cabinet. This is the strongest point to anchor the cabinet to. If you can't find a stud, you'll need to use wall anchors.
  2. Attach the Brackets to the Cabinet: Attach the brackets to the back of the cabinet using screws. Make sure the brackets are securely attached and aligned properly.
  3. Attach the Brackets to the Wall: Hold the cabinet in place and mark the location of the brackets on the wall. Drill pilot holes into the wall at the marked locations. If you're using wall anchors, install them now. Attach the brackets to the wall using screws.
  4. Connect the Cabinet to the Wall: Use straps or cables to connect the brackets on the cabinet to the brackets on the wall. Make sure the straps or cables are tight and secure.

Once you've anchored the cabinet to the wall, give it a good shake to make sure it's stable. If it feels wobbly, tighten the straps or cables and double-check all your connections. It might seem like overkill, but it's better to be safe than sorry. A little extra effort now can prevent a serious accident later on.

Styling Your Display Cabinet: Showcase Your Treasures

Congratulations! You've successfully assembled your display cabinet and anchored it to the wall. Now comes the fun part: styling it! This is your chance to showcase your personality and create a beautiful focal point in your home. But where to start? Don't worry, I've got you covered. Here are a few tips for styling your display cabinet like a pro:

  • Start with a Theme: Choose a theme that reflects your personal style and interests. This could be anything from travel souvenirs to vintage collectibles to books and plants.
  • Create

Displaying Your Treasures: Styling Tips

So, you've finally got your BTO flat! Congrats, lah! Now comes the fun part: turning that blank canvas into a home that reflects *you*. And if you're anything like me, you've probably accumulated a collection of cherished items – souvenirs from your travels, family heirlooms, or maybe even just that limited-edition Star Wars figurine you snagged. The question is: how do you show them off without your place looking like a cluttered mess?

That's where a display cabinet comes in handy. It's not just a piece of furniture; it's a stage for your memories, a gallery for your passions, and a stylish way to keep your precious belongings safe and dust-free. But with so many options out there, choosing the right one – and styling it *just right* – can feel a bit overwhelming, right? Don't worry, we'll break it down, step by step.

Choosing the Right Display Cabinet for Your Space

First things first: size matters! Before you even think about browsing online or heading to the furniture store, grab your measuring tape. You need to know exactly how much space you have available. Consider the overall layout of your living room or dining area. Will the display cabinet be a focal point, or will it be tucked away in a corner? Make sure there's enough room to comfortably walk around it and open any doors or drawers.

Think about the *style* of your home too. Is it modern and minimalist, or more traditional and cozy? You want a display cabinet that complements your existing furniture and décor. For a sleek, contemporary look, consider a glass display cabinet with clean lines and metal accents. If your home has a more rustic feel, a wooden display cabinet with a warm finish might be a better choice.

And speaking of wood, let's talk materials. Solid wood display cabinets are durable and long-lasting, but they can be quite pricey. Veneer options offer a similar look at a more affordable price point. Glass display cabinets are great for showcasing delicate items, but they require a bit more maintenance to keep them clean and smudge-free. Consider furniture like cabinets, tables and chairs.

What about display cabinet styles? You've got your classic curio cabinets, perfect for displaying small collectibles. Then there are the wall-mounted display cabinets, which are great for saving floor space, especially in smaller BTO flats. Corner display cabinets are designed to fit snugly into corners, maximizing every inch of your precious space. And let's not forget the modern marvels with built-in lighting – talk about highlighting your treasures!

Don't forget to think about storage! Do you need extra drawers or shelves to store items that you don't want on display? A display cabinet with built-in storage can be a lifesaver for keeping clutter at bay. After all, we want to *display* our treasures, not create more chaos, right?

Preparing Your Display Cabinet for Styling

Okay, you've chosen your perfect display cabinet. Now what? Before you start filling it with your prized possessions, take some time to prepare the space. Start by giving the inside of the cabinet a good cleaning. Dust and wipe down all the shelves and surfaces. Nobody wants to admire your collectibles through a layer of grime, *kancheong* spider webs.

Consider adding shelf liners. These can protect the shelves from scratches and spills, and they can also add a pop of color or texture to the inside of the cabinet. You can find shelf liners in a variety of materials, from non-adhesive paper to self-adhesive vinyl. Choose one that complements your décor and provides the level of protection you need.

Lighting is key! If your display cabinet doesn't have built-in lighting, consider adding some. LED strip lights are a great option because they're energy-efficient and easy to install. You can place them along the top or sides of the cabinet to highlight your items. Spotlights can also be used to draw attention to specific pieces.

Think about the background. A plain white background can be a good option for showcasing colorful items, but you can also experiment with different colors and textures. Wallpaper, fabric, or even painted cardboard can be used to create a unique backdrop. Just make sure the background doesn't clash with the items you're displaying.

And before you start arranging your items, take some time to plan your layout. Group similar items together, and consider the height and size of each piece. You want to create a visually appealing arrangement that is both balanced and interesting. Maybe sketch out a few different layouts on paper before you start moving things around. In Singapore’s compact HDB flats and modern residences, the sleeping area often acts as a rest zone and more— a place for deep relaxation after long workdays, do some light reading, or even set up a temporary WFH corner when required. It’s common for local residents to feel stuck with layouts that appear overcrowded, overly bright illumination, or storage that eats into valuable floor space, making the room feel more utilitarian than serene. That’s where thoughtful singapore mattress store truly excels—it centres around smart space planning, relaxing colour schemes, multifunctional furniture, and clever lighting to create a peaceful retreat that optimises relaxation while maintaining a clean, open feel. All at once your sleep space evolves into the place you genuinely anticipate at the after a long day, helping you relax quicker, sleep deeper, and start mornings feeling revitalised for whatever the next day brings. Resources like Wondrous La Vie offer plenty of real-life examples and easy connections to experts focused on these functional and stylish local bedroom renovations.. A little planning can go a long way!

Arranging Your Items for Maximum Visual Appeal

Alright, this is where the fun begins! Now comes the art of arranging your items inside the display cabinet. The goal is to create a visually appealing display that showcases your treasures in the best possible light. Here are a few tips to help you get started:

Start with the focal point. Choose one or two key items that you want to draw attention to. These should be the largest or most interesting pieces in your collection. Place them in a prominent position, such as in the center of the cabinet or on a higher shelf.

Create visual balance. Arrange your items in a way that is both balanced and symmetrical. You can achieve balance by placing similar items on opposite sides of the cabinet, or by using different heights and sizes to create visual interest. Avoid overcrowding the shelves; leave some empty space to allow each item to breathe.

Play with heights and depths. Vary the heights of your items to create a more dynamic display. Use risers or platforms to elevate smaller items. Place larger items in the back of the cabinet and smaller items in the front to create depth. Think of it like creating a landscape – you want to have a foreground, a middle ground, and a background.

Use the rule of thirds. This is a basic principle of design that can be applied to almost anything, including display cabinet styling. Imagine dividing your cabinet into thirds, both horizontally and vertically. Place your key items at the intersections of these lines to create a more visually appealing composition. It sounds complicated, but trust me, it works!

Consider color coordination. Group items together that have similar colors or tones. This can create a more cohesive and harmonious display. You can also use color to create contrast and highlight certain items. For example, you could place a bright red vase against a neutral background to make it stand out.

Tell a story. Think about the story you want to tell with your display. Are you showcasing your travels? Your hobbies? Your family history? Arrange your items in a way that reflects this story. Add personal touches, such as photos, letters, or other mementos. This will make your display cabinet more meaningful and personal.

Don't be afraid to experiment! There's no right or wrong way to style a display cabinet. Have fun and try different arrangements until you find something that you love. And remember, you can always change things up later if you get bored. It's your space, so make it your own!

Maintaining Your Display Cabinet and its Contents

You've styled your display cabinet to perfection. Now, how do you keep it looking its best? Regular maintenance is key to preserving your treasures and keeping your display cabinet in tip-top shape.

Dust regularly. Dust is the enemy of all things beautiful. Use a soft cloth or duster to remove dust from the shelves and items inside the cabinet. For delicate items, use a soft brush or canned air to avoid scratching them. A quick dusting once a week can make a big difference.

Clean the glass. Glass display cabinets can easily become smudged and streaky. Use a glass cleaner and a microfiber cloth to clean the glass regularly. Avoid using harsh chemicals or abrasive cleaners, as these can damage the glass. And remember to dry the glass thoroughly to prevent water spots.

Protect your valuables from sunlight. Direct sunlight can fade and damage delicate items, such as fabrics, paper, and photographs. Position your display cabinet away from direct sunlight, or use curtains or blinds to block out the sun's rays. You can also use UV-protective glass to help protect your valuables.

Control humidity. High humidity can also damage delicate items. If you live in a humid climate (like Singapore, *duh*!), consider using a dehumidifier to control the humidity levels in your home. You can also place desiccant packets inside the display cabinet to absorb moisture.

Check for pests. Pests, such as moths and silverfish, can damage fabrics, paper, and other organic materials. Inspect your display cabinet regularly for signs of pests. If you find any, take steps to eliminate them immediately. You can use mothballs, cedar chips, or other pest control products to keep pests away.

Re-arrange your display periodically. Even the most beautiful display can become stale over time. Re-arrange your items periodically to keep things fresh and interesting. You can also add new items to your collection to keep your display evolving. Think of it as giving your treasures a new lease on life!

So there you have it! With a little planning and effort, you can create a stunning display cabinet that showcases your treasures and adds a touch of personality to your home. Now go forth and style, *steady pom pi pi*!

Check our other pages :

Frequently Asked Questions


Youll typically need a Phillips head screwdriver, a flathead screwdriver, a rubber mallet, and possibly a level. Check the assembly manual for specific tool requirements.
Clear a spacious area and protect the floor with a drop cloth or cardboard to prevent scratches. Ensure you have enough room to move around the cabinet parts.
Before you start, cross-reference all the parts with the parts list in the assembly manual. Label them with stickers if necessary to avoid confusion.
Contact the retailer or manufacturer immediately. Do not attempt to assemble the cabinet with missing parts, as it could compromise the structural integrity.
Use a level on the top surface of the cabinet. If its not level, adjust the feet (if adjustable) or use shims underneath the base until its perfectly level.
Use a soft, damp cloth to wipe down the surfaces. Avoid harsh chemicals or abrasive cleaners. Regularly check and tighten any screws or bolts to maintain stability.