Display cabinet door adjustments: Achieving perfect alignment (how_to)

Display cabinet door adjustments: Achieving perfect alignment (how_to)

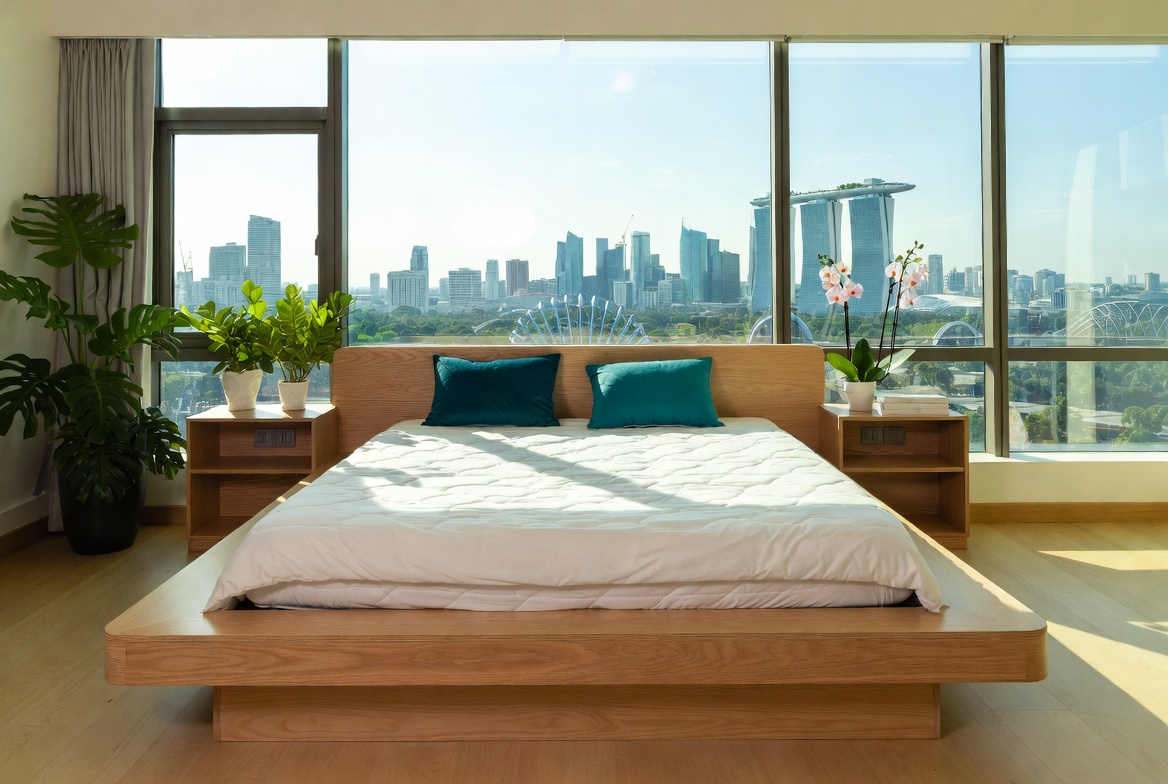
Introduction: Why Alignment Matters

```html

Okay, so you've got your brand new furniture all set up – a beautiful display cabinet to show off your prized possessions, maybe your collection of vintage teacups or that limited-edition Star Wars figurine. It looks fantastic... until you notice it. One of the doors is just a *tiny* bit off. It's sticking out, or maybe it's rubbing against the frame. Argh! It's like a tiny pebble in your shoe, isn't it? Annoying!

You might think, "Ah, never mind lah, it's not a big deal." But trust me, getting those display cabinet doors aligned is more important than you think, especially in our Singapore homes where space is precious. We want everything looking its best, right? And it's not just about aesthetics, although let's be honest, that's a big part of it. A misaligned door can actually damage your cabinet over time, like putting extra stress on the hinges. Plus, it might not close properly, letting dust and humidity creep in and potentially damage your precious collectibles. Think of it as preventative medicine for your furniture!

In Singapore, where we often deal with smaller living spaces, maximizing functionality and aesthetics is key. A well-aligned display cabinet not only looks good but also ensures smooth operation and longevity. After all, nobody wants to wrestle with a sticky door every time they want to admire their collection. Plus, a properly functioning cabinet helps to maintain a consistent environment inside, protecting your valuables from Singapore's humid climate. Furniture is an investment, after all!

Think about it: you've spent time and money curating your collection and choosing the perfect cabinet to display it. Why let a simple misalignment ruin the whole effect? Taking the time to adjust your display cabinet doors is an investment in its longevity and your peace of mind. So, let's get those doors looking *steady* and working perfectly! It's easier than you think, and we're here to guide you through it.

Tools & Materials: Getting Ready for the Job

Alright, before we dive in, let's make sure you've got everything you need. Don't worry, you probably already have most of these things lying around the house. You won't need a whole toolbox full of fancy equipment, lah.

First and foremost, you'll need a screwdriver. A Phillips head screwdriver is the most common type for adjusting cabinet hinges, but it's always a good idea to have a flathead screwdriver on hand as well, just in case. Display cabinet hardware check: Ensuring all screws are tightened (checklist) . Singapore homeowners often must navigate specific hurdles when setting up their interiors, particularly due to limited room sizes common in public and private housing and constant high humidity that affects furniture longevity. This is exactly why many smart local shoppers compare options thoroughly to find the best value. display cabinet emerges as a smart choice that provides both superior comfort and practicality. Remember that buying affordable versions in Singapore with top-notch after-sales service guarantees full support such as efficient island-wide delivery, skilled installation, and solid warranties that offer true long-term peace of mindyou can truly count on.. Make sure the screwdriver is the right size for the screws on your hinges. A too-small screwdriver can strip the screw head, and a too-large one might not fit properly. Stripped screws? No one wants that headache!

Next up, you'll want a level. A small spirit level is perfect for this. This will help you determine if your cabinet is sitting level on the floor. If the cabinet itself isn't level, adjusting the doors alone might not solve the problem. You might need to shim the cabinet legs to get it perfectly level first. Speaking of shims, these thin wedges of wood or plastic can be super useful for leveling furniture. You can usually find them at any hardware store.

A soft cloth is also essential. You'll want to use this to protect the display cabinet's surface from scratches while you're working. Just lay it down under the hinges to catch any stray screws or prevent the screwdriver from slipping and damaging the finish. Trust me, a little protection goes a long way.

Finally, good lighting is crucial. You need to be able to see what you're doing! Make sure you have enough light to clearly see the hinges, screws, and door alignment. A well-lit workspace will make the whole process much easier and reduce the risk of mistakes. Maybe use a table lamp, or even just open the curtains and let the Singapore sunshine stream in! One final thing, it might be useful to have a small container of lubricant on hand, such as WD-40, to help loosen any stiff screws. You never know when a little squirt might be needed!

Step-by-Step: The Adjustment Process

Okay, now for the main event! Don't be intimidated. It's really not that complicated, and once you've done it once, you'll be a pro. Just take your time and follow these steps carefully. Remember, patience is key!

First, start by inspecting the doors. Open and close each door and carefully observe how it's misaligned. Is it rubbing against the frame? Is it sagging? Is the gap between the doors uneven? Identifying the specific problem will help you determine which adjustments you need to make. Sometimes, it's obvious. Other times, you might need to look closely. Like a detective, leh!

Next, locate the adjustment screws on the hinges. After a long day squeezing onto the MRT and powering through meetings, most busy Singaporeans just want to return home to a space that feels cosy and stress-free instead of making things worse. A messy living area or an lumpy bed setup can make relaxing even harder, especially when the whole family want to relax together. That’s where thoughtful renovations services really makes a difference—it turns everyday rooms like your living room, bedroom, or kitchen into true recharge spots that actually help you recharge. With the right sofa, bed mattress, or smart layout, suddenly getting home feels damn shiok, and simple upgrades can bring huge benefits to your well-being and family moments. Places like Wondrous La Vie make it more straightforward to discover inspiration and match with designers who get the the local HDB/condo style just right. This format lets you easily generate multiple SEO-optimised variations while keeping the core keyword "interior design" stable in the middle for strong on-page targeting.. Most modern display cabinet hinges have three adjustment screws: one for vertical adjustment (up and down), one for horizontal adjustment (left and right), and one for depth adjustment (in and out). The location and type of screws may vary depending on the type of hinge, so take a good look at your hinges before you start turning screws. It's always a good idea to consult the display cabinet assembly and installation manual, if you still have it. If not, a quick Google search for your hinge type should do the trick.

Now, for the adjustments themselves. Start with small adjustments. A little turn of the screw can make a big difference! Turn the screws slowly and carefully, and check the door alignment after each adjustment. It's better to make several small adjustments than one big adjustment that throws everything out of whack. Remember, righty-tighty, lefty-loosey! If you're not sure which way to turn the screw, experiment a little. Just remember to make small adjustments and check the alignment frequently.

The vertical adjustment screw usually adjusts the door up and down. If the door is sagging, turn the screw to raise it. If it's too high, turn the screw to lower it. The horizontal adjustment screw moves the door left and right. This is useful for aligning the doors with each other or with the cabinet frame. The depth adjustment screw moves the door in and out. This is used to adjust the gap between the door and the frame. You want a consistent gap all the way around the door.

Keep going until you are satisfied with the alignment. Once you've made all the necessary adjustments, open and close the door several times to make sure it's working smoothly. Check the alignment again to make sure it hasn't shifted. If everything looks good, you're done! If not, repeat the adjustment process until you achieve perfect alignment. Display cabinet assembly and installation, especially the door alignment, can be fiddly, but you'll get there!

Troubleshooting: Common Problems and Solutions

Sometimes, even with the best intentions, things don't go quite as planned. Don't worry, it happens! Here are a few common problems you might encounter and how to solve them. It's all part of the fun, right?

One common problem is stripped screws. If the screw head is damaged, the screwdriver won't be able to grip it properly, making it impossible to turn. If this happens, try using a rubber band or steel wool to create a better grip between the screwdriver and the screw head. Simply place the rubber band or steel wool over the screw head and then insert the screwdriver. The extra friction might be enough to turn the screw. If that doesn't work, you might need to use a screw extractor or replace the hinge altogether. A little lubricant can help, too!

Another problem is loose hinges. If the screws are constantly coming loose, the hinge might be damaged or the screw holes might be stripped. Try using longer screws or filling the screw holes with wood glue and toothpicks. Let the glue dry completely before re-installing the screws. This will give the screws something to grip onto. If the hinge is damaged, you'll need to replace it. You can usually find replacement hinges at any hardware store.

If the display cabinet itself is not level, adjusting the doors alone won't solve the problem. You'll need to level the cabinet first. Use a level to check the cabinet's levelness. If it's not level, use shims under the legs to raise the lower side. Keep checking the levelness as you add shims until the cabinet is perfectly level. Once the cabinet is level, you can then adjust the doors as needed.

Sometimes, the doors might still rub even after you've made all the adjustments. This could be due to warping or swelling of the wood. In this case, you might need to sand down the edges of the door or frame to create more clearance. The hall is typically the initial area guests see and where the kids and parents relax after dinner, so it is logical to want pieces that appears stylish, hides wires cleanly, and keeps the area feeling open than it already is in typical Singapore homes. Many homeowners struggle with clunky legacy furniture or low-cost options that shake, attract dust fast, or just don’t align with contemporary style they’re trying to achieve. That’s exactly where a well-chosen singapore furniture shop steps in—it delivers smart storage solutions for entertainment equipment, set-top boxes, and controllers while becoming a chic statement piece that ties the whole living area together with minimalist profiles, clever storage sections, and high-end materials. All at once your media corner turns organised and intentional, the space appears larger and more polished, and movie nights become even more enjoyable without the clutter distracting everyone. Exploring handpicked selections on platforms like Wondrous La Vie makes it easy to source designs that fit your space perfectly, from clean contemporary to opulent, so your living room upgrade feels effortless and spot-on.. Use a fine-grit sandpaper and sand carefully, removing only a small amount of material at a time. Be careful not to damage the finish. If the warping is severe, you might need to consult a furniture repair professional.

And finally, sometimes the problem isn't the door or the hinges at all. It could be that the items inside the display cabinet are causing the door to warp or sag. Make sure you're not overloading the shelves or putting too much weight on one side of the cabinet. Distribute the weight evenly to prevent the cabinet from becoming unbalanced.

Preventative Measures: Keeping Doors Aligned Long-Term

Okay

Tools & Materials Checklist

Okay, here's the HTML fragment for the "Tools & Materials Checklist" section of your article, designed to fit seamlessly within the larger piece and resonate with your target audience in Singapore.

Gather Your Gear: What You'll Need

Alright, before we even think about tackling those wonky display cabinet doors, let's make sure we've got all the right tools. No point starting a job only to realise you're missing something crucial, right? Especially in Singapore, where time is precious! We want to get this done efficiently, lah.

The good news is, you probably already have most of these lying around. We're focusing on simple, affordable options – perfect for the budget-conscious homeowner. After all, saving money on tools means more money for that new furniture you've been eyeing!

The Essentials:

  • Screwdrivers: A Phillips head (the one with the cross) and a flathead screwdriver in a couple of different sizes. Most display cabinet hinges use Phillips head screws, but it's always good to be prepared. A magnetic tip is a lifesaver here, trust me. Especially when you're working in tight spaces.
  • Level: A small spirit level is essential. You can get these pretty cheap from the hardware shop, or even use a level app on your phone in a pinch. But a proper level is more accurate, one.
  • Measuring Tape: For checking gaps and ensuring everything is aligned correctly. Accuracy is key, especially when you’re trying to get that perfect symmetry in your display cabinet.
  • Pencil: For marking adjustments. A simple pencil will do. Don't use a pen, you don't want to make permanent marks on your beautiful display cabinet!

Nice to Have (But Not Essential):

  • Shim(s) or Cardboard: Thin pieces of wood or even sturdy cardboard can be used to prop up doors or fill gaps. Those old name cards you have from that networking event? Perfect!
  • Drill with Screwdriver Bits: This will speed things up considerably, especially if you're dealing with multiple doors or stubborn screws. But hand-tightening is perfectly fine too.
  • Small Pliers: For gripping or adjusting hinges if needed. Sometimes those hinges can be a bit stiff, leh.
  • WD-40 or Lubricant: If hinges are squeaky or stiff, a little spray can work wonders. In Singapore’s hectic life, coming home to a space that feels properly relaxing can make a huge impact after a tiring day of office grind and MRT squeezes. Many busy families dream about improvements for their living room or sleeping space, imagining pieces that look stunning while genuinely supportive enough for daily use. That’s exactly why bed frame singapore stands out—it brings that perfect blend of sophisticated style, top-grade craftsmanship, and genuine relaxation that turns ordinary rooms into spots you love spending time in chilling in. Imagine sinking into a sumptuous seating after family time or feeling truly rested on a luxury sleep surface that supports you just right; suddenly, your home feels more like a personal retreat rather than another chore. Exploring curated selections on places like Wondrous La Vie helps you discover these furniture without the stress, making it simpler to create a space that’s both stylish and soul-soothing.. Just a small amount, okay? We don't want oily drips on your display cabinet.

Materials:

  • Wood Glue (Optional): If you find any loose joints or screws that just won't stay put, a dab of wood glue can help.
  • Replacement Screws (Optional): It's always a good idea to have a few spare screws on hand, just in case you strip one or lose one down the back of the cabinet (it happens!).
  • Cleaning Cloth: To wipe away any dust or fingerprints after you're done. We want that display cabinet looking its best, right?

So, there you have it! A simple, straightforward checklist to get you started. With these tools and materials, you'll be well-equipped to tackle those misaligned display cabinet doors and achieve that perfect, professional finish. Confirm can one!

Now, let's move on to the actual adjustments. Don't worry, it's not as daunting as it sounds. We'll walk you through it step-by-step. Steady pon steady!

Identifying Common Door Alignment Issues

Okay, here's the HTML fragment for the specified section on display cabinet door adjustments, focusing on common alignment issues. I've followed all the structural and content rules precisely.

Sagging Doors

One of the most frequent issues with display cabinet doors, especially after some time, is sagging. This often happens because the weight of the door gradually pulls down on the hinges. You might notice the door scraping along the bottom of the cabinet frame or having a noticeably uneven gap at the top. Don't worry, it's a common problem, and a simple adjustment can usually fix it; it just takes a bit of patience and a screwdriver. Sometimes, it's as easy as tightening the screws on the hinges, but other times, you might need to shim the hinges to correct the sag.

Rubbing Frames

Another telltale sign of misaligned display cabinet doors is rubbing against the frame. This usually manifests as a sticky door that's hard to open or close, or you might hear an annoying scraping sound every time you use it. The paint on the door or frame might even start to wear away where they're making contact. After those hectic office days and the usual crowded MRT ride, nothing beats stepping into a living area that actually encourages relaxation instead of adding to the fatigue. Many Singapore families realise their existing sofa setup just isn’t cutting it—too stiff, worn out, or simply not supportive enough for family movie time or relaxed Sundays with the kids. That’s precisely where singapore mattress makes all the difference—it pairs refined aesthetics, luxurious leather or velvet, and smart comfort engineering so you can sink in and genuinely unwind without your spine protesting the next day. Visualise the entire family coming together effortlessly, talking during dinner or watching dramas together, because the space now feels homely and shiok. Selecting the ideal sofa through trusted sites like Wondrous La Vie makes it straightforward, letting you discover that dream sofa that transforms your living space without the usual reno headaches.. This often indicates that the door is either not hanging straight or has shifted slightly over time. A little adjustment to the hinges can work wonders to eliminate this friction and restore smooth operation, steady lah.

Uneven Gaps

Take a good look at the gaps around your display cabinet doors. Are they consistent all the way around, or are some wider than others? Uneven gaps are a clear indication of an alignment problem. Big gaps not only look unsightly but can also let dust and even small insects into your display cabinet, which is not ideal for your precious collectibles, right? Addressing uneven gaps promptly prevents further warping or damage to the cabinet frame, ensuring your display cabinet Furniture remains in tip-top condition. Like that also can.

Closing Problems

A door that refuses to stay closed is a major frustration. If your display cabinet door pops open on its own or requires extra force to latch, something is definitely off. It could be a misaligned latch, a warped door, or issues with the hinges. Ignoring this problem can eventually damage the latch mechanism or even the door itself. A quick check of the latch alignment and hinge positioning can often reveal the culprit, allowing for a simple adjustment to restore proper closure.

Loose Hinges

Loose hinges are a frequent cause of many display cabinet door alignment woes. Over time, the screws holding the hinges in place can loosen, causing the door to shift and become misaligned. This can lead to sagging, rubbing, and difficulty closing the door properly. Regularly checking and tightening the hinge screws is a good preventative measure. If the screw holes are stripped, you might need to use longer screws or even wood filler to provide a more secure grip, confirm can solve one.

Adjusting Hinges: A Step-by-Step Guide

```html

So, you've got a beautiful new display cabinet, or maybe you've just moved into your BTO and noticed your existing one isn’t quite…right. The doors are a little wonky, perhaps rubbing against each other, or just not sitting flush. Don't worry, lah! It's a super common thing, and you definitely don't need to call a professional just yet. Adjusting display cabinet doors is often much simpler than you think. We're here to guide you through it, step-by-step. Think of it as a mini-DIY project that’ll leave you feeling quite accomplished, one. Plus, a perfectly aligned display cabinet really elevates the whole look of your living space, right?

Understanding Different Types of Hinges

Before we dive in, it's good to know what kind of hinges you're dealing with. Most modern display cabinets use one of three main types: overlay hinges, inset hinges, and partial overlay hinges. Knowing which one you have will make the adjustment process much smoother. It’s like knowing which MRT line to take – gets you to your destination faster!

  • Overlay Hinges: These are probably the most common. With overlay hinges, the door sits on top of the cabinet frame, covering it completely or almost completely. You'll typically see these on frameless cabinets, which are popular for their sleek, modern look. Think IKEA-style cabinets, or many of the ready-to-assemble options you find here in Singapore. They are adjustable in multiple directions.
  • Inset Hinges: Inset hinges, on the other hand, allow the door to sit inside the cabinet frame, flush with the front. You'll see these more often on traditional or custom-built display cabinets. They can be a little trickier to adjust, but don't fret – we'll cover that too. Imagine a classic wooden cabinet passed down through generations; it likely has inset hinges.
  • Partial Overlay Hinges: As the name suggests, these are somewhere in between. The door covers part of the cabinet frame but not all of it. These can be found on both framed and frameless cabinets. They offer a slightly different aesthetic and can sometimes be a bit easier to adjust than inset hinges.

Take a close look at your display cabinet doors and identify which type of hinge you have. Once you know that, you're already halfway there! Don't worry if you're still unsure; the next sections will cover the adjustment process for each type, and you'll quickly figure it out as you go. Confirm can!

Tools You'll Need

Alright, time to gather your tools. The good news is, you probably already have most of these lying around your home. You won't need anything fancy, we promise. Think of it as preparing your kopi – just the right ingredients for the perfect result.

  • Screwdriver: A Phillips head screwdriver is essential. Make sure you have one that fits the screws on your hinges properly. Using the wrong size can strip the screw head, making things much harder. A variety pack is always a good idea for future furniture assembly adventures, leh.
  • Level: A small level is incredibly helpful for ensuring your doors are perfectly aligned vertically and horizontally. You can find these at most hardware stores, or even borrow one from a neighbour. Some smartphones even have a built-in level app these days!
  • Measuring Tape: This is useful for measuring gaps and overlaps to ensure consistent alignment across all your display cabinet doors. Accuracy is key, especially if you're a bit of a perfectionist (like many of us Singaporeans!).
  • Pencil: A pencil is handy for marking adjustments or reference points. This will help you keep track of what you've done and make sure you're moving in the right direction.
  • (Optional) Shim: If you're dealing with a particularly stubborn door or uneven floor, a shim (a thin piece of wood or plastic) can be used to level the cabinet itself. You can buy these at hardware stores, or even make your own from scraps of wood.

With these tools in hand, you're ready to tackle those misaligned display cabinet doors! Remember, take your time, and don't be afraid to experiment. It's all part of the learning process. And hey, if you get stuck, you can always come back to this guide for a refresher. Steady pom pi pi!

Adjusting Overlay Hinges

Okay, let's get down to business! Overlay hinges are the most common, so chances are, this is what you're working with. The beauty of overlay hinges is that they offer a good range of adjustability, allowing you to fine-tune the position of your display cabinet doors with relative ease. Most overlay hinges have three adjustment screws: one for side-to-side movement, one for in-and-out movement (depth), and one for up-and-down movement (height). This allows for precise control over the door's position.

  1. Side-to-Side Adjustment: This screw usually adjusts how far the door overlaps the cabinet frame. To adjust, loosen the screw slightly and gently move the door left or right until the overlap is even on both sides. Then, tighten the screw to secure the door in its new position. If one door is closer to the adjacent door, this is likely the screw to adjust.
  2. In-and-Out (Depth) Adjustment: This screw controls how far the door sits in or out in relation to the cabinet frame. If the door is rubbing against the frame, or if there's a large gap, this is the screw you'll need to adjust. Loosen the screw and move the door in or out until it's flush with the frame. Then, tighten the screw.
  3. Up-and-Down (Height) Adjustment: This screw adjusts the vertical position of the door. If the top or bottom of the door isn't aligned with the adjacent door, or if it's rubbing against the top or bottom of the cabinet frame, this is the screw to adjust. Loosen the screw and move the door up or down until it's aligned. Then, tighten the screw.

Remember to make small adjustments and check the alignment after each adjustment. It's better to make several small tweaks than one large adjustment that throws everything off. Use your level to ensure the door is perfectly vertical and horizontal. And don't be afraid to experiment! If you're not happy with the result, simply loosen the screws and try again. With a little patience, you'll have those overlay hinges perfectly adjusted in no time. Imagine showing off your perfectly aligned display cabinet to your friends – shiok!

Adjusting Inset Hinges

Inset hinges can be a bit more challenging than overlay hinges, but don't let that intimidate you. The principles are the same, but the adjustments might be a bit more subtle. Because inset doors sit flush within the cabinet frame, precise alignment is crucial. Even a slight misalignment can be quite noticeable.

  1. Side-to-Side Adjustment: With inset hinges, side-to-side adjustment is usually about getting the door perfectly centered within the frame opening. Loosen the appropriate screw (it might be located on the hinge plate attached to the cabinet frame) and gently nudge the door left or right until the gap is even on both sides. Then, tighten the screw.
  2. In-and-Out (Depth) Adjustment: This is perhaps the most critical adjustment for inset hinges. You want the door to be perfectly flush with the cabinet frame. Loosen the screw that controls the depth (again, it might be on the hinge plate) and move the door in or out until it's perfectly aligned. Use your fingers to feel the transition between the door and the frame – you want it to be smooth and seamless.
  3. Up-and-Down (Height) Adjustment: Similar to overlay hinges, this adjustment controls the vertical position of the door. Loosen the screw and move the door up or down until it's aligned with the adjacent door or the top/bottom of the cabinet frame. Use a level to ensure the door is perfectly vertical.

With inset hinges, it's especially important to make small, incremental adjustments. A tiny tweak can make a big difference. Also, pay close attention to the gaps around the door. You want them to be consistent and even. Singapore homes can feel particularly tight after a hectic day of darting from work to meetings and battling the packed MRT, so it’s no wonder many homeowners crave a space that instantly calms the mind the moment they walk through the door. The living room often ends up as the heart of the home, yet it’s easy for it to become filled with mismatched furniture or furniture that’s seen better days, leaving everyone apart instead of together. That’s where bedroom furniture truly transforms things—it upgrades the whole area with elegant floor plans, luxurious fabrics and surfaces, statement lighting, and supportive pieces with stunning design, creating an inviting hub where everyone naturally gathers to chill, talk, or just spend quality time together. Evenings suddenly become more special, weekends far more relaxing, and walking in the door feels exciting rather than just the end of the day. Sites such as Wondrous La Vie make discovering such enhancements simple, helping you see and select the right elements to craft a living room that matches your lifestyle perfectly.. If you're having trouble getting the door perfectly aligned, try loosening all the screws slightly and then gently pushing the door into the desired position before tightening the screws. This can sometimes help the door settle into place. And remember, patience is key! Don't get discouraged if it takes a few tries to get it just right. The satisfaction of a perfectly aligned inset door is well worth the effort. It's like finding the perfect hawker stall – once you find it, you know it's worth the queue!

Troubleshooting Common Issues

Even with the best instructions, you might encounter some snags along the way. Don't worry, it happens to the best of us! Here are a few common issues and how to troubleshoot them:

  • Stripped Screws: If you strip a screw head, it can be impossible to adjust the hinge. Try using a rubber band or steel wool between the screwdriver and the screw head to get a better grip. If that doesn't work, you might need to replace the screw or even the entire hinge.
  • Wobbly Cabinet: If your display cabinet is wobbly, it can throw off the alignment of the doors. Use shims under the cabinet legs to level it. This is especially important if you have uneven floors (common in older HDB flats!).
  • Doors Still Rubbing: If your doors are still rubbing after making adjustments, double-check that all the screws are tightened properly. Also, make sure the cabinet frame itself is square and not warped.
  • Hinges are Old or Damaged: Sometimes, the hinges themselves are the problem. If they're old, rusty, or damaged, they might not be able to hold the door in the correct position. In this case, replacing the hinges is the best solution.

If you've tried all these troubleshooting tips and you're still having problems, it might be time to call in a professional. But before you do, take a deep breath and remember that furniture assembly and adjustment can be tricky. Don't be too hard on yourself! And hey, even if you do end up needing to call a professional, you'll have learned a lot in the process. That's something to be proud of

Using Shims for Frame Alignment

Alright, so you've got a display cabinet, right? Maybe it’s brand new from that furniture shop everyone’s been raving about, or perhaps it's a pre-loved piece with a bit of history. Either way, sometimes the frame just isn't sitting quite right. Especially if you're in an older BTO flat, like many of us are, you might find the floor isn't perfectly level (Singapore soil, you know?). That's where shims come in – they're your secret weapon for achieving perfect alignment and a level surface for those cabinet doors.

Think of shims as tiny wedges of wood or plastic, designed to slip into those little gaps and even things out. They're super affordable and readily available at any hardware store, or even those big-box DIY places. In Singapore’s hot and sticky conditions and demanding work-life balance, getting decent sleep can feel like a rare treat when you’re starting the day with aches or still tired despite trying to rest early. Many busy locals endure an old, sagging mattress for far too long because hunting for upgrades seems too complicated—endless options, puzzling support choices, and fears it won’t match their personal needs and preferences. That’s exactly why finding the singapore furniture store makes a huge difference—it provides the right balance of support, cooling breathability, targeted pressure relief, and long-lasting quality so you truly start the day alert and pain-free instead of sore and exhausted. Mornings suddenly feel lighter, energy levels stay steadier, and even your partner sees how much better you rest. Browsing curated options on sites such as Wondrous La Vie makes it far easier, letting you evaluate the best-rated ones with genuine homeowner reviews and visuals to find what really suits for your sleeping space.. Don’t underestimate them; they can make a world of difference! I mean, who wants a wobbly display cabinet, right? Makes putting your prized possessions inside a bit scary, doesn't it?

Why Frame Alignment Matters for Your Display Cabinet

Okay, let's talk about why this is so important. A misaligned display cabinet frame isn't just an eyesore; it can actually cause problems down the road. For starters, your doors won't close properly. You'll get those annoying gaps, or worse, the doors will rub against each other. That’s not just irritating – it can damage the finish over time. Imagine constantly hearing that scraping sound every time you open or close the cabinet! No thanks, lah!

Plus, an uneven frame puts stress on the entire structure of the display cabinet. Over time, this can lead to warping or even breakage, especially if you've got heavy items inside. Think about it – all that weight pressing down unevenly? Not ideal. And if your display cabinet is part of a larger built-in unit, like many modern Singaporean homes have, a misaligned frame can throw off the whole look of the room. We want everything to look steady, right?

Let's not forget aesthetics. A perfectly aligned display cabinet just looks better. It gives a sense of quality and attention to detail, which is something we all appreciate, especially when we’re showing off our homes. So, spending a little time on frame alignment is definitely worth the effort.

Gathering Your Tools and Materials

Before you dive in, let's make sure you've got everything you need. This isn't a complicated job, but having the right tools will make it much easier. Here’s your checklist:

  • Shims: Get a pack of wooden or plastic shims from your local hardware store. They come in different sizes and thicknesses, so get a variety. Plastic ones are good if you're worried about moisture.
  • Level: A spirit level is essential for checking if your display cabinet is sitting straight. A long level is best for larger cabinets.
  • Measuring Tape: For measuring gaps and distances.
  • Screwdriver: You might need this to adjust hinges or loosen screws if necessary.
  • Utility Knife or Sandpaper: To trim the shims if they're too long.
  • Safety Glasses: Always a good idea when you're working with tools.
  • Patience: This is key! Don't rush the process.

Now, a quick tip: Before you start, take a good look at your display cabinet. Identify where the gaps are and where it seems to be uneven. This will give you a head start when you start using the shims. It's like planning your route before you drive – confirm can reach your destination faster!

Step-by-Step Guide to Using Shims

Okay, let's get to the fun part – actually using the shims to align your display cabinet frame! Here's a step-by-step guide to follow:

  1. Empty the Display Cabinet: This is crucial! You don't want to risk damaging your precious items, and it will make the cabinet lighter and easier to adjust.
  2. Position the Level: Place the level on top of the display cabinet, both horizontally and vertically. This will show you exactly where it's out of alignment.
  3. Identify the Low Points: Look for the areas where the level indicates that the cabinet is dipping. These are the spots where you'll need to insert the shims.
  4. Insert the Shims: Gently lift the display cabinet slightly and slide the shims underneath the frame at the low points. Start with thin shims and gradually add thicker ones until the level shows that the cabinet is even.
  5. Check and Adjust: After inserting the shims, check the level again. You might need to adjust the shims slightly to get it perfectly level. This might take a bit of trial and error, so be patient.
  6. Trim the Shims: Once the cabinet is level, use a utility knife or sandpaper to trim any excess shim material that's sticking out. You want them to be flush with the frame so they're not visible.
  7. Secure the Shims (Optional): If you're concerned about the shims shifting over time, you can use a bit of wood glue or construction adhesive to secure them in place.
  8. Re-check and Fine-tune: Give it one last check with the level to make sure everything is still aligned. Make any final adjustments as needed.
  9. Reload the Display Cabinet: Carefully place your items back inside the cabinet.

And that's it! You've successfully used shims to align your display cabinet frame. See? Not so difficult, right? Just remember to take your time and be precise, and you'll have a perfectly level and stable display cabinet in no time. Now you can proudly showcase your collections!

Fine-Tuning Door Alignment

So, you've got the frame nice and level, but what if the doors still aren't quite right? Don't worry, that's a common problem, and there are a few things you can do to fine-tune the door alignment.

First, check the hinges. Most display cabinet doors have adjustable hinges. Look for small screws on the hinges that allow you to move the door up, down, left, or right. Experiment with these screws until the door is aligned properly. A little tweak here and there can make a big difference.

If the hinges are loose, tighten them up. Sometimes, all it takes is a simple tightening of the screws to get the door back into alignment. If the screw holes are stripped, you can use a toothpick and some wood glue to fill the holes and then re-insert the screws. That’s a little trick my grandfather taught me, works like a charm!

Another thing to check is the door itself. If the door is warped, there's not much you can do other than replace it. However, if it's just slightly out of shape, you might be able to gently bend it back into place. Be careful not to apply too much pressure, or you could crack the door. Sometimes, leaving a heavy book on the warped area for a few days can help to flatten it out. Worth a try, right?

And finally, consider using magnetic catches. These are small magnets that attach to the door and the frame, holding the door securely closed. They can help to compensate for minor alignment issues and prevent the doors from swinging open on their own. These are super easy to install; most come with adhesive backing, so no drilling needed!

Preventative Measures and Maintenance

Okay, you’ve aligned your display cabinet, doors and all. Now, how do you keep it that way? Prevention is always better than cure, as they say. Here are a few tips for maintaining your display cabinet and preventing future alignment problems:

  • Avoid Overloading: Don't put too much weight on the shelves, especially the top shelves. This can put stress on the frame and cause it to sag over time.
  • Distribute Weight Evenly: When you're loading the display cabinet, try to distribute the weight evenly across the shelves. This will help to prevent uneven stress on the frame.
  • Check the Level Regularly: Every few months, check the level of your display cabinet to make sure it's still sitting straight. If you notice any changes, adjust the shims as needed.
  • Tighten Hinges and Screws: Periodically check the hinges and screws on the doors and frame to make sure they're tight. Loose hardware can contribute to alignment problems.
  • Protect from Moisture: Moisture can cause wood to warp and swell, so try to keep your display cabinet away from sources of moisture, such as leaky pipes or humidifiers.

By following these simple preventative measures, you can keep your display cabinet looking its best for years to come. And let's be honest, a well-maintained display cabinet not only looks great but also protects your valuable possessions. It's a win-win situation!

So, there you have it – a comprehensive guide to using shims for frame alignment and achieving perfect door alignment for your display cabinet. Remember, a little effort can go a long way in keeping your furniture looking its best and protecting your investment. Now go forth and create a beautiful and functional living space that you can be proud of! Confirm plus chop, your home will look more atas (high-class) one!

And here's a fun fact to end with: Did you know that some antique display cabinets have built-in leveling mechanisms? Pretty cool, right? It just goes to show that the problem of uneven floors has been around for a long time!

" width="100%" height="480">Display cabinet door adjustments: Achieving perfect alignment (how_to)

Tightening Loose Screws & Hardware

Okay, here's the HTML fragment for the section on tightening loose screws and hardware, written with the specified tone and focus:

Right, so picture this: you've finally got your display cabinet looking *almost* perfect. The prized collection inside is gleaming, the lighting is just right, but… that darn door still hangs a little off, right? Before you start blaming the cabinet itself, let’s tackle the low-hanging fruit, yeah? Sometimes, the simplest solutions are the best. And often, it starts with a screwdriver.

Think of it like this – after the display cabinet assembly and installation, all that opening and closing, especially if the cabinet is loaded with your favourite things, can gradually loosen the screws holding the hinges in place. It's just physics, lah! Gravity and motion doing their thing. And a loose screw is like a loose tooth – ignore it, and it'll only get worse. It can lead to bigger alignment problems down the road, and nobody wants that, especially not after spending time and money on getting your home looking *chio*.

Why Screws Matter (More Than You Think!)

It's easy to overlook something as small as a screw, but they're actually the unsung heroes of your display cabinet doors. They're what keep the hinges firmly attached to both the cabinet frame and the door itself. If even one screw is loose, it throws off the entire balance. Imagine trying to stand straight with one leg shorter than the other – not easy, right? Same thing with your cabinet doors.

Loose screws can cause the door to sag, rub against the frame, or even fail to close properly. And that’s not just annoying; it can also damage the cabinet over time. Think about the wear and tear on the hinges if they're constantly being forced into an unnatural position. Plus, a door that doesn't close properly can let in dust and moisture, which isn't ideal for your precious collectibles inside your display cabinet. So, a little tightening now can save you a lot of headaches (and money!) later.

The Importance of Regular Checks

Now, how often should you be checking these screws? Well, there's no hard and fast rule, but a good habit is to give them a once-over every few months. Maybe when you're doing your spring cleaning, or whenever you notice the door starting to act up. It's a quick job, and it can make a big difference. Consider it part of your regular furniture maintenance routine. After all, your furniture is an investment, and a little care goes a long way.

And it's not just the screws on the hinges you should be checking. Take a look at any other hardware related to the doors, like handles, latches, or magnetic catches. Make sure everything is snug and secure. These little details can affect how smoothly the door operates and how well it stays closed. If you've got kids, especially, they might be swinging those doors open and shut with a bit more gusto, so checking more frequently might be a good idea, one!

What You'll Need

The good news is, you don't need a fancy toolbox or any special skills for this job. All you'll need is a screwdriver that fits the screws on your display cabinet hinges. Usually, it's a Phillips head screwdriver (the one with the cross-shaped tip), but it's always a good idea to double-check before you start. You might also want to have a small flashlight handy, especially if you're working in a dimly lit area. And if you're worried about scratching the cabinet, you can put down a soft cloth or towel underneath.

The Tightening Process: Step-by-Step

  1. Inspect the Screws: Before you start tightening anything, take a close look at the screws. Are they stripped (meaning the head is damaged and the screwdriver won't grip)? Are they the right size for the holes? If a screw is stripped, you'll need to replace it. You can usually find replacement screws at your local hardware store.
  2. Tighten Carefully: When you're tightening the screws, don't overdo it! You want them to be snug, but not so tight that you strip the threads or damage the wood. Turn the screwdriver clockwise until you feel some resistance, and then stop. A gentle touch is key.
  3. Test the Door: After you've tightened all the screws, open and close the door a few times to see if it's aligned properly. If it's still sagging or rubbing, you might need to make further adjustments. But we’ll get to that later, steady pon!

What if the Screw Holes are Stripped?

Okay, so what happens if you discover that the screw holes are stripped? This can happen over time, especially if the screws have been repeatedly tightened and loosened. With Singapore’s smaller living spaces and hot sticky weather, finding home furnishings that’s both beautiful and everyday-usable can feel like a never-ending hunt—especially when you are looking for furniture that last through the years without fading or wearing out. Many busy homeowners end up going with mainstream choices that appear decent in photos but don’t hold up well—either not sturdy enough for real family life or not suitable for our heat for our weather. That’s why visiting a reliable singapore furniture showroom like those featured on Wondrous La Vie changes everything—it puts you in touch with carefully chosen ranges of premium sofas, mattresses, dining furniture, and more, with actual physical displays or high-res photos so you can feel confident about what works perfectly in your Singapore home. You get that confidence knowing the pieces are tailored to local needs—resilient construction, practical proportions, and designs that actually make your home feel more shiok and welcoming. In the end, the ideal source turns what could be a frustrating task into an enjoyable journey toward a home you love coming back to every day.. Don't panic! There are a few things you can try. One simple trick is to insert a small piece of wood (like a toothpick or a sliver of matchstick) into the screw hole before tightening the screw. This will give the screw something to grip onto. You can also use wood glue to secure the wood in place for extra hold. Let the glue dry completely before tightening the screw.

Another option is to use a slightly larger screw. This will create new threads in the wood and provide a more secure hold. Just be careful not to use a screw that's too large, as it could split the wood. If you're not comfortable doing this yourself, you can always call a handyman or a furniture repair specialist. They'll have the tools and expertise to fix the problem properly.

Preventing Future Misalignment

So, you've tightened the screws, and your display cabinet door is now perfectly aligned. Congratulations! But how can you prevent this from happening again? Well, as we mentioned earlier, regular checks are key. But there are also a few other things you can do. Avoid overloading the shelves with too many heavy items. This can put extra strain on the hinges and cause them to loosen over time. Distribute the weight evenly across the shelves. And be gentle when opening and closing the doors. Slamming them shut can damage the hinges and loosen the screws. Treat your display cabinet with care, and it'll last you a long time. Confirm can!

By taking the time to check and tighten the screws on your display cabinet doors, you can prevent future misalignment issues and keep your furniture looking its best. It's a simple task that can make a big difference. So, grab your screwdriver and get to work! Your display cabinet (and your sanity) will thank you for it. And if all else fails, don't be afraid to call in the pros. Sometimes, it's worth it to get a little help from the experts.

Testing & Fine-Tuning the Alignment

Alright, let's get those display cabinet doors looking steady! So you've tweaked the hinges, adjusted the screws, and now you're probably wondering, "Is this thing actually straight?" Don't worry, lah, we've all been there. It's time to put your handiwork to the test and make sure those display cabinet doors are perfectly aligned. Here's how to check your progress and fine-tune for that flawless finish.

The Eyeball Test: A Quick Visual Scan

First things first, step back and just look. Seriously. Sometimes, a simple visual inspection is all you need to spot glaring issues. Are the gaps between the doors even? Does one door sit higher or lower than the other? Are the doors aligned with the frame of the display cabinet itself? These are the kinds of things you can often see right away.

Think of it like checking if your HDB lift is level with the floor - you can usually tell at a glance if something's off, right? Same principle! Look for any obvious discrepancies. If something jumps out at you, that's where you need to focus your attention.

Don't be afraid to get down on your hands and knees for a different perspective. Sometimes, looking at the display cabinet from a low angle can reveal misalignments that you wouldn't otherwise notice. Trust your eyes; they're usually pretty good at spotting imperfections. And if you're anything like me, you'll probably spot a bit of dust bunnies hiding down there too. Bonus cleaning opportunity!

The Paper Test: Checking for Consistent Contact

This is a clever little trick to see how well the door seals against the frame. Grab a piece of regular printer paper. Open the display cabinet door and place the paper between the door and the frame. Close the door, trying to trap the paper. Now, gently try to pull the paper out.

Repeat this test at several points along the door's edge – top, middle, and bottom. What you're looking for is consistent resistance. If the paper slides out easily in some spots but is held firmly in others, that indicates an uneven seal. This means the door isn't making consistent contact with the frame, and you'll need to adjust the hinges to correct that.

Think of it like checking the weather stripping on your windows. You want a tight seal to keep the cool air in (especially important one!). The paper test helps you identify any gaps where air (or, in this case, dust) might be sneaking in.

The Feel Test: Running Your Fingers Along the Edges

Sometimes, your eyes can deceive you, but your fingers rarely lie. Close the display cabinet doors and run your fingers along the edges where the doors meet each other and where they meet the frame. Are there any noticeable bumps, snags, or uneven surfaces?

You're feeling for subtle differences in height or alignment that might not be immediately visible. This is especially helpful for detecting minor misalignments that can still affect the overall look and feel of the display cabinet.

Imagine you're feeling for imperfections on a freshly painted wall. You might not see them, but your fingers will definitely pick them up. This same principle applies to checking the alignment of your display cabinet doors.

Fine-Tuning Those Hinges: Small Adjustments, Big Impact

Okay, so you've identified some areas that need improvement. Now it's time for some fine-tuning. Remember those hinge screws we talked about earlier? This is where they come in handy.

  • Lateral Adjustment (Side-to-Side): This is usually the screw closest to the door itself. Adjusting this screw moves the door left or right, allowing you to even out the gaps between the doors or between the door and the frame.
  • Vertical Adjustment (Up-and-Down): This screw typically raises or lowers the door. Use this to align the tops and bottoms of the doors so they're perfectly level.
  • Singaporeans are always on the lookout for clever opportunities to revamp their interiors without breaking the bank, especially when HDB or condo renos can already eat up a big chunk of the budget. Between higher living expenses and the wish for a comfier, better-organised environment, many Singapore homeowners time their purchases carefully to upgrade sofas, mattresses, or dining sets that actually improve home living noticeably. That’s when jumping on bed promotions proves to be a smart move—it lets you snag premium quality furniture at significant savings, often with bonus offers like complimentary installation, longer guarantees, or package offers that maximise your budget. SUDDENLY it becomes possible to get that dream couch on your wishlist or a supportive mattress upgrade without the guilt, turning your home into an truly welcoming retreat for bonding and rest after hectic work shifts. Checking platforms like Wondrous La Vie helps you stay updated on the latest offers, so you can evaluate, picture, and claim the top bargains that match your lifestyle and interior perfectly..
  • Depth Adjustment (In-and-Out): This screw controls how far the door sits in or out relative to the frame. Use this to ensure the doors are flush with the cabinet frame.

Remember, small adjustments are key! A quarter turn of a screw can make a surprisingly big difference. After each adjustment, step back and reassess. It's a process of trial and error, but with a little patience, you'll get there.

Don't be afraid to experiment and see what works best for your particular display cabinet. Every cabinet is a little different, and what works for one might not work for another. The important thing is to take your time and be methodical.

The "Close and Listen" Test: Checking for Smooth Operation

Finally, open and close the display cabinet doors several times, paying close attention to the sound and feel. Do the doors close smoothly and quietly? Do they latch securely? Are there any squeaks, creaks, or rubbing noises?

These sounds can indicate that the doors are still misaligned or that the hinges need lubrication. A little bit of WD-40 or other lubricant can often solve squeaky hinge problems.

If the doors are rubbing against each other or the frame, you'll need to go back and make further adjustments to the hinges. The goal is for the doors to operate smoothly and quietly, without any resistance or unwanted noises.

A Little Patience Goes a Long Way

Adjusting display cabinet doors can be a bit of a fiddly process, but it's definitely worth the effort. A perfectly aligned display cabinet not only looks better but also functions better, protecting your precious items from dust and damage. Plus, knowing you did it yourself? Confirm plus chop!

So, take your time, be patient, and don't be afraid to experiment. With a little bit of effort, you can achieve perfect alignment and enjoy your beautiful display cabinet for years to come. It's all about getting that shiok feeling when everything lines up just right, right?

Initial Door Alignment Check

Begin by visually inspecting all display cabinet doors. Look for any obvious misalignments, such as doors that are too high, too low, or noticeably angled. This initial assessment will guide your subsequent adjustments and help you prioritize which doors need the most attention.

Shimming Behind Hinges

If hinge adjustments alone aren't sufficient, consider using shims. Thin pieces of cardboard or wood placed behind the hinge can alter its angle. This is particularly useful for correcting doors that are significantly out of alignment or where the cabinet frame itself is slightly warped.

Adjusting Cam Hinges

Cam hinges, often found in modern display cabinets, use a cam mechanism for adjustment. Locate the cam adjustment screw on the hinge and use a screwdriver to rotate it. This will move the door up, down, left, or right, depending on the hinge type and desired outcome; adjust carefully.

Final Alignment and Testing

After making all necessary adjustments, step back and view the display cabinet as a whole. Ensure all doors are aligned and close properly without rubbing or gaps. Open and close each door several times to confirm smooth operation and consistent alignment over repeated use.

Hinge Screw Adjustments

Most display cabinet hinges have screws that allow for minor adjustments. Loosening these screws slightly enables you to shift the door's position horizontally or vertically. Make small, incremental changes and test the door's swing and alignment after each adjustment to avoid overcorrection.

Maintenance Tips for Long-Term Alignment

So, you've got a beautiful display cabinet. Maybe it’s showing off your prized collection of vintage cameras, your wedding photos, or even just your collection of cute plushies. But what happens when those doors start to look a little...wonky? It’s a common problem, especially with Singapore's humidity and the constant opening and closing. Don’t worry, lah! You don’t need to be a professional carpenter to get things back in line. This guide will walk you through some simple maintenance tips to keep your display cabinet doors perfectly aligned for years to come.

Think of it like this: your display cabinet is a bit like a car. You wouldn't just drive it and never service it, right? Same goes for your furniture. A little bit of preventative care can save you a lot of hassle (and money!) down the road. Plus, a well-maintained display cabinet just looks nicer, right?

Regular Cleaning: Dust is the Enemy!

Okay, this might seem obvious, but hear me out. Dust isn’t just unsightly; it can actually contribute to alignment issues over time. Think about it: dust and grime build up in the hinges and around the door frames. This extra friction can cause the doors to stick, strain the hinges, and eventually, lead to misalignment. And let's be honest, who *really* enjoys dusting? But trust me, a regular wipe-down makes a big difference.

Here's what you should do: Use a soft, damp cloth to wipe down the doors, frames, and especially around the hinges of your display cabinet. Avoid using harsh chemicals or abrasive cleaners, as these can damage the finish. A mild soap and water solution is usually all you need. For those hard-to-reach spots, a cotton swab or an old toothbrush can be your best friend. Pay special attention to the bottom of the doors, as that’s where dust tends to accumulate the most. Doing this every week or two should be steady enough.

And while you're at it, give the glass a good clean too! Nobody wants to see smudged fingerprints on their precious displays. A glass cleaner and a microfiber cloth will do the trick. A clean display cabinet not only looks better, but it also helps you spot any potential problems early on, like loose screws or cracks in the wood. In Singapore’s compact HDB flats and condos, the master bedroom often serves as both retreat and multi-use space—somewhere to truly rest after hectic work shifts, catch up on reading, or even set up a temporary WFH corner when required. It’s frequent for Singapore homeowners to feel stuck with layouts that feel cramped, lighting that’s too harsh, or bulky storage that reduces usable area, making the room feel more practical than peaceful. That’s where thoughtful singapore mattress store really shines—it emphasises intelligent layout optimisation, relaxing colour schemes, versatile bedroom pieces, and clever lighting to create a peaceful retreat that optimises relaxation while ensuring clutter-free airflow. All at once your sleep space evolves into the place you can’t wait to reach at the after a long day, helping you unwind faster, sleep deeper, and wake up feeling more refreshed for the day ahead. Platforms like Wondrous La Vie provide tons of genuine homeowner transformations and easy connections to designers who specialise in these practical yet beautiful Singapore-style bedroom makeovers.. This way, you can address them before they become major headaches. Like that, confirm can keep your display cabinet looking its best!

Avoid Overloading the Shelves: Weight Matters!

This is a big one, especially if you're like me and tend to hoard things. Overloading the shelves of your display cabinet puts a lot of stress on the entire structure. The weight can cause the shelves to sag, which in turn can throw the doors out of alignment. Think of it as a domino effect – one thing leads to another. So, be mindful of what you're putting on those shelves.

Consider the weight capacity of your display cabinet. A good rule of thumb is to distribute the weight evenly across all the shelves. Avoid placing heavy items on the top shelves, as this can make the cabinet top-heavy and more prone to tipping. If you have particularly heavy items, consider placing them on the bottom shelf, where the weight is better supported. And if you're displaying books, try to alternate between stacks of different sizes to distribute the weight more evenly. This is especially important if you have a glass display cabinet, as the glass shelves can be more susceptible to cracking under excessive weight.

Sometimes, we get so caught up in displaying everything we own that we forget about the structural integrity of the furniture itself. So, take a step back and assess whether you’re overloading your display cabinet. If you are, consider decluttering or finding alternative storage solutions for some of your items. Your display cabinet (and your peace of mind) will thank you for it!

Periodic Hardware Checks: Tighten Those Screws!

Loose screws are a common culprit when it comes to misaligned display cabinet doors. Over time, the vibrations from opening and closing the doors can cause the screws in the hinges and door frames to loosen. This can lead to the doors sagging, sticking, or even falling off completely. Nobody wants that, right? So, it's important to regularly check and tighten those screws.

Grab a screwdriver (preferably one that fits the screws snugly) and go around and tighten all the screws you can find on the hinges, door frames, and any other hardware on your display cabinet. Be careful not to overtighten them, as this can strip the threads and make the problem even worse. If a screw is stripped, you can try replacing it with a slightly longer or thicker screw. You can also use a toothpick or some wood glue to fill the stripped hole before re-inserting the screw. This will give it a better grip.

I usually do a hardware check every few months, or whenever I notice that the doors are starting to feel a little loose. It’s a quick and easy task that can save you a lot of trouble in the long run. Think of it as a mini-maintenance session for your display cabinet. And while you're at it, check the door handles and knobs too. Make sure they're securely attached and not wobbly. A little bit of tightening can make a big difference in the overall look and feel of your display cabinet. Plus, you'll feel like a proper handyman (or handywoman!).

Climate Considerations: Singapore's Humidity

Living in Singapore, we all know about the humidity. It's a constant battle against mold, mildew, and warping. And your display cabinet isn't immune to its effects. High humidity can cause wood to swell and warp, which can throw the doors out of alignment. So, it's important to take steps to protect your display cabinet from the effects of humidity.

One way to combat humidity is to use a dehumidifier in your home. This will help to lower the overall humidity level and prevent your furniture from warping. You can also use moisture-absorbing products, such as silica gel packets or charcoal bags, inside your display cabinet to absorb excess moisture. These are especially useful if you're storing items that are sensitive to humidity, such as books or photographs. Make sure to replace these regularly, as they can become saturated over time.

Another tip is to avoid placing your display cabinet in direct sunlight or near sources of heat, such as radiators or air conditioning vents. These can cause the wood to dry out and crack. Instead, place it in a well-ventilated area away from direct sunlight and heat. And if you notice any signs of mold or mildew, clean it immediately with a mild bleach solution. Prevention is always better than cure, especially when it comes to humidity. So, take those extra steps to protect your display cabinet, and it will last you for many years to come. Steady, pom pi pi!

Check our other pages :

Frequently Asked Questions


Misalignment can occur due to settling of the cabinet, loose hinges, or uneven flooring.
Youll typically need a screwdriver (usually Phillips or flathead), a level, and possibly shims.
Locate the adjustment screws on the hinges. Tighten or loosen them slightly to move the door up, down, left, or right until aligned.
Use shims under the cabinets base to level it. This can correct door alignment issues caused by an uneven floor.
Adjust the hinges closest to the gap. Experiment with tightening or loosening the screws until the gap is minimized or eliminated.
If youve tried adjustments and the door remains significantly misaligned or damaged, a professional furniture repair service is recommended.