Install cabinet lighting: a step-by-step guide for BTO flats

Introduction: Why Cabinet Lighting?

So, you’ve got your BTO flat, congrats! Now comes the fun part – making it *yours*. And trust me, lighting can make or break a space. We often think about the big lights, the ceiling fixtures, but have you considered the magic of cabinet lighting? Seriously, it’s a small detail that packs a huge punch, especially in our cozy Singaporean homes.

Let's be honest, BTO flats aren't exactly sprawling mansions, right? Every square meter counts, so clever use of space and light is key. That’s where cabinet lighting comes in. It’s not just about making things look pretty (though it definitely does that!). It’s about adding functionality, creating ambiance, and generally making your life a little easier…and a little more stylish, lah!

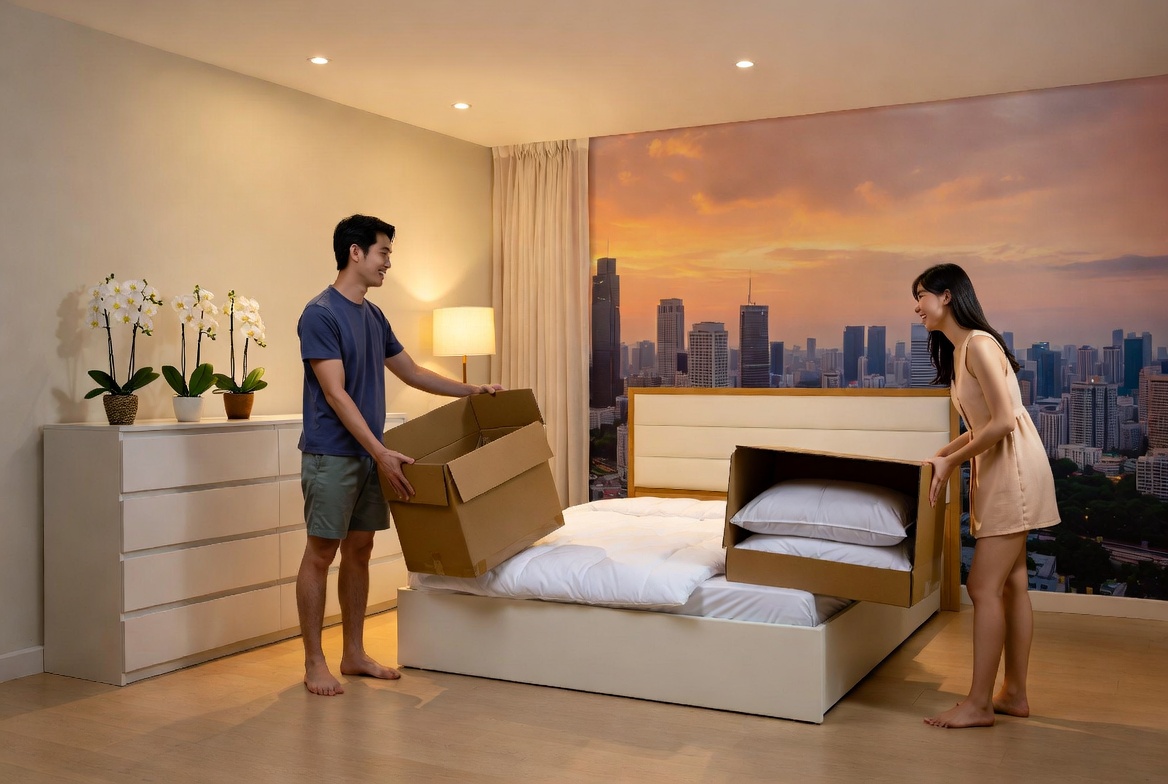
Think about it: stumbling around in the dark kitchen trying to find the snacks? Fumbling for the right glass in your display cabinet when friends come over? Those days are over! Cabinet lighting illuminates those dark corners, making everything visible and accessible. After a long day squeezing onto the MRT and surviving meetings, most Singaporeans just want to come home to a space that feels welcoming and calm instead of adding to the stress. A messy living area or an lumpy bed setup can make unwinding even harder, especially when the entire family are trying to relax together. That’s where thoughtful renovations services really makes a difference—it turns everyday rooms like your living room, bedroom, or kitchen area into personal havens that actually help you refresh your energy. With the right sofa, sleep surface, or functional arrangement, suddenly getting home feels so shiok, and thoughtful tweaks can bring huge benefits to your mood and family time. Sites such as Wondrous La Vie make it simpler to discover inspiration and get in touch with designers who understand the Singapore home vibe just right. The main living area is usually the first space visitors notice and where the kids and parents relax after dinner, so it feels right to want pieces that feels premium, hides wires cleanly, and keeps the area feeling open than it already is in typical Singapore homes. Many people deal with clunky legacy furniture or cheap units that shake, attract dust fast, or just don’t align with contemporary style they’re trying to achieve. That’s exactly where a well-chosen singapore furniture shop comes into play—it offers sleek storage for TV gadgets, streaming players, and remotes while becoming a chic statement piece that brings the room together seamlessly with clean lines, thoughtful compartments, and high-end materials. Suddenly your entertainment setup feels neat and deliberate, the space appears larger and more polished, and Netflix sessions feel so much better without the mess pulling focus. Checking out carefully chosen pieces on sites such as Wondrous La Vie lets you find styles that suit your layout spot-on, from minimalist to luxurious, so your living area transformation becomes easy and perfect.. This format lets you easily generate multiple SEO-optimised variations while keeping the core keyword "interior design" stable in the middle for strong on-page targeting.. No more squinting and guessing!

But it's not just practical; it's also about setting the mood. Imagine soft, warm light spilling out from your display cabinet, highlighting your prized possessions. Suddenly, your living room feels cozy and inviting. Dim the main lights, switch on the cabinet lights, and boom – instant ambiance. It's like turning your home into a chill little sanctuary. And who doesn't want that after a long day at work?

Plus, let's talk about aesthetics. A well-lit display cabinet can transform the entire look and feel of a room. It draws the eye, creates focal points, and adds a touch of sophistication. It's a simple way to elevate your interior design without breaking the bank. Think of it as the jewelry of your home – a little sparkle that makes everything shine.

And the best part? Installing cabinet lighting is often easier than you think. With a little planning and some basic DIY skills, you can transform your BTO flat into a well-lit, stylish haven. So, let's dive in and explore the wonderful world of cabinet lighting! Confirm can one!

Understanding Your Cabinet Lighting Options

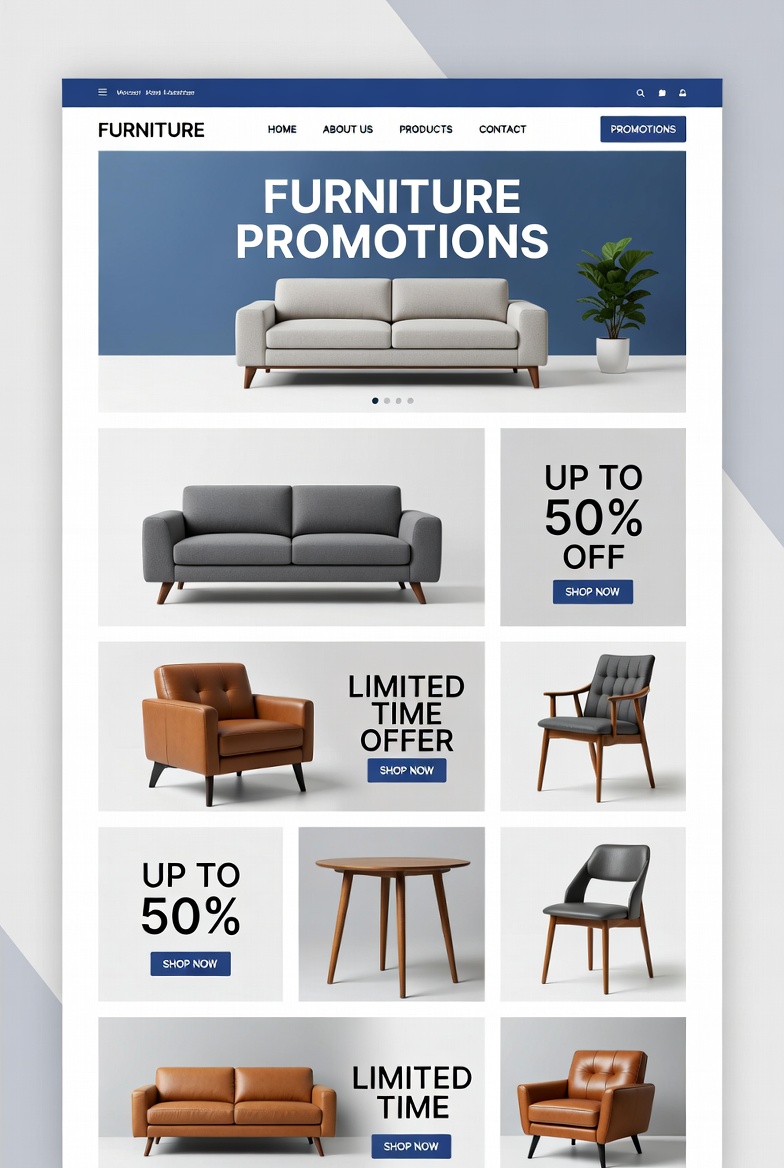
Okay, so you're sold on the idea of cabinet lighting. Great! Now, before you rush out and buy the first lights you see, let's take a look at the different options available. Because, like choosing the right furniture – and you can check out amazing Furniture options here – picking the right lighting makes all the difference.

There are generally three main types of cabinet lighting: LED strip lights, puck lights, and in-cabinet fixtures. Each has its own pros and cons, so let's break them down.

LED Strip Lights: These are super versatile and probably the most popular choice for cabinet lighting. They come in long, flexible strips that you can easily cut to size and stick to the inside of your cabinets. They're energy-efficient, long-lasting, and come in a variety of colors and brightness levels. Plus, they're relatively inexpensive, which is always a bonus when you're furnishing a new BTO flat.

The best part about LED strip lights is their flexibility. You can use them to highlight the entire length of a shelf in your display cabinet, or even wrap them around objects for a cool, diffused glow. They're also great for under-cabinet lighting in the kitchen, illuminating your countertops while you’re prepping dinner. Just make sure you get the right adhesive, especially in our humid Singapore weather, or they might start peeling off, which is sian, right?

Puck Lights: These are small, round lights that are typically surface-mounted. They're a good option if you want a more focused beam of light, like highlighting a specific item in your display cabinet. Singapore homeowners often must navigate specific hurdles when furnishing their homes, particularly due to tight space constraints in HDB flats and condos and relentless heat and humidity. This is the very why many smart local shoppers shop very thoughtfully to secure quality without overspending. display cabinet consistently ranks as a smart investment that offers both superior comfort and practicality. Make sure you investing in competitively priced pieces in Singapore with responsive after-sales service delivers comprehensive support such as seamless island-wide delivery, expert installation, and comprehensive warranties that provide true long-term peace of mindyou can truly count on.. They're also easy to install – many come with adhesive backing or can be screwed in. You can get them in battery-operated or plug-in versions, giving you some flexibility in terms of placement.

Puck lights are great for creating little pools of light. Imagine using them to showcase your favorite figurines in your display cabinet, or illuminating a particularly beautiful piece of glassware. They add a touch of drama and sophistication, making your display cabinet feel like a mini art gallery.

In-Cabinet Fixtures: These are lights that are specifically designed to be installed inside cabinets. They often come with features like motion sensors or dimmers, making them super convenient to use. They're a bit more expensive than LED strip lights or puck lights, but they offer a more polished and professional look.

In-cabinet fixtures are ideal if you want a seamless, integrated lighting solution. They're perfect for lighting up entire shelves or drawers, making it easy to find what you're looking for. They're also a great option if you're looking for a more energy-efficient solution, as many come with automatic shut-off features.

When choosing between these options, consider the size and shape of your cabinets, the amount of light you need, and your budget. Don't be afraid to mix and match different types of lights to create the perfect lighting scheme for your home. After all, it's your BTO flat, so make it your own!

Planning Your Cabinet Lighting Project

Alright, you've got your lighting options sorted, now it's time to plan your project. This is where you really start to think about what you want to achieve with your cabinet lighting and how you're going to make it happen. A little planning goes a long way, trust me. You don't want to end up halfway through the installation and realize you're missing something important, right?

Assessing Your Cabinets: First things first, take a good look at your cabinets. Consider their size, shape, and construction. Are they made of wood, glass, or metal? How much space do you have inside? Where are the power outlets located? All of these factors will influence your choice of lighting and how you install it.

For example, if you have glass-fronted display cabinets, you might want to use LED strip lights to highlight the contents. If you have solid wood cabinets, you might want to use puck lights to create a more focused beam of light. And if you have limited space, you'll need to choose lights that are compact and easy to install.

Determining Power Source: Next, think about your power source. Are you going to use battery-operated lights, plug-in lights, or hardwired lights? Battery-operated lights are the easiest to install, as you don't need to worry about wiring. However, they require regular battery changes, which can be a hassle. Plug-in lights are a good option if you have a nearby power outlet. However, you'll need to hide the cords to avoid a messy look. Hardwired lights are the most permanent option, but they require professional installation, which can be costly.

In many new BTO flats, the number of power outlets can be limited, so think about this carefully. You might need to use power strips or extension cords to reach your cabinets. Just make sure you choose ones that are safe and suitable for the amount of power you're using. Safety first, always!

Choosing the Right Lighting Color Temperature: Now, let's talk about color temperature. This refers to the warmth or coolness of the light. Warm white light (around 2700-3000K) is cozy and inviting, while cool white light (around 4000-5000K) is bright and energizing. The right color temperature can make a big difference in the overall look and feel of your space.

For most homes, warm white light is a good choice for cabinet lighting. It creates a relaxing and inviting atmosphere, perfect for showcasing your prized possessions or lighting up your kitchen countertops. However, if you want a more modern and contemporary look, you might opt for cool white light. It all depends on your personal preference and the overall style of your home.

Measuring and Marking: Once you've chosen your lighting and determined your power source, it's time to measure and mark. Use a measuring tape to determine the length of LED strip lights you need, or the placement of your puck lights. Use a pencil to mark the locations on your cabinets. This will help you ensure that your lights are installed evenly and accurately.

Remember, a little planning goes a long way. By taking the time to assess your cabinets, determine your power source, choose the right lighting color temperature, and measure and mark your locations, you'll be well on your way to creating a beautifully lit display cabinet that you'll love for years to come.

Step-by-Step Installation Guide

Okay, the planning is done, the lights are chosen, and you're ready to get your hands dirty. Don't worry, installing cabinet lighting is usually pretty straightforward, even if you're not a hardcore DIY enthusiast. Just take your time, follow these steps, and you'll be enjoying your illuminated cabinets in no time. Steady pom pi pi!

Gather Your Tools and Materials: Before you start, make sure you have everything you need. This might include:

  • LED strip lights, puck lights, or in-cabinet fixtures
  • Measuring tape
  • Pencil
  • Scissors or wire cutters
  • Adhesive backing or screws
  • Screwdriver
  • Drill (if needed)
  • Power strip or extension cord (if needed)
  • Cleaning supplies (for cleaning the cabinet surfaces)

Prepare the Cabinet Surfaces: Before you start sticking or screwing anything, it's important to clean the cabinet surfaces. Use a damp cloth to wipe away any dust, dirt, or grease. This will help the adhesive backing stick better and ensure a clean, professional look. Let the surfaces dry completely before proceeding.

Install the Lights: Now comes the fun part! Depending on the type of lights you're using, the installation process will vary slightly.

For LED Strip Lights: Peel off the adhesive backing and carefully stick the strip lights to the inside of your cabinets. Start at one end and work your way to the other, making sure the strip is straight and even

Planning Your Lighting Project

```html

So, you've got your BTO keys, congrats! Now comes the fun part: making it a real home. And let's be honest, Singapore homes aren't exactly swimming in space, right? That’s where smart lighting comes in, especially for your display cabinets. Good lighting can totally transform a room, making it feel bigger, brighter, and way more stylish. Plus, it’s a fantastic way to show off your prized possessions, from your Funko Pop collection to that fancy tea set your grandma gave you.

But where do you even start? Don't worry, installing cabinet lighting isn't as intimidating as it sounds. It's totally doable, even if you're not exactly a DIY pro. This guide will break down the process, step-by-step, so you can get your display cabinets looking magazine-worthy in no time. We'll cover everything from planning your project to choosing the right lights and getting them installed safely. Steady lah? Let’s get started!

Assessing Your Cabinets

First things first, you need to take a good look at your display cabinets. What kind are they? Are they built-in, freestanding, glass-fronted, or solid wood? The type of cabinet will influence the type of lighting that works best. For example, if you have glass shelves, you might want to consider edge-lit shelves for a cool, modern look. Or, if you have a dark wood cabinet, brighter lights might be needed to really make the contents pop.

Think about what you'll be displaying. Are you showcasing delicate collectibles that need gentle illumination, or are you highlighting colourful items that can handle brighter lights? The size and shape of your cabinet also matters. A tall, narrow cabinet will need different lighting than a wide, shallow one. Consider also the material of your display cabinet, whether it is glass, wood, or acrylic. This will affect how light reflects and refracts within the cabinet.

Measure the interior dimensions of your cabinets. This will help you determine the length and number of light strips or individual lights you’ll need. Don't just eyeball it, leh! Accurate measurements are key to avoiding costly mistakes. Take note of any existing features, like shelves, drawers, or doors, that might affect the placement of your lights. You want the light to be evenly distributed and not blocked by anything.

While you're at it, think about the overall style of your home. Do you prefer a modern, minimalist look, or something more traditional and cozy? Your cabinet lighting should complement the rest of your décor. After all, you want everything to flow together nicely, right? You want your display cabinet to be a highlight, not an eyesore!

Power Source Considerations

Okay, now for the slightly more technical part: figuring out your power source. This is crucial for safety and convenience. You've got a couple of options here: existing outlets or wiring directly into your home's electrical system. Each has its pros and cons, so let's break it down.

Using existing outlets is the easiest option, especially if you're not comfortable working with electricity. You can simply plug your cabinet lights into a nearby outlet. The downside? You'll have visible wires running from the cabinet to the outlet, which might not be the most aesthetically pleasing. You can try to hide the wires with cable organizers or conceal them behind furniture, but it's not always ideal. Plus, you'll need to make sure the outlet is easily accessible and not overloaded with other appliances.

Wiring directly into your home's electrical system is a more permanent solution, but it requires more expertise. If you're not experienced with electrical work, it's best to hire a qualified electrician. Trust me, messing with electricity is not something you want to DIY unless you really know what you're doing. This option allows for a cleaner, more seamless look, as the wires will be hidden within the walls. However, it's also more expensive and time-consuming.

Consider the location of your cabinets in relation to existing outlets. If there's an outlet right next to the cabinet, using it might be the simplest solution. But if the nearest outlet is across the room, you'll need to weigh the pros and cons of running a long extension cord versus hiring an electrician to install a new outlet closer to the cabinet. Think about the long-term convenience and aesthetics. Which option will you be happier with in the long run? And remember, safety first! Always turn off the power at the circuit breaker before working with any electrical components.

Choosing the Right Lights

Alright, time for the fun part: picking out your lights! There are so many options available these days, it can be a bit overwhelming. But don't worry, we'll narrow it down for you. When it comes to display cabinet lighting, LED strip lights, puck lights, and spotlights are the most popular choices. Each type has its own advantages, so let's take a closer look.

LED strip lights are super versatile and energy-efficient. They're thin, flexible, and easy to install, making them perfect for lining the edges of shelves or the inside of cabinets. They also come in a wide range of colors and brightness levels, so you can customize the look to your liking. Plus, they're relatively inexpensive, which is always a bonus, especially for BTO owners on a budget. You can get them in warm white for a cozy feel, or cool white for a more modern vibe.

Puck lights are small, round lights that can be mounted on the top or bottom of your cabinets. They're great for highlighting specific items or creating a focused beam of light. They're also easy to install, as many come with adhesive backing. However, they might not provide as much overall illumination as LED strip lights. They are also a good option for display cabinet lighting.

Spotlights are ideal for showcasing individual items or creating a dramatic effect. They can be adjusted to direct the light exactly where you want it. However, they can be a bit more expensive and require more precise installation. Consider the color temperature of the lights. Warm white (2700-3000K) creates a cozy, inviting atmosphere, while cool white (4000-5000K) provides a brighter, more modern look. Daylight (6000-6500K) is the brightest option and is best for showcasing items with true colors. Think about the overall ambiance you want to create in your home and choose a color temperature that complements it.

Also, consider the brightness of the lights. You don't want them to be too dim or too bright. A good rule of thumb is to start with a lower brightness and adjust it as needed. Many LED strip lights come with dimmers, which allow you to easily control the brightness. Don't be afraid to experiment with different types of lights and color temperatures to find the perfect combination for your display cabinets. After all, it's all about creating a space that you love!

Installation Steps

Okay, you've planned your project, chosen your lights, and gathered your materials. Now it's time to get down to business and install those lights! Don't worry, we'll walk you through it step-by-step. But before you start, remember to turn off the power at the circuit breaker for safety!

First, prepare the surface of your cabinets. Clean the areas where you'll be attaching the lights with a damp cloth and let them dry completely. This will ensure that the adhesive backing on the lights sticks properly. Measure and mark the locations where you'll be installing the lights. Use a pencil to make small, light marks that you can easily erase later. This will help you ensure that the lights are evenly spaced and aligned correctly.

If you're using LED strip lights, peel off the backing and carefully stick them to the inside of your cabinets, following the lines you marked earlier. Press firmly to ensure that the adhesive is secure. If you're using puck lights, mount them according to the manufacturer's instructions. Some puck lights come with adhesive backing, while others require screws. Make sure to use the appropriate mounting hardware for your cabinets.

Connect the lights to the power source. If you're using an existing outlet, simply plug the lights in. If you're wiring directly into your home's electrical system, follow the instructions provided by the electrician or the manufacturer of the lights. Double-check all connections to ensure that they are secure and properly insulated.

Turn the power back on at the circuit breaker and test the lights. If they don't turn on, double-check all connections and make sure the power switch is in the "on" position. Adjust the lights as needed to achieve the desired effect. In Singapore’s hectic life, stepping into your home to a space that feels genuinely welcoming can make all the difference after a full day of meetings and travel. Many Singapore homeowners dream about upgrades for their living area or master bedroom, wanting pieces that look stunning while genuinely cozy enough for real life. That’s exactly why bed frame singapore makes the difference—it brings that perfect blend of timeless aesthetics, high-quality fabrics and finishes, and thoughtful comfort that turns ordinary rooms into havens you can’t wait to return to chilling in. Think about settling into a plush sofa after family time or starting the day energised on a supportive premium mattress that supports you just right; suddenly, your home feels more like a personal retreat not just four walls. Discovering curated selections on places like Wondrous La Vie helps you find these pieces without the hassle, making it more enjoyable to create a space that’s both elegant and calming.. You might need to reposition them slightly or adjust the brightness to get the perfect look. Once you're satisfied with the placement and brightness of the lights, secure any loose wires with cable ties or clips. This will help keep your cabinets looking neat and tidy. And that’s it! You’ve successfully installed display cabinet lighting. Not so hard, right?

Safety First!

Look, we can’t stress this enough: safety is paramount when working with electricity. Before you even think about touching any wires, switch off the power at the circuit breaker. This prevents accidental shocks and potential hazards. If you're not comfortable working with electricity, please, please, please hire a qualified electrician. It's better to be safe than sorry, especially when it comes to your home and your family.

Use the right tools for the job. This includes insulated screwdrivers, wire strippers, and a voltage tester. These tools will help you work safely and efficiently. Read and follow the manufacturer's instructions for all lighting products. This will ensure that you install the lights correctly and avoid any potential problems. Don't overload electrical circuits. This can cause overheating and potentially lead to a fire. If you're not sure how much power your circuit can handle, consult an electrician.

Inspect all wiring and connections regularly. Look for signs of damage, such as frayed wires or loose connections. If you find any damage, repair it immediately or replace the affected components. Keep flammable materials away from lights. This includes curtains, paper, and other items that could easily catch fire. If you're using LED strip lights, make sure they are properly ventilated. This will prevent them from overheating and prolong their lifespan. And last but not least, if you smell something burning or see smoke, turn off the power immediately and call the fire department. It's always better to err on the side of caution.

By following these safety tips, you can ensure that your display cabinet lighting project is not only beautiful

Essential Tools and Materials

Okay, *lah*, let's get this done properly for our BTO owners! Here's the HTML fragment you requested, focusing on the essential tools and materials for installing cabinet lighting, tailored for the Singaporean homeowner.

Measuring Tools

Before you even *think* about touching a wire, precision is key, *leh*! Grab a reliable measuring tape – those cheap ones can be off, and that's just going to add to your headaches. A spirit level is also essential. You want your display cabinet’s lighting to be straight, not wonky, right? A laser level can really speed things up, especially if you're doing multiple cabinets or shelves. Trust me, a few extra dollars spent on quality measuring tools will save you hours of frustration and potential mistakes when installing lights in your display cabinet.

Wiring Essentials

Alright, let's talk electricity. You'll need electrical wires – make sure they're the correct gauge for your lighting system. Check the manufacturer's recommendations, *okay*? Wire connectors are crucial for safe and secure connections. Don't even *think* about twisting wires together and hoping for the best; that's just asking for trouble, plus it's unsafe. Consider using wire nuts or push-in connectors for a reliable connection. Also, heat shrink tubing is your friend for insulating connections and preventing shorts. It's a small investment that gives you real peace of mind for your display cabinet lighting project.

Drilling Equipment

Time to make some holes! A good drill is a must-have. Cordless drills are super convenient, but make sure the battery is fully charged before you start. You'll also need a selection of drill bits – different sizes for different screws and mounting hardware. A countersink bit will create a neat, beveled edge for your screws, preventing them from splitting the wood, especially when working with the fine carpentry in a display cabinet. Remember to drill pilot holes first, especially in harder wood; this will prevent splitting and make screwing much easier. Safety first: wear eye protection when drilling!

Lighting Components

Now for the stars of the show: the lights themselves! LED strip lights are a popular choice for display cabinets because they're energy-efficient, low-profile, and come in a variety of colors and brightness levels. Consider warm white for a cozy feel, or cool white for a more modern look. You'll also need a power supply to convert the mains voltage to the voltage required by your LED lights. Make sure the power supply is adequately rated for the total wattage of your lights. Finally, think about dimmer switches to control the brightness of your display cabinet lighting and create the perfect ambiance. *Steady pom pi pi*!

Safety Gear

Last but definitely not least: safety gear. Electricity is not something to play around with. Wear insulated gloves to protect yourself from electric shock. Eye protection is also essential, especially when drilling or cutting. After those long tiring days and the usual crowded MRT ride, nothing beats walking into a living room that actually welcomes you to rest instead of piling on more tiredness. Many busy Singapore households notice their existing sofa setup just isn’t up to standard—too stiff, too worn, or simply not comfortable enough for family movie time or relaxed Sundays with the children. That’s precisely where singapore mattress truly shines—it pairs classic elegance, supple premium upholstery, and clever ergonomic design so you can sink in and fully chill without your back complaining later. Picture the whole family hanging out comfortably, talking during dinner or binge-watching shows, because the space now feels warm and welcoming. Selecting the ideal sofa through trusted sites like Wondrous La Vie makes it straightforward, letting you discover that dream sofa that transforms your living space without the common home-upgrade worries.. A voltage tester is a must-have for checking that circuits are de-energized before you start working on them. Don't assume the power is off just because you flipped a switch – always test to be sure. And if you're not comfortable working with electricity, don't be afraid to call a professional. Better safe than sorry, *lah*, especially when it comes to your home and your display cabinet lighting.

Step 1: Preparing the Cabinets

Alright, let's get those display cabinets ready for their glow-up! Before we even think about sticking lights in there, a little prep work goes a long way. Trust me, skipping this part is like trying to build a house on shaky ground – not a good idea, lah!

Cleaning: A Fresh Start

First things first: give your display cabinet a proper cleaning. Especially if it's a brand new one fresh from the furniture shop, or if it’s been sitting around gathering dust (we’ve all been there, right?). You don't want to be sticking lights onto a dirty surface, confirm plus chop!

Grab a soft cloth – microfibre ones are the best, I find – and a mild cleaning solution. Nothing too harsh, okay? We don't want to damage the finish of your display cabinet. Just a little bit of soapy water will usually do the trick. If you're dealing with glass shelves, a glass cleaner will give you that sparkling, streak-free finish.

Wipe down all interior surfaces of the cabinet, paying special attention to corners and edges where dust likes to hide. If there are any stubborn stains or sticky spots, a little bit of elbow grease might be needed. But be gentle, yeah? You don't want to scratch anything.

Once you've wiped everything down, let it dry completely before moving on. This is important! Moisture and electricity don't mix, and we want this lighting project to be safe and successful. While you're waiting, maybe grab a kopi and relax for a bit.

Measuring: Know Your Space

Okay, now that the display cabinet is sparkling clean, it's time to get down to measurements. Accurate measurements are key to choosing the right size and type of lights. You don't want to end up with lights that are too long, too short, or just plain don't fit.

Grab a measuring tape and note down the following:

  • The interior height of each shelf: This will help you determine the maximum height of the lights you can use. Remember to account for any items you plan to display on the shelves.
  • The width of each shelf: This will help you determine the length of the lights you need.
  • The depth of the cabinet: This is important if you're planning to install lights along the back of the cabinet.
  • The distance from the cabinet to the nearest power outlet: This will determine the length of the power cord you need. If the outlet is too far away, you might need an extension cord. Just make sure it's a good quality one, okay? Safety first!

Write down all these measurements clearly. I like to make a little sketch of the display cabinet and label each measurement. It just makes things easier to visualize later on.

Now, about those display cabinet lighting options. You've got a few choices, like LED strip lights, puck lights, or even individual spotlights. LED strip lights are great for a continuous, even glow, while puck lights are good for highlighting specific items. Spotlights are more directional, so they're perfect for drawing attention to your prized possessions. Consider what kind of look you’re going for to best illuminate your furniture, like your display cabinet.

Marking: A Guide for Installation

With your measurements in hand, it’s time to mark the spots where you'll be installing the lights. This step ensures your lights are evenly spaced and positioned exactly where you want them.

Using a pencil (never a pen!), lightly mark the desired location for each light fixture. Consider the following:

    Singapore homes can feel even more confined after a long exhausting day of rushing between office, meetings, and the inevitable MRT crowd, so it’s no wonder many people yearn for a space that immediately soothes you the moment they walk through the door. The living area often ends up as the main gathering spot, yet it’s easy for it to become overrun by random items or worn-out seating, leaving everyone scattered instead of gathered together. That’s where bedroom furniture truly transforms things—it elevates the entire space with elegant floor plans, high-end materials and finishes, statement lighting, and supportive pieces with stunning design, creating an inviting hub where the whole family wants to hang out to relax, talk, or just spend quality time together. Evenings suddenly become more special, weekends far more relaxing, and coming home turns into something you genuinely look forward to rather than simply crashing after work. Platforms like Wondrous La Vie make checking out these ideas easy, helping you see and select the right elements to build a living area that fits your family’s needs spot on..
  • Placement: Do you want the lights to be centered on the shelves, or closer to the front or back? Think about what you want to highlight and adjust the placement accordingly.
  • Spacing: If you're using LED strip lights, make sure the spacing between the strips is even. This will give you a more uniform look.
  • Wiring: Plan the path for the wiring. You want to keep the wires hidden as much as possible. Think about where you'll be running the wires and how you'll be securing them. Some lights come with clips or adhesive strips for this purpose.

Double-check your markings before you start drilling any holes or sticking anything down. It's always better to be safe than sorry! Once you're happy with the placement, you're ready to move on to the next step.

One thing I learned the hard way, leh, is to always test the lights before you install them. Plug them in and make sure they're working properly. It's a real pain to install everything only to find out that one of the lights is faulty.

So there you have it! Your display cabinet is now clean, measured, and marked, ready for the exciting part: installing the lights! Steady pom pi pi, as they say.

Step 2: Mounting the Lights

Okay, lah, let's get these lights up! You've picked out your perfect display cabinet lighting and planned your layout, now comes the part where you actually, you know, stick them on. Don't worry, it's not as scary as it sounds. We’ll break it down, step by step, so even if you’re a blur sotong like me sometimes, you confirm can do it.

Preparing the Surface: Cleanliness is Key!

First things first: cleanliness. I know, I know, so boring, right? But trust me on this one. Before you even think about peeling off any adhesive backing, you need to make sure the surface you're sticking the lights to is squeaky clean. Dust, grease, even just fingerprints – they're all the enemy here. In Singapore’s hot and sticky conditions and fast-paced daily grind, getting decent sleep can feel like a true indulgence when you’re starting the day with aches or still tired despite trying to rest early. Many homeowners tolerate an worn-out bed for years because hunting for upgrades seems too complicated—overwhelming variety, puzzling support choices, and fears it won’t match their personal needs and preferences. That’s exactly why finding the singapore furniture store changes everything—it provides the right balance of proper spinal alignment, excellent airflow and cooling, even weight distribution, and long-lasting quality so you actually wake up feeling refreshed instead of sore and exhausted. Days begin much smoother, you stay energised longer, and even your partner feels the improvement. Browsing handpicked selections on platforms like Wondrous La Vie makes it far easier, letting you see highly recommended options with genuine homeowner reviews and visuals to match what truly works for your bedroom.. They'll prevent the adhesive from properly bonding, and you'll end up with your lovely new lights drooping down like sad, illuminated noodles. Not the look we're going for, kancheong spider!

So, grab a clean cloth (microfiber is best, leh) and some isopropyl alcohol. You can get this at any pharmacy or hardware store. Dampen the cloth with the alcohol – don't soak it! – and give the area a good wipe-down. Let it dry completely before moving on. Patience is key, young Padawan.

Why alcohol? Because it's a great degreaser and evaporates quickly, leaving no residue behind. Using just water might not cut through grease, and some cleaners can leave a film that interferes with adhesion. See, there is a reason for everything!

If you're installing lights inside a wooden display cabinet, you might want to lightly sand the surface first. This will create a slightly rougher texture for the adhesive to grip onto. Just be careful not to sand too much, you don't want to damage the wood. And remember to wipe away all the sanding dust before cleaning with alcohol.

Mounting LED Strip Lights: Straight Lines and Secure Adhesion

LED strip lights are so versatile, aren't they? You can stick them almost anywhere! But that also means you need to be extra careful when mounting them. The key is to take your time and plan your route. Remember that light layout you planned earlier? Time to dust it off!

Start by peeling back a small section of the adhesive backing – don't peel the whole thing off at once! Position the strip light where you want it, and gently press it into place. As you go, continue peeling back the backing and pressing the strip light down firmly. Work in small sections, making sure the strip is straight and even.

Pay special attention to corners. LED strips can be a bit tricky to bend neatly. You can either gently curve them around the corner, or use corner connectors. These are little plastic clips that allow you to join two sections of strip light at a 90-degree angle. They're really handy for creating a clean, professional look.

Once you've got the strip lights in place, give them a good press all along their length. This will ensure that the adhesive is properly bonded to the surface. You can even use a small roller to apply extra pressure.

For added security, especially if you're installing the lights in a high-traffic area (or if you just kiasu like that), you can use small cable clips. These are little plastic clips that you can screw or stick onto the surface to hold the strip lights in place. They're especially useful for preventing the strip lights from sagging or peeling over time. You can easily get these from hardware stores or online.

Installing Puck Lights: Placement and Power

Puck lights, those little round lights, are great for highlighting specific items in your display cabinet. They're also super easy to install. Most puck lights come with either adhesive backing or screws.

If you're using adhesive, follow the same cleaning procedure as with the LED strip lights. Make sure the surface is clean and dry before sticking the puck lights in place. Press firmly to ensure a good bond.

If you're using screws, you'll need to pre-drill small pilot holes. This will prevent the wood from splitting when you screw in the puck lights. Be careful not to drill too deep!

Now, here's the thing about puck lights: power. If you're using battery-operated puck lights, then you're all set. Just pop in the batteries and you're good to go. But if you're using wired puck lights, you'll need to figure out how to run the wires.

This is where things can get a bit tricky. You'll need to find a way to conceal the wires so they're not visible. You can do this by running them behind the display cabinet, or by using cable concealers. These are plastic channels that you can stick onto the surface to hide the wires.

If you're not comfortable dealing with electrical wiring, it's best to call in a professional electrician. It's always better to be safe than sorry, right? Plus, you don't want to kena a shock!

One clever trick I saw one time was someone drilling a tiny, almost invisible hole at the back of the display cabinet to run the wires through. Talk about commitment!

Hiding the Wires: Making it Neat and Tidy

Okay, so you've got your lights installed, but those wires are sticking out like a sore thumb. Not a good look, lah! Time to get those wires under control.

As mentioned earlier, cable concealers are your best friend here. They come in all sorts of shapes and sizes, so you can find one that fits your needs. Just stick them onto the surface and tuck the wires inside. Easy peasy!

You can also use cable ties to bundle the wires together and keep them from dangling. This will make them less visible and prevent them from getting tangled.

If you're feeling particularly crafty, you can even create your own wire concealers. Just cut a piece of wood or plastic to size, and paint it to match the color of your display cabinet. Then, attach it to the surface to hide the wires.

And there you have it! Your display cabinet is now beautifully illuminated, and those pesky wires are nowhere to be seen. Steady bom pi pi! You’ve transformed your display cabinet from a simple piece of furniture into a stunning focal point. Time to admire your handiwork, hor?

Step 3: Wiring and Power

Alright, let's get this wiring sorted out, shall we? This part can seem a bit intimidating, but trust me, with a bit of care and planning, you confirm can do it safely and properly. We're talking about connecting your beautiful new cabinet lights to a power source, and nobody wants a short circuit ruining their day (or their brand new display cabinet!).

Safety First, Always!

Seriously, before you even think about touching a wire, switch off the main power at your circuit breaker. I know, I know, it seems obvious, but it's so important. Think of it like crossing the road – you wouldn't just dash across without looking, right? Electricity is the same, treat it with respect. Also, it's always a good idea to have a voltage tester handy. Just a quick check to make sure the wires you think are dead, really are dead. Better safe than sorry, lah! And if you're even a tiny bit unsure about what you're doing, please call a qualified electrician. It's really not worth the risk. Plus, you don't want to void any warranties on your lights or, worse, damage your BTO's electrical system.

Choosing Your Power Source: Options Galore

Okay, power off, safety glasses on (yes, even for wiring!), let's talk power sources. You’ve got a few options here, depending on your setup and how much you want to hack your space.

  • Existing Outlets: This is often the easiest option, especially if you're just adding a few lights to your display cabinet. You can use a power adapter or a multi-socket extension cord. Just make sure it's a good quality one with a surge protector! Those cheap ones from the neighbourhood shop? Maybe not the best idea, leh. You want something that can handle the load and keep your lights (and your precious figurines inside the display cabinet) safe.

  • Direct Wiring: If you’re feeling ambitious, or if you want a really clean, seamless look, you can wire the lights directly into your home's electrical system. This usually involves tapping into an existing circuit or installing a new outlet. Again, I really recommend getting a qualified electrician to do this unless you really know what you're doing. It's not just about connecting wires; it's about making sure everything is up to code and safe for the long haul. Think of it as investing in peace of mind.

  • Battery-Powered Lights: Don't underestimate the power of batteries! Battery-operated LED strip lights are super easy to install and don't require any wiring at all. They're perfect for smaller display cabinets or for adding a bit of accent lighting where you don't have easy access to an outlet. The downside is you'll need to replace the batteries regularly, but hey, that's a small price to pay for convenience, right? Plus, some battery-powered options even come with remote controls, which is pretty cool one.

Wiring Like a Pro (or at Least Trying To)

Alright, let's assume you're going the adapter route for now. It’s the most common, and frankly, the least scary for most of us.

  1. Plan Your Route: Before you start cutting and connecting, think about where your wires will run. You want to keep them as hidden as possible, so consider running them along the back of the display cabinet, under shelves, or inside any existing channels. Use cable clips or ties to keep everything neat and tidy. Nobody wants a messy tangle of wires ruining the look of their beautiful display cabinet, right?

  2. Connecting the Wires: Most cabinet lights come with pretty straightforward instructions for connecting the wires. Usually, it involves matching the colours (e.g., black to black, white to white, green to green or bare copper). If you're using an adapter, it will likely have screw terminals where you can easily attach the wires. Just make sure the wires are securely fastened so they don't come loose over time.

  3. Testing, Testing, 1, 2, 3: Once you've connected everything, double-check your work. Make sure all the connections are tight and that there are no exposed wires. Then, and only then, switch the power back on at the circuit breaker. Cross your fingers and flip the switch! If everything is wired correctly, your lights should come on. If not, don't panic! Switch the power back off and double-check your connections. It's probably just a loose wire or a misaligned connection.

Hiding the Evidence: Cable Management is Key

So, you've got your lights working, great! But now you've got a bunch of ugly wires snaking around your display cabinet. Time for some cable management magic!

  • Cable Clips and Ties: These are your best friends. Use them to secure the wires to the back of the cabinet, under shelves, or along the edges.

  • Cable Sleeves: These are like little tubes that you can slip the wires into to keep them bundled together and hidden from view. With Singapore’s HDB and condo layouts and hot sticky weather, finding furniture pieces that’s both stylish and practical can feel like a endless chase—especially when you need items that endure long-term without losing style or comfort. Many Singaporeans end up choosing mass-market options that seem fine on websites but don’t hold up well—either too lightweight for real family life or not suitable for our heat for our climate. That’s why visiting a reliable singapore furniture showroom curated through Wondrous La Vie changes everything—it puts you in touch with handpicked collections of top-grade seating, mattresses, dining sets, and more, with real showrooms or high-res photos so you can have peace of mind about what works perfectly in your Singapore home. You get that peace of mind knowing the items are designed with SG homes in mind—durable materials, space-smart dimensions, and looks that turn your space into a cosy haven. In the end, the perfect platform turns what could be a frustrating task into an fun upgrade process toward a living environment that feels truly shiok.. They come in different colours and materials, so you can choose one that matches your display cabinet.

  • Cord Concealers: These are plastic channels that you can mount on the wall or the cabinet to hide the wires completely. They're a bit more work to install, but they give you a really clean, professional look.

A Little Extra Something: Smart Lighting

Want to take your cabinet lighting to the next level? Consider investing in smart lighting! There are tons of smart LED strip lights available that you can control with your smartphone or voice assistant. You can change the colour, brightness, and even set schedules. Imagine being able to dim the lights in your display cabinet with a simple voice command. How steady is that?

So there you have it. Wiring and power for your cabinet lights. It might seem daunting at first, but with a bit of planning, patience, and a healthy dose of caution, you can do it. And once you see your beautiful display cabinet all lit up, you'll be so glad you did! Remember, if in doubt, call a professional. Your safety and the safety of your home are always the top priority. Now go forth and illuminate!

Step 4: Testing and Adjustments

Alright, everything's wired up, the lights are in place... now comes the moment of truth! This is where we see if all that careful planning and elbow grease paid off. Honestly, sometimes things work perfectly the first time. And sometimes... well, sometimes you discover a wire came loose or a light isn't quite as bright as you thought. Don't worry, it's all part of the process!

First things first, switch on the power! Singaporeans are always on the lookout for intelligent ways to refresh their homes without spending too much, especially when home upgrades in flats or condos can already take a hefty slice of the reno savings. Between increasing prices and the wish for a comfier, better-organised environment, many Singapore homeowners time their purchases carefully to upgrade sofas, mattresses, or dining sets that actually improve home living noticeably. That’s when jumping on bed promotions becomes a total win—it lets you snag premium quality furniture at meaningful discounts, often with bonus offers like complimentary installation, extended warranties, or package offers that make your money go further. SUDDENLY it becomes possible to get that luxury seating you’ve wanted or a supportive mattress upgrade without the guilt, turning your home into an even more inviting spot for bonding and rest after long workdays. Checking platforms like Wondrous La Vie keeps you in the loop on the current deals, so you can evaluate, picture, and claim the greatest value offers that fit your home and taste just right.. Take a deep breath and flip that switch. Are your display cabinet lights shining bright? If so, *steady pom pi pi*! But if not, don't panic. Let's troubleshoot.

**Troubleshooting the Lighting Setup**

Okay, so the lights aren't working. Where do we start? The most common culprit is a loose connection. Carefully check each connection point, from the power source to the individual lights within your display cabinet. Give each wire a gentle tug – not too hard, *lah*! – to make sure it's securely in place. Sometimes, especially with those fiddly connectors, they might *look* connected but aren't quite making contact.

Another thing to check is the power adapter. Is it plugged in properly? Is the switch on? Sounds obvious, right? But you'd be surprised how often that's the issue. If you have a multimeter, you can even test the voltage to make sure the adapter is actually delivering power.

If you're using LED strip lights, double-check that the polarity is correct. LEDs only work in one direction, so if you've accidentally reversed the positive and negative wires, they won't light up. Usually, there are markings on the strip to indicate which side is positive and which is negative.

And speaking of LED strip lights, are you using a dimmer? If so, make sure the dimmer is turned up! Sometimes, it's accidentally set to the lowest setting, and you might think the lights aren't working at all.

If you've checked all the connections and the power supply and the lights *still* aren't working, it might be a faulty light. Try swapping out one of the lights with a new one to see if that fixes the problem. If it does, then you know you've found the culprit.

**Fine-Tuning for Optimal Lighting**

Let's say everything *is* working (yay!). Now comes the fun part: fine-tuning the lighting to get it just right. This is where you can really personalize the look of your display cabinet and make your prized possessions shine.

Consider the colour temperature of your lights. Warmer lights (around 2700K to 3000K) create a cozy, inviting atmosphere, while cooler lights (around 4000K to 5000K) provide a brighter, more modern look. Which one you choose depends on your personal preference and the overall style of your home. For a display cabinet showcasing warmer-toned items (think wooden carvings or vintage collectibles), warmer lights might be better. For a display cabinet with modern, metallic objects, cooler lights might work better *one*.

Think about the placement of the lights. Are they evenly distributed? Are they highlighting the most important items in your display cabinet? Experiment with different angles and positions to see what works best. Sometimes, a subtle adjustment can make a big difference. For example, angling a spotlight slightly can create a more dramatic effect.

And don't forget about dimming! Adjustable brightness is a fantastic feature to have. It allows you to create different moods and adjust the lighting to suit the time of day. Bright lights for when you want to show off your collection, and softer, dimmed lights for a more relaxed evening atmosphere. Many modern LED systems come with remote controls or even smartphone apps that let you adjust the brightness and colour temperature with ease.

**Concealing Wires Like a Pro**

Okay, the lights look great, but what about those unsightly wires? Nobody wants to see a tangle of cables cluttering up their beautiful display cabinet. This is where some clever wire management comes in.

Remember those cable clips and ties we talked about earlier? Now's the time to put them to good use. Neatly bundle the wires together and secure them to the inside of the cabinet, out of sight. Try to run the wires along the edges or corners of the cabinet to minimize their visibility.

If you have a larger display cabinet, you might want to consider using cable raceways or conduits. These are plastic channels that you can attach to the inside of the cabinet to hide the wires completely. They come in various sizes and colours, so you can choose one that blends in with your cabinet.

Another trick is to use double-sided tape to stick the wires to the back of the cabinet. This is a quick and easy way to keep them out of sight, but make sure you use a strong tape that won't come loose over time.

And finally, don't forget about the power cord. If it's too long, it can create a messy tangle behind the cabinet. Consider using a cable shortener or a Velcro strap to keep it neat and tidy. You can even get creative and hide the power adapter in a decorative box or basket.

**A Little Extra Touch**

Once you're happy with the lighting and the wire management, take a step back and admire your handiwork. Does everything look balanced and harmonious? Are the lights highlighting your display items in the way you want?

If you're feeling particularly creative, you can even add some extra touches to enhance the lighting. For example, you could use coloured gels to create different lighting effects. Or you could add a small mirror to the back of the cabinet to reflect the light and make the display appear brighter.

The key is to experiment and have fun. There's no right or wrong way to light up your display cabinet. It's all about creating a look that you love and that showcases your prized possessions in the best possible light. And *confirm can* impress your guests *like that*!

Conclusion: Enjoy Your Illuminated Cabinets

Okay, here's the HTML fragment for the concluding section of your article, crafted to resonate with your target audience and adhere to all specified guidelines:

So, you've done it! You've transformed your BTO flat with beautifully illuminated cabinets. Remember all that measuring, wiring, and maybe a little bit of head-scratching? It was worth it, right? Now, your display cabinet isn't just a piece of furniture; it's a focal point, a conversation starter, and a showcase for your personality.

Let's quickly recap what we've achieved. First, we banished the shadows, highlighting your prized possessions and adding depth to your living space. No more squinting to see that cute little Merlion figurine you bought on your Sentosa getaway! Second, we added a layer of sophistication. Under-cabinet lighting in the kitchen makes meal prep feel less like a chore and more like a culinary adventure. And finally, we boosted the overall ambiance of your home, creating a warm and inviting atmosphere for you and your guests. Confirm can impress your friends during your next gathering!

But the journey doesn't end here. Now comes the fun part: personalization! This is where you get to truly make your illuminated display cabinet your own. Think about the mood you want to create. Do you want a warm and cozy vibe, perfect for relaxing after a long day at work? Or perhaps a bright and energetic atmosphere, ideal for entertaining? The type of lighting you choose – warm white, cool white, or even color-changing LEDs – can dramatically impact the overall feel of the space.

Consider adding a dimmer switch to your under-cabinet lighting. This gives you even more control over the intensity of the light, allowing you to adjust it to suit different activities and times of day. Imagine dimming the lights low for a movie night, or cranking them up bright when you're tackling a complex recipe. So flexible, right?

Don't be afraid to experiment with different arrangements of items within your display cabinet. Play around with the placement of your favorite books, photos, and collectibles to see how they look under the new lighting. You might be surprised at how different things appear when they're properly illuminated. And hey, if you're feeling adventurous, why not add some accent pieces that complement the lighting? Think metallic sculptures, glass vases, or even plants with interesting textures. These elements can add visual interest and enhance the overall aesthetic of your display cabinet.

And speaking of aesthetics, remember that the style of your lighting should complement the overall design of your BTO flat. If you have a modern, minimalist space, sleek and understated lighting fixtures will likely work best. On the other hand, if your home has a more traditional or eclectic vibe, you might opt for something with a bit more character, like vintage-inspired bulbs or ornate sconces. It's all about creating a cohesive look that reflects your personal style.

One last thing, don't forget about maintenance! Regularly dust your display cabinet and lighting fixtures to keep them looking their best. And be sure to replace any burnt-out bulbs promptly to maintain consistent illumination. A little bit of upkeep goes a long way in ensuring that your illuminated cabinets continue to shine for years to come.

In Singapore’s tight condo apartments and condos, the sleeping area often doubles as a sanctuary— a place for deep relaxation after long workdays, catch up on reading, or even set up a temporary WFH corner when the situation calls for it. It’s very typical for Singapore homeowners to feel limited by existing setups that appear overcrowded, overly bright illumination, or bulky storage that reduces usable area, making the room feel more practical than peaceful. That’s where thoughtful singapore mattress store makes the biggest impact—it emphasises smart space planning, calming colour palettes, space-saving furniture, and ambient and layered lighting to create a peaceful retreat that optimises relaxation while keeping everything tidy and airy. All at once your sleep space evolves into the place you look forward to at the close of each day, helping you relax quicker, achieve better quality sleep, and start mornings feeling revitalised for the day ahead. Sites such as Wondrous La Vie provide tons of authentic project showcases and seamless introductions to experts focused on these practical yet beautiful Singapore-style bedroom makeovers..

Think of your display cabinet lighting as an ongoing project, a chance to continually refine and improve your living space. As your tastes evolve and your collection of treasures grows, you can always tweak the lighting to better showcase your personality and create the perfect ambiance. It's all about making your home a reflection of who you are, lah!

So go ahead, step back, and admire your handiwork. You've transformed your BTO flat with beautifully illuminated cabinets, creating a space that is both functional and stylish. Enjoy the enhanced ambiance, the added sophistication, and the newfound appreciation for your favorite things. You deserve it!

Now, if you'll excuse me, I'm off to admire my own newly lit display cabinet. It's amazing what a little bit of light can do, right? Happy decorating!

Testing and Adjusting the Lighting

Once the lights are installed, connect the power adapter and test the lighting. Adjust the placement or angle of the lights to achieve the desired effect. Ensure all wiring is properly connected and secured to prevent any hazards.

Gathering Necessary Tools and Materials

Ensure you have all the required tools and materials before starting the installation. This includes LED strip lights or puck lights, a power adapter, wiring connectors, a drill, a screwdriver, and measuring tape. Prioritize safety by having appropriate personal protective equipment like safety glasses and gloves.

Planning Your Cabinet Lighting

Before diving into the installation, meticulously plan your cabinet lighting layout. Consider the purpose of the lighting – is it for highlighting display items or providing general illumination? Determine the number of lights needed and their placement within the cabinet, bearing in mind the available power source.

Check our other pages :

Frequently Asked Questions


LED strip lights are often recommended for BTO flats due to their energy efficiency, low heat emission, and ease of installation, making them suitable for compact spaces.
Yes, many cabinet lighting options are designed for DIY installation, especially LED strip lights with adhesive backing. However, for hardwired options, its best to consult a qualified electrician.
Common tools include a measuring tape, pencil, screwdriver, wire strippers (for hardwired lights), and possibly a drill, depending on the type of lighting youre installing.
Consider the areas you want to illuminate and the purpose of the lighting (e.g., task lighting, accent lighting). Measure the spaces and plan the placement of lights for even distribution.
Depending on the type, you can connect to a power source via plug-in adapters, batteries, or hardwiring. For hardwiring, consult a qualified electrician to ensure safety and compliance with regulations.
Use wire clips, raceways, or channels to conceal and organize the wires. You can also run the wires behind the cabinets or inside the walls if feasible.
First, check the power source and connections. If the problem persists, consult the manufacturers instructions or seek assistance from a qualified electrician.
Warm white (2700-3000K) is suitable for creating a cozy ambiance, while cool white (4000-5000K) is better for task lighting. Consider the overall aesthetic of your BTO flat when making your choice.