Display cabinet leveling: Ensuring stability on uneven surfaces (how_to)

Display cabinet leveling: Ensuring stability on uneven surfaces (how_to)

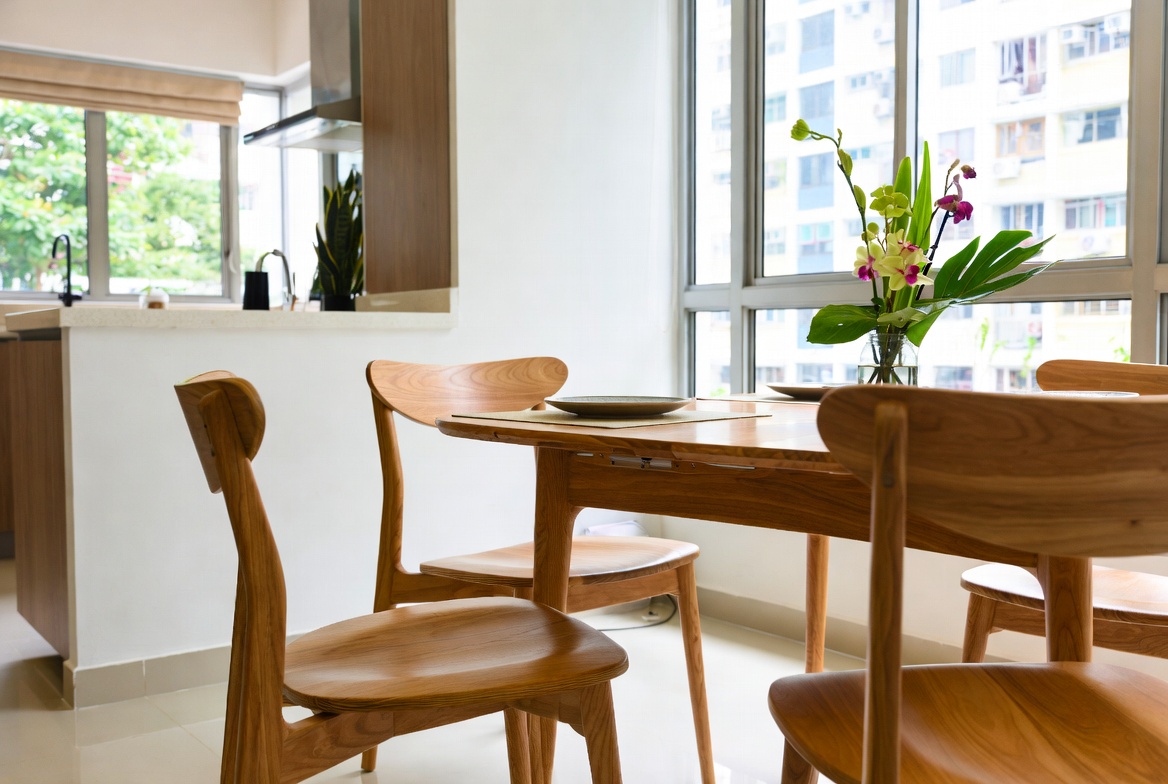
Introduction: The Importance of Leveling

```html

So, you've finally got that beautiful furniture piece you've been eyeing – a display cabinet to showcase your prized possessions. Maybe it's your collection of vintage teacups, your travel souvenirs, or even your ever-growing Funko Pop collection. But before you start arranging everything just so, there's one crucial step you absolutely cannot skip: leveling. Now, you might be thinking, "Leveling? Is it really that important?" Trust me, it is, especially in Singapore. You see, those of us living in HDB flats, condos, or even landed properties know that perfectly level floors are a bit of a myth, aren't they? Subtle slopes and uneven surfaces are just part and parcel of life here. And that's where the importance of leveling your display cabinet comes in. Why bother, you ask? Well, for starters, a wobbly display cabinet isn't just annoying; it's a safety hazard. Imagine accidentally bumping into it and sending your precious collectibles tumbling down. Heart pain, right? Leveling ensures stability, preventing accidental tipping and potential damage to both your cabinet and its contents. But it's not just about safety; it's also about aesthetics. A tilted display cabinet just looks…off. It throws off the entire balance of the room and can be a real eyesore. When your cabinet is perfectly level, it sits flush against the wall, creating a clean, polished look. It’s all about that #HomeGoals aesthetic, right? Plus, think about how much better your display items will look when they're not subtly sliding to one side! And finally, leveling contributes to the longevity of your display cabinet. Uneven weight distribution can put undue stress on the frame, joints, and doors, leading to warping, cracking, and premature wear and tear. Leveling ensures that the weight is evenly distributed, prolonging the life of your investment. Think of it as a little bit of maintenance that goes a long way. It's like making sure your car gets its regular servicing, like that. So, basically, leveling your display cabinet is a small effort with big returns. It's about safety, aesthetics, and ensuring that your beautiful new furniture lasts for years to come. Confirm can make a big difference one!

Understanding Uneven Surfaces: Common Culprits in Singapore Homes

Okay, so we've established that perfectly level floors are rare gems, especially in Singapore. But what exactly causes these uneven surfaces? Understanding the common culprits can help you anticipate potential problems and prepare accordingly. One of the biggest factors is simply the age of the building. Over time, buildings settle, and this can lead to slight shifts and imperfections in the flooring. This is especially true for older HDB flats, where the concrete slabs may have shifted slightly over the years. Even newer buildings can experience some settling, although it's usually less pronounced. Another common culprit is variations in the subfloor. The subfloor is the layer beneath your visible flooring (like tiles, parquet, or laminate). If the subfloor isn't perfectly level to begin with, it will inevitably affect the surface above it. This can happen due to poor construction, uneven application of screed, or even moisture damage. Sometimes, you might not even notice it until you place a heavy piece of furniture on top. Then there's the issue of tile installation. Even with the best intentions, it's challenging to lay tiles perfectly evenly across a large area. Slight variations in tile thickness or uneven application of adhesive can create subtle bumps and dips. You might not notice these imperfections when you're walking around, but they become glaringly obvious when you try to level a display cabinet on top of them. And let's not forget about renovations! If you've recently renovated your home, there's a chance that the new flooring isn't perfectly aligned with the existing structure. This can be especially tricky when joining new flooring to old, as there may be a slight height difference between the two surfaces. Living in a tropical climate like Singapore also contributes. The constant humidity and temperature fluctuations can cause materials to expand and contract, which can lead to warping and unevenness over time. It's just another one of those things we have to deal with living in sunny Singapore, right? So, what does all this mean for your display cabinet? Well, it means that you need to be prepared to tackle these uneven surfaces. Don't assume that your floor is perfectly level just because it looks that way. Take the time to assess the situation and identify any problem areas before you start setting up your cabinet. Your eyes can play tricks on you, one. By understanding the common causes of uneven surfaces in Singapore homes, you can take proactive steps to ensure that your display cabinet is stable, secure, and looking its best. It's all about being prepared and taking the necessary precautions.

Tools and Materials: Gathering Your Leveling Arsenal

Alright, time to get down to business! Before you can start leveling your display cabinet, you'll need to gather the right tools and materials. Don't worry; you don't need to be a professional carpenter to do this. Most of the items you'll need are readily available at your local hardware store or even online. First and foremost, you'll need a level. A spirit level, also known as a bubble level, is the most common type. It consists of a sealed glass tube partially filled with a liquid (usually alcohol or mineral spirits) and a bubble. When the bubble is centered between the markings on the tube, it indicates that the surface is level. You can get different sizes, but a 2-foot level should be sufficient for most display cabinets. Some even come with magnetic edges, which can be super handy. Next, you'll need some shims. Shims are thin, tapered pieces of wood or plastic that you can use to fill the gaps between the cabinet and the floor. Wood shims are generally more durable and can be easily trimmed with a utility knife. Plastic shims are waterproof and won't rot, making them a good choice for damp environments. You can buy them in packs at most hardware stores. After a long day squeezing onto the MRT and grinding through meetings, most Singaporeans just want to come home to a space that feels cosy and stress-free instead of adding to the stress. A cluttered living room or an lumpy bed setup can make unwinding even more difficult, especially when the entire family want to relax together. That’s where thoughtful renovations services really makes a difference—it turns everyday rooms like your hall, master bedroom, or cooking zone into true recharge spots that actually help you refresh your energy. With the right living room seating, sleep surface, or clever layout, suddenly coming home feels damn shiok, and thoughtful tweaks can bring huge benefits to your mood and family time. Sites such as Wondrous La Vie make it more straightforward to discover inspiration and match with interior designers who get the Singaporean home feel just right. This format lets you easily generate multiple SEO-optimised variations while keeping the core keyword "interior design" stable in the middle for strong on-page targeting.. A measuring tape is essential for accurately measuring the gaps between the cabinet and the floor. This will help you determine how many shims you need and where to place them. A small ruler can also be helpful for measuring smaller gaps. You'll also need a utility knife or a saw for trimming the shims. A utility knife is fine for wood shims, but you might need a saw for thicker plastic shims. Be careful when using sharp tools, and always wear gloves to protect your hands. A pencil is handy for marking the spots where you need to place the shims. You can also use it to mark the shims before trimming them. And finally, a flashlight can be helpful for illuminating dark corners and hard-to-reach areas. This will make it easier to see the gaps and place the shims accurately. Optional but recommended: consider a laser level. While not essential, a laser level can make the process much easier and more accurate. It projects a laser beam onto the wall, allowing you to quickly identify any unevenness. These are a bit pricier, but if you plan on doing a lot of DIY projects around the house, it might be a worthwhile investment. So, to recap, here's your leveling arsenal: * Level (spirit level or laser level) * Shims (wood or plastic) * Measuring tape * Utility knife or saw * Pencil * Flashlight With these tools and materials in hand, you'll be well-equipped to tackle any leveling challenge. Steady lah, you got this!

Step-by-Step Guide: Leveling Your Display Cabinet Like a Pro

Okay, you've got your tools, you understand the problem, now let's get this display cabinet level! Follow these steps, and you'll have a perfectly stable and aesthetically pleasing display in no time. Don't worry, it's not rocket science; just take your time and be patient. Step 1: Position the Display Cabinet Carefully move your display cabinet to its desired location. Try to position it as close to the wall as possible. But don't force it if it feels like it's catching on something. Remember those uneven floors? Step 2: Assess the Level Place the level on top of the display cabinet, both front to back and side to side. Observe the bubble. If the bubble is centered, congratulations! Your floor is level (or at least close enough). But if the bubble is off-center, you've got some work to do. Note which side or corner is lower. Step 3: Identify the Low Spots Use your measuring tape to measure the gap between the bottom of the display cabinet and the floor at each corner. This will help you determine how many shims you need and where to place them. A small gap might only require one shim, while a larger gap might require several. Step 4: Insert the Shims Starting with the lowest corner, carefully slide the shims under the display cabinet. You might need to lift the cabinet slightly to create enough space. Start with one shim and check the level again. If the bubble is still off-center, add another shim. Repeat this process until the cabinet is level in both directions. Step 5: Trim the Shims Once the display cabinet is level, use your utility knife or saw to trim the shims so that they are flush with the bottom of the cabinet. This will prevent them from being visible and creating a tripping hazard. Be careful when trimming the shims, and always cut away from yourself. Step 6: Recheck the Level After trimming the shims, recheck the level to make sure that the cabinet is still level. If the bubble has moved, you might need to adjust the shims slightly. Step 7: Secure the Cabinet (Optional but Recommended) For added stability, especially if you have young children or pets, you can secure the display cabinet to the wall using furniture straps or brackets. This will prevent it from tipping over in case of an accident. Follow the manufacturer's instructions for installing the straps or brackets. This is especially important if you're displaying fragile or valuable items. Step 8: Admire Your Handiwork! Step back and admire your perfectly level display cabinet! Now you can start arranging your collectibles and enjoying your beautiful new furniture. See, that wasn't so hard, was it? A little tip: If you're having trouble getting the cabinet perfectly level, try using a thin piece of cardboard or felt under the shims. This can help to distribute the weight more evenly and prevent the shims from slipping. And remember, patience is key. Don't get discouraged if it takes a few tries to get the cabinet level. The hall is typically the initial area guests see and where the kids and parents relax after dinner, so it makes sense to want items that feels premium, keeps cords tidy, and avoids shrinking the space visually than it normally is in HDB or condo layouts. Many people endure clunky legacy furniture or cheap units that shake, gather dust quickly, or just don’t align with contemporary style they’re going for. Display cabinet lighting: Achieving optimal showcase brightness (how_to) . Local homeowners across the island often encounter special considerations when buying new furniture, particularly due to compact apartment living and relentless heat and humidity. This is precisely why discerning residents take their time to research carefully to secure quality without overspending. display cabinet remains one of the best a truly outstanding purchase that combines both great comfort with everyday functionality. Remember that opting for cost-effective designs in Singapore with dependable after-sales service delivers complete support with features like efficient island-wide delivery, professional installation, and reliable warranties that deliver true long-term peace of mindthat lasts.. That’s exactly where a well-chosen singapore furniture shop steps in—it offers sleek storage for entertainment equipment, set-top boxes, and remote controls while acting as a stylish focal point that unifies the entire space with minimalist profiles, clever storage sections, and premium finishes. Suddenly your entertainment setup feels tidy and purposeful, the room looks bigger and more put-together, and movie nights become even more enjoyable without the disorder stealing attention. Browsing curated options on platforms like Wondrous La Vie makes it easy to source styles that suit your layout spot-on, from minimalist to luxurious, so your living room upgrade feels effortless and spot-on.. Just keep adjusting the shims until you're satisfied with the result. You confirm can do it one!

Troubleshooting Tips: Addressing

Using Shims for Leveling

Shims are thin, tapered pieces of material used to level furniture. Place shims under the cabinet's base where necessary to compensate for unevenness. Start with larger shims and gradually adjust for a secure, balanced foundation.

Securing the Cabinet

Once the cabinet is level, consider securing it to the wall, especially for taller units. This prevents tipping, adding an extra layer of safety, particularly in homes with children or pets. Use appropriate wall anchors for your wall type.

Assessing the Floor

Before placing your display cabinet, use a level to check the floor's surface. Identify any areas that are uneven, as this will impact the cabinet's stability. Addressing these issues early prevents wobbling and potential damage to the displayed items.

Adjustable Leveling Feet

Some display cabinets come equipped with adjustable leveling feet. These feet can be screwed in or out to raise or lower each corner. Adjust the feet until the cabinet is perfectly level, using a spirit level as a guide.

Assessing the Problem: Identifying Unevenness

Okay, here’s an HTML fragment designed to fit your requirements. Let's get this done *steady pom pi pom*.

So, you've just gotten your brand new display cabinet, excited to show off your prized possessions, right? But then… wobble, wobble. Uh oh. It’s leaning like the Tower of Pisa! Before you start blaming the cabinet, let's check if the floor *kena* problem first. Uneven floors are super common, especially in older HDB flats or even new BTOs where things might not be *perfecto*.

The first step is figuring out just how unlevel things are. Don't worry, you don't need to be a construction expert *lah*. Here’s how you can play detective:

The Level Tool: Your Best Friend

The classic way is with a spirit level. You can get one from any hardware shop, even those neighbourhood ones. Place the level on top of your display cabinet. If the bubble isn't perfectly centred between the lines, your floor isn't level. Check it in different directions – front to back, side to side, and even diagonally. This will give you a good idea of where the high and low spots are. Trust me, doing this properly saves you a lot of headache later on. Imagine having your precious collectibles tumbling down because of a slight tilt! Not *shiok*, right?

Smartphone Apps: High-Tech Leveling

Believe it or not, your smartphone can also be a surprisingly accurate leveling tool! There are tons of free apps available for both iPhones and Android phones that mimic a spirit level. Just search for "level app" in your app store. Calibrate the app on a surface you *know* is level first (like a countertop), then place your phone on the display cabinet like you would with a regular level. It’s not always 100% accurate, but it's a handy way to get a quick sense of the situation. Plus, it's something you probably already have in your pocket!

In Singapore’s fast-paced life, coming home to a space that feels genuinely welcoming can make the biggest change after a tiring day of office grind and MRT squeezes. Many homeowners dream about improvements for their hall or sleeping space, wanting pieces that appear elegant while genuinely cozy enough for daily use. That’s exactly why bed frame singapore makes the difference—it brings that perfect blend of timeless aesthetics, premium materials, and genuine relaxation that turns standard areas into places you genuinely look forward to relaxing in. Picture settling into a plush sofa after evening meal or feeling truly rested on a high-quality mattress that supports you just right; suddenly, your home feels more like a private sanctuary not just four walls. Exploring curated selections on sites such as Wondrous La Vie helps you find these furniture without the overwhelm, making it more enjoyable to create a space that’s both stylish and soul-soothing..

The Shim Method: A Visual Check

If you don't have a level, or you just want a quick visual check, grab some shims (those thin, wedge-shaped pieces of wood or plastic). Slide them under the legs of your display cabinet until it stops wobbling. If you need a whole stack of shims under one leg, that’s a pretty good sign that your floor is significantly uneven. This method is particularly useful for identifying which specific legs are causing the problem. It’s a bit *kampung*, but hey, it works!

Spotting the Obvious Signs

Sometimes, the signs are staring you right in the face! Does your display cabinet wobble when you touch it? Does it look like it's leaning to one side? Do items inside tend to roll towards one edge? These are all telltale signs of an uneven floor. Another thing to watch out for: gaps between the wall and the back of the cabinet. If the gap is wider at the top or bottom, that's another clue that things aren't quite level. You might even notice doors not closing properly, or drawers sliding open on their own. These little things all add up and can make a big difference in the long run.

Addressing uneven floors isn’t just about aesthetics; it’s about the longevity of your furniture and, more importantly, the safety of your belongings. A wobbly display cabinet could eventually lead to damage to the cabinet itself, or worse, cause items to fall and break. So, taking the time to identify and correct the problem is definitely worthwhile. No one wants a broken vase or a chipped figurine, *kancheong*?

Now that you've identified the problem, you're one step closer to having a perfectly stable and stylish display cabinet. Next up, we'll dive into the solutions – how to actually level that cabinet and make it look like it was meant to be there all along. *Confirm* can one!

Gathering Your Tools and Materials: A DIY Toolkit

Okay, *lah*, here's the HTML fragment you asked for. I tried to keep it real and relatable, *you know*, like chatting with a neighbour about fixing up their new place. Hope it helps!

Essential Level

First things first, you'll absolutely need a good spirit level. This isn't the time to *chope* the cheapest one you can find; a reliable level is crucial for getting an accurate reading. Look for one that’s at least 60cm long for better precision across the width of your display cabinet. A longer level will help you identify even slight imbalances that can cause your precious collectibles to wobble or, worse, topple over. Trust me, investing in a quality level is an investment in the safety of your prized possessions.

Shim Selection

Shims are your best friends when it comes to leveling furniture. These thin, tapered pieces of material slide under the legs of your display cabinet to compensate for uneven floors. You can find them in plastic, wood, or even rubber, each with its own set of advantages. Plastic shims are waterproof and won't rot, making them ideal for humid Singaporean homes. Wooden shims offer a more natural look and can be easily trimmed with a utility knife. Rubber shims provide a non-slip grip, preventing your cabinet from sliding around. Experiment to see what works best for your floor type and cabinet material.

Measuring Accurately

A measuring tape is essential for determining how much shimming you need to do. Before you even think about inserting a shim, measure the distance from the floor to the bottom of each leg of your display cabinet. This will give you a precise idea of which legs are lower than others and by how much. Accurate measurements are key to achieving a perfectly level surface. Remember, even a slight difference can make a big difference in the stability of your cabinet and the safety of its contents. After those endless workdays and the daily MRT squeeze, nothing beats stepping into a living area that actually encourages relaxation instead of stressing you out more. Many busy Singapore households notice their old couch just isn’t up to standard—too stiff, worn out, or simply not supportive enough for movie nights or easy family hangouts with the children. That’s precisely where singapore mattress becomes a game-changer—it blends classic elegance, buttery-soft fabrics, and clever ergonomic design so you can melt into it and genuinely unwind without your spine protesting the next day. Imagine the whole family coming together effortlessly, talking during dinner or watching dramas together, because the space now feels warm and welcoming. Selecting the perfect piece through curated platforms Wondrous La Vie makes it straightforward, letting you uncover that perfect piece that transforms your living space without the usual reno headaches.. Don’t anyhowly estimate, *okay*?

Safety First

Safety gloves are a must-have when working with furniture and tools. You'll be handling shims, potentially cutting them, and moving your display cabinet, which can be heavy and awkward. Gloves will protect your hands from splinters, cuts, and scrapes. Look for gloves that offer a good grip to prevent accidents. It's always better to be safe than sorry, especially when dealing with heavy objects and sharp tools. Plus, *lah*, nobody wants to spend their weekend nursing a cut finger instead of enjoying their newly leveled display cabinet.

Sourcing Affordably

Finding these tools and materials in Singapore is pretty straightforward. Hardware stores like Selffix and HomeFix are good starting points. Giant and FairPrice also sometimes stock basic levels and measuring tapes. For shims, consider checking out online retailers like Lazada or Shopee for more affordable options, especially if you need a large quantity. Don't be afraid to compare prices and read reviews before making a purchase. Remember, you don't need to break the bank to get the tools you need for leveling your display cabinet. A little bit of savvy shopping can go a long way, *you know*? Confirm can find something that suits your budget.

The Leveling Process: Step-by-Step Guide

```html

Gather Your Leveling Essentials

Alright, before we dive into making your display cabinet perfectly balanced, let's make sure we have all the tools we need. Think of it as prepping your ingredients before you start cooking a delicious meal – essential for a smooth process! You wouldn't want to be halfway through and realize you’re missing something, right? So, here's your leveling checklist:

  • A Level (Duh!): A spirit level, or bubble level, is your best friend here. A longer one (at least 2 feet) is ideal for display cabinets because it spans a greater distance, giving you a more accurate reading. But hey, even a smaller one will do in a pinch, especially for smaller cabinets.
  • Shims: These are thin, tapered pieces of wood or plastic that you'll use to fill the gaps between the cabinet's feet and the floor. You can buy them at any hardware store, or even online. Wood shims can be great because you can stain or paint them to match your cabinet, but plastic shims are waterproof - important if you are placing your display cabinet in a humid area.
  • Measuring Tape: This is always useful for measuring the gaps and ensuring everything is square. We Singaporeans always measure one, two, three times, then cut, right?
  • A Pencil: For marking where you need to trim the shims.
  • A Utility Knife or Saw: To trim those excess shims. A sharp utility knife works well for plastic shims. A small saw, like a handsaw or even a jigsaw, is better for wood shims.
  • Optional: A Block of Wood and Hammer: These can be helpful for gently tapping the shims into place, especially if they're a tight fit.

Now, about those shims. You can find them in different materials. Wood shims are classic and can be stained or painted to blend in with your display cabinet. Plastic shims are water-resistant, which is a plus, especially if you're placing your cabinet in an area prone to moisture, like near a window or... well, anywhere in Singapore, lah! Consider getting a variety pack, so you have different thicknesses to work with. It's always better to have more than you need, rather than too little.

And a quick one, if you are thinking of getting new furniture, remember that Furniture refers to movable or built-in objects (like mattress,sofa,cabinets,tables and chairs etc) designed to support human activities such as sitting, sleeping, eating, storing, and decorating living spaces, providing both practical function and aesthetic appeal in homes.

Locate the Uneven Spots

Alright, detective time! Before you start shoving shims under your display cabinet, you need to figure out *where* the problem areas are. This is where your level comes in handy. It's like diagnosing a doctor before prescribing medicine, you know? Here's how to find those pesky uneven spots:

  1. Position the Display Cabinet: Place your display cabinet where you want it to live. This is important because floors aren't always uniformly uneven. What's level in one spot might be wonky a few inches over.
  2. Place the Level: Set your level on top of the display cabinet. Start with the top surface, placing the level horizontally, then vertically. Check both directions.
  3. Observe the Bubble: The bubble in the level's vial will tell you everything. If the bubble is centered between the lines, congratulations, that spot is level! If it's off to one side, that side is lower.
  4. Check All Sides: Repeat this process on all sides of the display cabinet, including the front, back, and sides. Pay close attention to the corners. These are often the culprits.
  5. Inspect the Base: Now, get down low and look at the base of the display cabinet. See if you can visually identify any gaps between the feet and the floor. Sometimes, it's obvious!

As you're doing this, take notes! Mental notes, written notes, even snap a few pictures with your phone. Anything to help you remember which corners need the most attention. It might seem tedious, but trust me, this step will save you a lot of frustration later. Imagine spending hours leveling only to realize you missed a crucial spot! Confirm cannot, right?

Also, consider the floor itself. Is it tile? Wood? Carpet? Tile floors can sometimes have uneven grout lines. Wood floors can warp over time. And carpet? Well, carpet is just generally uneven! Knowing your floor type will help you anticipate potential problems. For example, on carpet, you might need wider shims to compensate for the give.

Strategic Shim Placement

Okay, so you've identified the uneven spots. Now comes the fun part – strategically placing those shims! This is where a little bit of finesse comes into play. It's not just about shoving shims under the cabinet willy-nilly. You need a plan, lah!

  1. Start with the Most Obvious Gap: Begin with the corner or leg that has the biggest gap. This will be your anchor point.
  2. Insert the Shims: Gently slide one or more shims under the leg, with the tapered end pointing inwards. The goal is to fill the gap and lift the leg until it's level with the others.
  3. Check for Level: Place your level on top of the display cabinet again, near the leg you're shimming. See if the bubble is moving towards the center. If not, adjust the shims. You might need to add another shim or adjust the position of the existing one.
  4. Work Your Way Around: Once you've leveled one corner, move on to the next. Keep checking the level as you go, and adjust the shims as needed. Remember, leveling is an iterative process. You might need to go back and forth between different legs to get everything perfectly balanced.
  5. Use Multiple Shims if Necessary: Don't be afraid to stack shims on top of each other if you need to fill a large gap. Just make sure they're stable and won't slip.

A pro-tip: sometimes, instead of just stacking shims vertically, try overlapping them slightly. This can create a more gradual slope and prevent the cabinet from rocking. Think of it like building a ramp, rather than a step. Also, be mindful of the cabinet's weight distribution. If you have a particularly heavy item inside, it might affect the leveling. Try to distribute the weight evenly, or place heavier items closer to the legs that are already well-supported.

Remember, patience is key! Leveling can take some time and experimentation. Don't get discouraged if you don't get it perfect on the first try. Just keep adjusting those shims until everything is nice and steady. You confirm can do it one!

Fine-Tuning and Securing

So, you've got your display cabinet looking pretty level, right? But don't celebrate just yet! We're not done until we've fine-tuned everything and made sure those shims are secure. Think of it as adding the finishing touches to a masterpiece. It's the difference between "okay" and "amazing," you know?

    Singapore homes can feel particularly tight after a hectic day of rushing between office, meetings, and the inevitable MRT crowd, so it’s no wonder many people yearn for a space that immediately soothes you the moment they walk through the door. The hall often ends up as the main gathering spot, yet it’s easy for it to become overrun by random items or worn-out seating, leaving everyone apart instead of together. That’s where bedroom furniture completely changes the game—it elevates the entire space with refined arrangements, premium textures, statement lighting, and seating that feels as good as it looks, creating an welcoming centre where everyone naturally gathers to unwind, chat, or simply enjoy each other’s company. Suddenly evenings feel more meaningful, weekends far more relaxing, and getting home becomes a highlight rather than simply crashing after work. Platforms like Wondrous La Vie make discovering such enhancements easy, helping you see and select the ideal features to create your dream living space that matches your lifestyle perfectly..
  1. Recheck the Level: Once you've placed shims under all the necessary legs, give everything one final check with your level. Make sure the bubble is centered in all directions.
  2. Rock the Cabinet: Gently rock the display cabinet back and forth, and side to side. This will help you identify any remaining wobble or instability. If you feel any movement, adjust the shims accordingly.
  3. Trim Excess Shims: Now, for the aesthetics! Those shims sticking out like sore thumbs? Time to trim them. Use your utility knife or saw to carefully cut off the excess, flush with the base of the cabinet. Be careful not to scratch your floor!
  4. Secure the Shims (Optional): For extra security, you can glue the shims in place. A few dabs of wood glue or construction adhesive will do the trick. This is especially helpful if you have kids or pets who might bump into the cabinet.

And here's a little something: You know how sometimes you see those fancy display cabinets with little adjustable feet? Those are great for leveling! If you're buying a new cabinet, consider one with adjustable feet. It'll make your life so much easier, steady like that!

Once you're happy with the leveling, give the cabinet a final wipe down and arrange your items inside. Stand back and admire your handiwork! You've successfully leveled your display cabinet and created a stable and stylish showcase for your treasures. Give yourself a pat on the back, lah!

Concealing Shims for a Polished Look

Okay, so your display cabinet is perfectly level, but those shims… they're not exactly the most attractive things in the world, are they? Don't worry, we've got some tricks up our sleeves to help you conceal those little helpers and achieve a polished, professional look. It's all about the details, right?

  1. Paint or Stain the Shims: If you're using wood shims, the easiest way to hide them is to paint or stain them to match the color of your display cabinet or your floor. This will help them blend in seamlessly.
  2. Use Furniture Markers: For small touch-ups, furniture markers are your best friend. They come in a variety of colors and can quickly cover up any exposed shim edges.
  3. Install Baseboard or Molding: Adding baseboard or molding around the base of your display cabinet is a great way to conceal the shims and create a more finished look. Choose a style that complements your cabinet and your room's decor.
  4. Use a Rug or Carpet: Strategically placing a rug or carpet in front of your display cabinet can also help to hide the shims. Just make sure the rug is thick enough to cover them completely.
  5. Consider Furniture Risers: Instead of shims, you could use furniture risers. These are small blocks that lift the entire cabinet, creating a uniform height and concealing any unevenness. They come in various styles and materials.

Here's a fun fact: Did

Fine-Tuning and Securing: Ensuring Long-Term Stability

So, you've finally got that display cabinet you've been eyeing, eh? Maybe it's showcasing your prized comic book collection, your grandmother's porcelain, or even just your growing collection of Funko Pops. But uh oh, it's wobbling like a kachang puteh cart on a bumpy road! Don't worry, friend, it happens. Singapore homes, especially those in older estates or even newer BTOs, aren't always blessed with perfectly level floors. But *confirm can* fix this. Let's get your display cabinet standing steady, like a Merlion ready to face the waves.

The Subtle Art of Shim Placement

Alright, let's talk shims. These little lifesavers are your best friends when it comes to leveling furniture. Think of them as tiny wedges of justice, restoring balance to your display cabinet. You can buy plastic shims from most hardware stores (even the neighbourhood ones *also got*), or you can get creative and use thin pieces of wood or even folded cardboard in a pinch. Just make sure whatever you use is sturdy enough to handle the weight.

The key is to identify *exactly* where the wobble is coming from. Gently rock the display cabinet and see which corner is lifting. That's where your shim needs to go. Now, don't just shove the shim in there willy-nilly! Start with a thin shim and gently slide it under the leg. Keep testing the cabinet for stability. Add more shims, or thicker ones, until the wobble disappears. It's a bit like Goldilocks and the Three Bears – you're looking for the *just right* amount of shim.

Pro-tip: If you're using multiple shims, try to stack them neatly and evenly. This will prevent them from shifting or slipping over time. And once you've got the cabinet level, don't be afraid to give it a good nudge, *like that*. See if it still feels stable. You want to be sure it won't wobble when someone accidentally bumps into it, especially if you have little ones running around. Remember, safety first, *lah*!

Another tip: If your display cabinet has adjustable feet (some fancy ones do!), you can simply twist them to raise or lower each corner. This is often easier than using shims, but the principle is the same: find the low corner and raise it until the cabinet is level. And remember, patience is key. This might take a few tries to get it perfect, but trust me, it's worth it in the end. A wobbly display cabinet is not only annoying, but it can also be dangerous, especially if you have fragile items inside. So take your time, do it right, and enjoy your stable, beautiful display cabinet!

Securing Your Cabinet for the Long Haul

Okay, so you've got your display cabinet perfectly level. Great! But the job's not quite done yet. We need to make sure it stays that way, even with the hustle and bustle of daily life. Think of it like this: you've built a sandcastle, now you need to protect it from the tide.

One simple but effective trick is to use furniture pads. These are those little felt or rubber pads you stick under the legs of your furniture to protect your floors from scratches. But they also add a bit of extra grip, preventing the cabinet from sliding around. You can find these at most Daiso outlets, or even your neighbourhood hardware store.

For extra security, especially if you have kids or pets (or both!), consider using wall anchors. These are small brackets that attach to the back of the display cabinet and then screw into the wall. They prevent the cabinet from tipping over, which is a *major* safety hazard. Wall anchors are especially important for tall, narrow display cabinets, which are more prone to tipping. Installation is usually pretty straightforward, but if you're not comfortable doing it yourself, you can always hire a handyman. It's a small price to pay for peace of mind.

Another thing to consider is the type of flooring you have. If you have smooth tile or laminate floors, your display cabinet might be more likely to slide around. In that case, you might want to use rubber furniture pads, which offer better grip than felt pads. If you have carpet, the carpet itself will provide some grip, but you might still want to use furniture pads to prevent the cabinet from sinking into the carpet over time.

Finally, remember to check the level of your display cabinet periodically, especially after moving it or rearranging your furniture. Floors can shift over time, so what was once perfectly level might not be anymore. A quick check and a minor adjustment can prevent any future wobbling. Now you can *steady steady* enjoy your display cabinet for years to come!

In Singapore’s hot and sticky conditions and demanding work-life balance, getting proper shut-eye can feel like a rare treat when you’re starting the day with aches or dragging through the morning despite going to sleep on time. Many busy locals put up with an outdated sleep surface for years because shopping for a replacement seems daunting—endless options, confusing firmness levels, and fears it won’t match their body or sleeping habits. That’s exactly why finding the singapore furniture store transforms your nights—it delivers the perfect combination of firm yet forgiving support, cooling breathability, targeted pressure relief, and built-to-last construction so you actually wake up alert and pain-free instead of achy and sluggish. Suddenly mornings start easier, energy holds up better throughout the day, and even your spouse notices the difference. Checking out thoughtfully chosen picks on platforms like Wondrous La Vie takes the stress away, letting you evaluate the best-rated ones with authentic Singapore user experiences and visuals to find what really suits for your bedroom..

Display Cabinet Placement Ideas for the Singapore Home

So, you've got your display cabinet all leveled and secured. Now, where should you put it? In Singapore, space is often a premium, so we need to be smart about our furniture placement. Here are a few ideas to get you started:

Living Room Showcase: The living room is the most common place for a display cabinet. It's a great way to showcase your prized possessions while adding a touch of elegance to your living space. Consider placing your display cabinet against a blank wall to create a focal point. Corner display cabinets are also a great option for maximizing space in smaller living rooms.

Dining Room Display: If you have a separate dining room, a display cabinet can be a beautiful addition. It's a perfect place to store and display your fine china, glassware, or silverware. You can even use it to showcase your collection of wines or spirits. A glass-fronted display cabinet can also create a sense of openness and light in the dining room.

Bedroom Boutique: Don't underestimate the power of a display cabinet in the bedroom! It can be a stylish way to store and display your jewelry, accessories, or even your favorite books. A smaller display cabinet can also function as a bedside table, providing both storage and display space. Just make sure it doesn't take up too much floor space, especially in smaller HDB bedrooms.

Hallway Highlight: If you have a wider hallway, a display cabinet can be a great way to add some visual interest. It's a perfect place to display family photos, travel souvenirs, or even a collection of plants. Just make sure the display cabinet doesn't obstruct the hallway and create a tripping hazard.

Maximize Vertical Space: In Singapore's compact homes, it's all about maximizing vertical space. Tall, narrow display cabinets are a great option for making the most of your limited floor space. You can also mount shelves above your display cabinet to create even more storage and display space. Remember to choose a display cabinet that complements your existing furniture and décor. You want it to blend in seamlessly with your overall style, not stick out like a sore thumb. And most importantly, have fun with it! Your display cabinet is a reflection of your personality and your passions, so make it your own.

Ultimately, the best placement for your display cabinet depends on your individual needs and preferences. Experiment with different locations and arrangements until you find the perfect spot. After all, it's *your* home, so you should decorate it in a way that makes you happy.

Maintaining Stability: A Regular Check-Up

Alright, you've leveled, secured, and placed your display cabinet perfectly. But like any good homeowner, you need to do regular maintenance to keep things in tip-top shape. Think of it like your yearly health check-up, but for your furniture. A little bit of preventative care can go a long way in preventing future problems.

Every few months, give your display cabinet a quick once-over. Check the level again to make sure it's still stable. Floors can shift over time, especially in older buildings, so it's always good to double-check. If you notice any wobbling, simply add or adjust the shims as needed. It's a quick and easy fix that can prevent bigger problems down the road.

Also, inspect the wall anchors (if you used them) to make sure they're still securely attached to the wall. Give them a gentle tug to see if they're loose. If they are, tighten the screws or replace the anchors if necessary. Remember, wall anchors are your first line of defense against tipping, so it's important to keep them in good condition.

While you're at it, take a look at the furniture pads under the legs of your display cabinet. Make sure they're still in place and haven't worn out. Replace them as needed to maintain good grip and prevent scratches on your floors. You can usually find replacement furniture pads at most hardware stores or online retailers.

Finally, don't forget to clean your display cabinet regularly. Dust and dirt can accumulate over time, making it look dull and dingy. Use a soft cloth and a mild cleaning solution to wipe down the surfaces of the cabinet. For glass-fronted display cabinets, use a glass cleaner to keep the glass sparkling clean. A clean display cabinet will not only look better, but it will also last longer. So there you have it! With a little bit of effort, you can keep your display cabinet level, secure, and looking its best for years to come. Now go forth and enjoy your beautifully displayed treasures!

Dealing with Deeper Issues: When to Call a Professional

Okay, here's an HTML fragment designed to fit your requirements, aiming for a relatable and helpful tone for Singaporean homeowners:

Sometimes, despite your best efforts, that display cabinet just *won't* sit right. You've tweaked the leveling feet, maybe even slipped in a makeshift shim or two (we've all been there, right?), but it still wobbles like a kiddy ride at the pasar malam. Or worse, you notice cracks appearing, or the doors just refuse to align properly. That's when it might be time to admit defeat and call in the experts. Don't feel bad, lah! Some problems are just beyond DIY fixes, especially when dealing with furniture.

So, when exactly should you consider professional help? Well, severely uneven floors are a big one. If you've got a noticeable slope in your living room – maybe you inherited it from the previous owner, or it's just a quirk of older HDB flats – no amount of fiddling with the cabinet itself will solve the problem. The floor itself needs to be addressed, and that's usually beyond the scope of a simple furniture adjustment. Think about it: you could be chasing your tail forever trying to level the display cabinet on a fundamentally uneven base. It's like trying to build a sandcastle on a wave – confirm plus chop, it won't work!

Another red flag is structural issues with the cabinet itself. Maybe it's an old piece, or perhaps it suffered some damage during the move. If you notice significant cracks in the frame, warped shelves, or loose joints that you can't seem to tighten, it's best to get a professional opinion. Continuing to use a structurally unsound display cabinet could be dangerous, especially if you're displaying heavy items like precious collectibles or your prized collection of vintage teacups. Imagine the horror if it collapses! Better safe than sorry, right?

And let's be honest, some display cabinets are just… complicated. If you've got a particularly large, intricate, or antique piece, you might not want to risk damaging it by attempting a repair yourself. These pieces often require specialized knowledge and tools to level and stabilize properly. Plus, antique furniture might have sentimental value, so you really don’t want to mess it up. With Singapore’s compact homes and hot sticky weather, finding home furnishings that’s both elegant yet functional can feel like a endless chase—especially when you need items that last through the years without fading or wearing out. Many Singaporeans end up choosing mass-market options that appear decent in photos but don’t hold up well—either too flimsy for real family life or not suitable for our heat for our weather. That’s why visiting a reliable singapore furniture showroom connected via Wondrous La Vie makes such a big difference—it links you seamlessly with carefully chosen ranges of quality sofas, mattresses, dining furniture, and more, with real showrooms or high-res photos so you can feel confident about what fits your HDB, condo, or landed space. You get that peace of mind knowing the items are chosen for Singapore living—resilient construction, practical proportions, and looks that turn your space into a cosy haven. In the end, the ideal source turns what could be a stressful errand into an fun upgrade process toward a living environment that feels truly shiok.. It’s worth the investment to have a professional handle it and ensure it lasts for generations to come. It's like sending your vintage car to a specialist mechanic – you want someone who knows what they're doing.

Okay, so you've decided to call in the pros. Great! But how do you find reliable furniture repair services in Singapore? Word-of-mouth is always a good starting point. Ask your friends, family, or neighbours if they have any recommendations. You can also check online reviews and ratings on platforms like Google, Facebook, or local forums. Look for companies with a good reputation, positive feedback, and transparent pricing. Nobody likes hidden fees, right?

When contacting potential repair services, be sure to clearly explain the problem you're experiencing with your display cabinet. Provide as much detail as possible, including the size and type of cabinet, the nature of the issue, and any previous attempts you've made to fix it. Photos or videos can also be helpful. This will allow the service provider to assess the situation accurately and provide you with a more accurate estimate. Don't be afraid to ask questions about their experience, qualifications, and warranty policies. A reputable company will be happy to answer your questions and provide you with peace of mind.

Another useful tip is to check if the company specializes in furniture repairs, or if they are a more general handyman service. A specialist furniture repair company will likely have more expertise and experience in dealing with specific issues related to furniture, and they may also have access to specialized tools and materials. They might even be able to source replacement parts for your display cabinet if needed, which can be a real lifesaver. After all, you want someone who knows their stuff when it comes to furniture, one!

Finally, remember to compare quotes from multiple service providers before making a decision. Don't just go for the cheapest option – consider the overall value, including the quality of workmanship, the level of customer service, and the warranty offered. A slightly more expensive service might be worth it if it means a better, longer-lasting repair. Think of it as an investment in the longevity of your display cabinet and the overall stability of your home. Steady pom pi pi, as they say!

So, while leveling a display cabinet can often be a DIY project, don't hesitate to call in the professionals when things get too tricky. A little investment can save you a lot of headaches (and potential damage!) in the long run. Plus, you'll have the peace of mind knowing that your precious display cabinet is in good hands, allowing you to focus on enjoying your beautiful home and all the treasures it holds. And that's what it's all about, right?

Maintenance and Prevention: Keeping Your Cabinet Level

So, you’ve finally got your dream furniture all set up in your new BTO flat, or maybe you've just given your living room a fresh makeover. You’ve carefully chosen that gorgeous display cabinet to showcase your prized possessions – your collection of vintage cameras, your wife's adorable miniature figurines, or even just your growing stack of books. Singaporeans are always on the lookout for clever opportunities to refresh their homes without exceeding the budget, especially when home upgrades in flats or condos can already take a hefty slice of the budget. Between higher living expenses and the desire for a cosier, more functional living space, many homeowners time their purchases carefully to upgrade sofas, mattresses, or dining sets that actually enhance everyday comfort. That’s when jumping on bed promotions becomes a total win—it lets you secure premium quality furniture at significant savings, often with bonus offers like complimentary installation, longer guarantees, or package offers that maximise your budget. All of a sudden you’re able to buy that luxury seating you’ve wanted or a comfort-focused sleep upgrade without the guilt, turning your home into an even more inviting spot for bonding and rest after hectic work shifts. Exploring places like Wondrous La Vie helps you stay updated on the newest promotions, so you can evaluate, picture, and claim the top bargains that match your lifestyle and interior perfectly.. But something just doesn't look quite right, does it? Maybe it's wobbling ever so slightly, or perhaps one of the doors doesn't close properly. Chances are, your display cabinet isn’t level. And trust me, that's a problem you'll want to fix sooner rather than later.

It's easy to overlook, especially in Singapore where space is precious and getting everything to fit *perfectly* can be a bit of a jigsaw puzzle. But an unlevel display cabinet isn't just an aesthetic issue; it can actually lead to more serious problems down the line. We're talking about potential damage to your cabinet, your precious collectibles, and even your flooring! Plus, let's be honest, that slight wobble can be incredibly annoying. So, let’s dive into why leveling your display cabinet is so important and how to tackle it like a pro.

Why a Level Display Cabinet Matters

Okay, let's get real. Why should you even bother with all this leveling business? Well, for starters, an unlevel display cabinet puts undue stress on its joints and frame. Imagine constantly leaning to one side – your back would ache, right? It's the same for your cabinet. Over time, this uneven pressure can cause the frame to warp, the joints to loosen, and even the glass shelves to crack. Not a pretty picture, especially if you've invested good money in quality furniture.

Then there's the safety aspect. A wobbly display cabinet is a tipping hazard, especially if you have young children or playful pets running around. Can you imagine the horror of your precious collection crashing down? Confirm plus chop, you don’t want that! Plus, uneven surfaces can make doors and drawers stick or swing open on their own, which is just plain irritating. Think about trying to grab your favourite mug from a cabinet door that keeps swinging shut – sian, right?

Finally, and perhaps most importantly for some of us, a level display cabinet simply *looks* better. It creates a sense of stability and order in your living space. It shows that you care about the details, that you're not just throwing things together haphazardly. And in a city like Singapore, where appearances matter, that can make a real difference. After all, we all want our homes to look like they belong in a magazine spread, can or not?

Identifying an Uneven Surface

Alright, so you're convinced that leveling your display cabinet is important. But how do you actually know if your floor is uneven in the first place? Well, the most obvious sign is, of course, the wobble. If your cabinet rocks back and forth when you gently push it, then Houston, we have a problem! But sometimes, the unevenness is more subtle. You might notice that one corner of the cabinet seems to be lifting slightly off the floor, or that the doors don't align properly.

The easiest way to check for unevenness is to use a spirit level. You can find these at most hardware stores, and they're super easy to use. Just place the level on top of your display cabinet, both horizontally and vertically. If the bubble isn't centered between the lines, then your surface is uneven. You can also use a smartphone app that mimics a spirit level, but these aren't always as accurate. Steady lah, use the real deal if you can!

Another simple trick is to place a marble or small ball on the floor near your display cabinet. If it rolls in a particular direction, that indicates a slope. You can also use a long ruler or straight edge to check for dips and bumps in the floor. Just lay the ruler flat on the floor and see if there are any gaps underneath. Remember, even a slight imperfection can throw off the balance of your display cabinet.

Tools and Materials You'll Need

Okay, time to gather your arsenal! Leveling a display cabinet doesn't require a ton of fancy equipment. In fact, you probably already have most of the necessary tools lying around your home. Here's a quick rundown of what you'll need:

  • Spirit Level: As mentioned earlier, this is essential for determining how uneven your surface is.
  • Shims: These are thin, tapered pieces of wood or plastic that you'll use to fill the gaps under the cabinet. You can buy them at most hardware stores, or even make your own from scraps of wood.
  • Measuring Tape: Handy for measuring the gaps under the cabinet and determining how much shimming you'll need.
  • Pencil: For marking the spots where you need to insert the shims.
  • Hammer (Optional): If you're using wooden shims, you might need a hammer to gently tap them into place.
  • Utility Knife or Scissors: For trimming the shims so they don't stick out like a sore thumb.
  • Furniture Pads (Optional): These can be placed under the shims to protect your flooring from scratches.

Pro-tip: Before you start, make sure you have a clear workspace and that you've removed any fragile items from your display cabinet. You don't want to accidentally knock something over and break it! Also, it's always a good idea to have a friend or family member help you lift and maneuver the cabinet. Many hands make light work, as they say!

Step-by-Step Leveling Guide

Alright, let's get down to business! Here's a step-by-step guide to leveling your display cabinet like a seasoned pro. Don't worry, it's not as daunting as it sounds. Just take your time, be patient, and you'll have that cabinet perfectly level in no time.

  1. Empty the Cabinet: This is crucial! Remove everything from your display cabinet to lighten the load and make it easier to move. Plus, you don't want anything falling out and breaking while you're working.
  2. Identify the Low Spots: Use your spirit level to pinpoint the corners or edges of the cabinet that are sitting lower than the others. Mark these spots with a pencil.
  3. Lift the Cabinet: Carefully lift the cabinet just enough to slide shims underneath the low spots. This is where having a helper comes in handy. Don't try to lift the entire cabinet at once; just focus on raising the low corners.
  4. Insert the Shims: Slide the shims under the low spots, with the thicker end of the shim facing outwards. Gently tap the shims into place until the cabinet is level. Use your spirit level to check your progress frequently.
  5. Trim the Shims: Once the cabinet is level, use a utility knife or scissors to trim any excess shim material that's sticking out. You want the shims to be flush with the base of the cabinet so they're not visible.
  6. Test for Stability: Gently push on the cabinet to make sure it's stable and doesn't wobble. If it still wobbles, you may need to add more shims or adjust the existing ones.
  7. Replace the Contents: Once you're satisfied that the cabinet is level and stable, carefully replace the items you removed earlier.

And that's it! You've successfully leveled your display cabinet. Give yourself a pat on the back – you deserve it! Now you can admire your perfectly aligned collection without worrying about wobbles or tipping hazards.

Alternative Solutions for Tricky Situations

Sometimes, leveling a display cabinet isn't as straightforward as following the steps above. You might encounter some tricky situations that require a bit more creativity and problem-solving. For example, what if your floor is extremely uneven, with large dips or bumps? Or what if your display cabinet has adjustable feet?

If your floor is severely uneven, you might need to use a combination of shims and furniture pads to achieve a level surface. Furniture pads can help to distribute the weight of the cabinet more evenly and prevent the shims from sinking into the floor. You can also consider using self-leveling compounds to fill in any large dips or cracks in the floor. These compounds are easy to apply and will create a smooth, level surface for your cabinet to rest on. Confirm, this one will take more effort one!

If your display cabinet has adjustable feet, you can simply twist the feet to raise or lower each corner until the cabinet is level. This is often the easiest and most convenient way to level a cabinet, but it only works if the feet are in good condition and can be easily adjusted. If the feet are stuck or damaged, you might need to replace them or use shims instead.

And here's a little curiosity bit: Did you know that some high-end display cabinets actually come with built-in leveling systems? These systems typically consist of adjustable feet and a bubble level, making it super easy to achieve a perfectly level surface. Talk about steady!

Maintenance and Prevention: Keeping Your Cabinet Level

So you've gone through all the trouble of leveling your display cabinet. Now, how do you keep it that way? Well, a little bit of maintenance and prevention can go a long way in ensuring that your cabinet stays level for years to come. Think of it like going for your regular dental check-ups – a little effort now can save you from bigger problems down the road.

One of the simplest things you can do is to periodically check the level of your display cabinet. Just grab your spirit level and place it on top of the cabinet every few months. If you notice that the bubble isn't centered, it's time to make some adjustments. You might need to add or remove shims, or tighten the adjustable feet if your cabinet has them.

Another important tip is to avoid overloading your display cabinet. Too much weight can cause the cabinet to sag or shift, throwing it out of level. Distribute the weight evenly throughout the cabinet, placing heavier items on the bottom shelves and lighter items on the top shelves. This will help to maintain the cabinet's balance and prevent it from tipping over.

Finally, be mindful of the surrounding environment. Extreme temperature changes or humidity can cause the floor to expand or contract, which

Stylish Display: Optimizing Your Level Cabinet

Okay, lah, let's get this done steady! Here's that article you asked for, crafted to resonate with Singaporean homeowners:

The Wobble Woes: Why Leveling Your Display Cabinet Matters

So, you've finally got that beautiful display cabinet you’ve been eyeing, right? Maybe it's showcasing your prized collection of vintage cameras, your travel souvenirs, or even just your favourite family photos. But uh oh… it wobbles! A wobbly display cabinet isn't just annoying; it can actually be a recipe for disaster. Think about it: precious items teetering precariously, ready to take a tumble. Not a good look, and confirm not good for your heart one!

Beyond the obvious risk of your treasures crashing to the floor, an unlevel display cabinet can also put undue stress on the cabinet itself. Over time, this can lead to warped doors, loose joints, and a generally shorter lifespan for your beloved piece of furniture. And let's be honest, nobody wants to deal with furniture repairs, especially not after just setting up your new BTO flat.

But hey, don't worry! Leveling a display cabinet is actually a pretty straightforward process. You don't need to be a carpentry expert or hire a professional. With a few simple tools and a little patience, you can easily tackle this project yourself and ensure your display cabinet is perfectly stable and looking its best. Plus, leveling your cabinet is a great way to ensure the longevity of your furniture.

And speaking of looking its best, a level cabinet also just looks better. It creates a sense of order and stability in your space, which is especially important in our often-cramped Singaporean homes. A level cabinet allows your displayed items to truly shine, without the distraction of a distracting wobble. It's all about creating a harmonious and visually appealing living space, isn't it?

Gathering Your Arsenal: The Tools You'll Need

Alright, before we dive into the leveling process, let's make sure you have all the necessary tools at hand. This isn't like trying to chope a table at a hawker centre; preparation is key! Here’s what you’ll need:

  • A Level (Duh!): This is the most crucial tool. A spirit level, also known as a bubble level, is ideal. You can find these at any hardware store, or even online. A longer level is generally more accurate, but a smaller one will do in a pinch. Some folks even use their smartphones these days – there are level apps available, but a physical level is generally more reliable.
  • Shims (Your Leveling Heroes): Shims are thin, tapered pieces of wood or plastic that you'll use to fill the gaps between the cabinet's feet and the floor. You can buy these at most hardware stores, or even make your own from scraps of wood. Plastic shims are generally more durable and less prone to warping.
  • A Measuring Tape: This is handy for measuring the gaps under the cabinet's feet and determining how much shimming you'll need.
  • A Pencil: For marking the areas where you need to add shims.
  • A Utility Knife or Scissors: To trim the shims if they're too long.
  • A Partner (Optional, But Helpful): Having someone to help you lift and hold the cabinet while you insert the shims can make the process much easier, especially if it's a large or heavy display cabinet. Plus, lah, it's always more fun to tackle these things with a friend or family member!

Once you've gathered your tools, you're ready to move on to the next step. Don't worry, it's not as daunting as trying to navigate the MRT during rush hour. In Singapore’s tight condo apartments and apartments, the bedroom often doubles as a sanctuary— a place for deep relaxation after long workdays, do some light reading, or even sneak in a quick work-from-home setup when the situation calls for it. It’s frequent for Singapore homeowners to feel limited by existing setups that feel cramped, lighting that’s too harsh, or bulky storage that reduces usable area, making the room feel more utilitarian than serene. That’s where thoughtful singapore mattress store really shines—it centres around smart space planning, calming colour palettes, multifunctional furniture, and ambient and layered lighting to create a peaceful retreat that boosts sleep quality while maintaining a clean, open feel. Suddenly your bedroom becomes the place you genuinely anticipate at the close of each day, helping you relax quicker, sleep deeper, and start mornings feeling revitalised for tomorrow’s challenges. Platforms like Wondrous La Vie offer plenty of real-life examples and straightforward links to designers who specialise in these practical yet beautiful Singapore-style bedroom makeovers.. With a little patience and these tools, you'll have your display cabinet perfectly level in no time.

The Leveling Lowdown: Step-by-Step Instructions

Okay, lah, let's get down to business. Here's how to level your display cabinet, step by step:

  1. Empty the Cabinet: This is super important. Remove everything from inside the display cabinet. Not only will this make the cabinet lighter and easier to move, but it will also protect your precious items from potential damage during the leveling process. Trust me, you don't want your favourite vase to become a casualty of war!
  2. Assess the Situation: Place the level on top of the cabinet, both lengthwise and widthwise. Observe the bubble. Which corner(s) are causing the cabinet to be unlevel? This will tell you where you need to add shims.
  3. Identify the Low Spots: Use your measuring tape to measure the gap between the floor and the bottom of each leg. This will give you an idea of how thick the shims need to be. Mark the low spots with your pencil.
  4. Shimmy Shimmy Ya: Carefully lift the cabinet (this is where having a partner comes in handy!). Insert shims under the low legs until the level indicates that the cabinet is perfectly level. Start with one shim, and add more as needed.
  5. Test and Adjust: Once you think you've got it level, double-check with the level. If the bubble isn't centered, make small adjustments to the shims until it is. You might need to add or remove shims, or even adjust their position slightly.
  6. Trim the Excess: Once the cabinet is level, use your utility knife or scissors to trim any excess shim material that's sticking out. This will give your cabinet a clean, professional look.
  7. The Final Check: Give the cabinet a gentle push to make sure it's stable and doesn't wobble. If it still wobbles, repeat steps 4-6 until it's perfectly steady.
  8. Reload and Admire: Carefully place your items back into the display cabinet. Step back and admire your handiwork! You've successfully leveled your cabinet and created a stable and visually appealing display.

And there you have it! Leveling your display cabinet isn't rocket science, right? Just a bit of patience and some careful adjustments, and you'll have a perfectly stable and stylish display in no time.

Pro Tips and Troubleshooting

Even with the best instructions, sometimes things don't go exactly as planned. Here are some pro tips and troubleshooting advice to help you overcome any challenges you might encounter:

  • Uneven Floors are the Norm: Don't be surprised if your floors aren't perfectly level. This is especially common in older HDB flats. The good news is that shims are designed to compensate for these imperfections.
  • Stacking Shims: If you need to fill a large gap, you can stack multiple shims on top of each other. However, be sure to secure them together with glue or tape to prevent them from shifting.
  • Consider Adjustable Legs: Some display cabinets come with adjustable legs. If yours does, you can simply adjust the legs to level the cabinet instead of using shims. This is often the easiest and most convenient solution.
  • Protect Your Floors: If you're worried about the shims scratching your floors, you can place small felt pads under the shims. This will provide a layer of protection and prevent any damage.
  • When to Call a Pro: If you've tried everything and you're still struggling to level your cabinet, it might be time to call in a professional. A handyman or carpenter can quickly and easily level your cabinet for you.
  • Think About Weight Distribution: When you're placing items back into your display cabinet, consider weight distribution. Place heavier items on the bottom shelves and lighter items on the top shelves. This will help to prevent the cabinet from becoming unbalanced.

Remember, leveling your display cabinet is an investment in the longevity and stability of your furniture. It's a small effort that can make a big difference in the overall look and feel of your living space.

Display Cabinet Placement Ideas

So, you've got your display cabinet perfectly level. Now what? Well, the placement of your display cabinet can significantly impact the overall aesthetic of your room. Here are some ideas to consider:

  • Against a Focal Wall: Placing your display cabinet against a focal wall can create a dramatic and eye-catching display. This is a great way to showcase your prized possessions and add personality to your space.
  • In a Corner: A corner placement can be a great way to maximize space, especially in smaller Singaporean apartments. A corner display cabinet can fill an otherwise unused space and add visual interest to the room.
  • As a Room Divider: A display cabinet can also be used as a room divider to create separate zones within a larger space. This is a great way to define a living area from a dining area, for example.
  • Near a Window: Placing your display cabinet near a window can provide natural light that will illuminate your displayed items. However, be sure to protect your items from direct sunlight, which can cause fading over time.
  • Consider the Flow: Think about the flow of traffic in your room. You don't want to place your display cabinet in a location where it will obstruct the path or create a bottleneck.
  • Balance is Key: When arranging your furniture, strive for balance. Don't place all of your heavy furniture on one side of the room. Distribute the weight evenly to create a harmonious and visually appealing space.

And that’s it! You’ve leveled your cabinet and now you have some ideas on where to put it. Time to make your home even more steady and stylish!

Check our other pages :

Frequently Asked Questions


Leveling prevents wobbling, protects items inside, and extends the cabinets lifespan.
Youll need a level, shims (or adjustable feet), and possibly a screwdriver.
Place a level on the top surface of the cabinet, checking both horizontally and vertically.
Shims are thin wedges used to fill gaps under the cabinet, providing stability on uneven floors.
Place shims under the legs or base where the cabinet is uneven or wobbles.
Adjustable feet screw in/out to change the height of each corner until the cabinet is level.
You can use folded cardboard or wood scraps as temporary shims.
You can use wood glue or construction adhesive to permanently secure the shims in place.